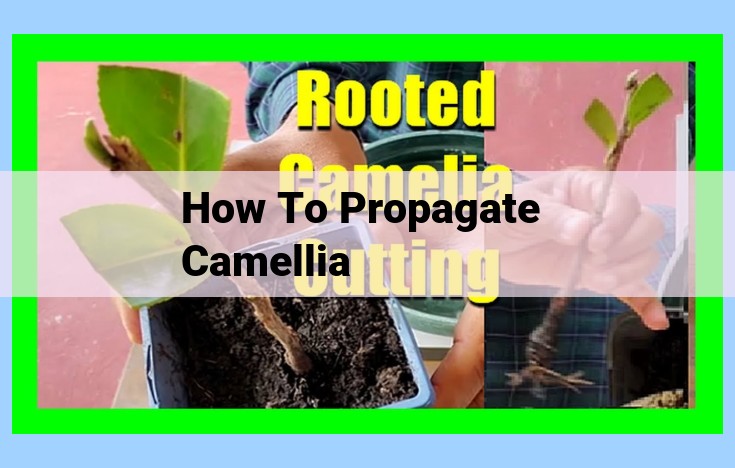
How To Propagate Camellias: Vegetative Methods For Success
Camellia propagation via vegetative methods involves using softwood or semi-hardwood cuttings, rhizomes, grafting, or layering. Each technique has its advantages and disadvantages based on factors such as rooting speed, success rate, and plant maturity. Essential materials include sharp tools, rooting hormone, potting mix, pots, stakes, and grafting tape. Ideal conditions include bright indirect light, warm temperatures, high humidity, and well-drained soil. Timing varies with each method and camellia growth patterns. Considerations include species selection, consulting experts, and utilizing resources for successful propagation.
Discuss the five vegetative propagation methods for camellia plants: softwood cuttings, semi-hardwood cuttings, rhizomes, grafting, and layering.
Vegetative Propagation of Camellias: A Comprehensive Guide
Camellias, renowned for their exquisite blooms and captivating foliage, can be effortlessly propagated through various vegetative methods, ensuring the preservation of their desirable traits. Join us as we embark on a journey to explore these five effective techniques that will transform you into a veritable camellia propagator:
1. **Softwood Cuttings:
- Softwood cuttings involve taking immature, green stems during the active growing season (early summer) when tissues are tender and easily rooted.
- Advantages: Rapid root development and the ability to acquire multiple plants from a single cutting.
2. **Semi-Hardwood Cuttings:
- Semi-hardwood cuttings utilize slightly mature stems that have developed some woody tissue. They are typically collected in late summer or early fall.
- Advantages: Greater resistance to desiccation compared to softwood cuttings. They also produce stronger root systems.
3. **Rhizomes:
- Rhizomes are underground stems that produce new shoots and roots. Division of rhizomes in late winter or early spring creates viable propagation material.
- Advantages: Preservation of the cultivar’s unique characteristics, easy and inexpensive method.
4. **Grafting:
- Grafting involves joining the desired variety (scion) onto an established rootstock (understock). It is commonly used for propagation of specific cultivars or to overcome rooting difficulties.
- Advantages: Maintains cultivar identity, improves plant vigor, and allows for the combination of multiple varieties on a single plant.
5. **Layering:
- Layering encourages root development on existing branches while still attached to the parent plant. Various layering techniques exist, including air layering and ground layering.
- Advantages: High success rate and preservation of cultivar characteristics. It also reduces stress on the newly propagated plant.
Explain the advantages and disadvantages of each method.
Vegetative Propagation Methods
1. Softwood Cuttings
- Advantages:
- Quick and easy method
- High success rate
- Preserves cultivar characteristics
- Disadvantages:
- Requires young, flexible stems
- Can be prone to wilting
2. Semi-Hardwood Cuttings
- Advantages:
- Can be taken from slightly more mature stems
- Higher chances of rooting compared to softwood cuttings
- Suitable for a wider range of cultivars
- Disadvantages:
- May take longer to root
- Can be more difficult to maintain humidity
3. Rhizomes
- Advantages:
- Produces multiple plants from a single division
- Maintains the genetic identity of the mother plant
- Disadvantages:
- Limited availability of rhizomes
- Requires careful division to avoid damage
4. Grafting
- Advantages:
- Allows for the combination of desirable traits from different cultivars
- Overcomes difficulties in rooting specific varieties
- Disadvantages:
- Requires specialized skills and equipment
- May result in incompatibility between rootstock and scion
5. Layering
- Advantages:
- Produces rooted plants while still attached to the mother plant
- Minimal disturbance to the existing plant
- Disadvantages:
- Time-consuming process
- May not be suitable for all cultivars
Essential Materials for Successful Camellia Propagation
Embarking on the captivating journey of propagating camellia plants requires an assortment of essential materials that will nurture their delicate growth. Imagine the joy of transforming a single plant into multiple vibrant specimens, adorning your garden with their exquisite blooms.
Foremost, you’ll need a sharp knife or pruners to make precise cuts on stem sections. The sharpness of the blade ensures clean incisions, promoting healthy root development.
Next, rooting hormone plays a crucial role in stimulating root growth. Dip cuttings in this magical elixir to encourage the formation of a dense, fibrous root system that will anchor the plant firmly in the soil.
Potting mix provides a nurturing environment for young camellias. Choose a well-draining mix that mimics the airy, humus-rich soil found in their natural habitat.
Pots or containers serve as temporary homes for your developing plants. Select containers with drainage holes to prevent waterlogging and ensure proper aeration. Consider the size of your cuttings when choosing the container size.
Stakes or trellises offer support to climbing or vining camellia varieties. As they grow vigorously, these structures will guide their upward trajectory, allowing them to reach their full potential.
Grafting tape or wax is essential for creating a secure union between rootstock and scion during grafting. This specialized material seals the graft site, promoting callus formation and successful fusion.
Describe the ideal environmental conditions for camellia plant propagation, such as bright, indirect light, warm and humid conditions, high humidity levels, and moist but well-drained soil.
Environmental Conditions for Successful Camellia Plant Propagation
Bright, Indirect Light
Camellias crave bright, indirect light to thrive. Harsh, direct sunlight can scorch their delicate leaves, so it’s crucial to shield them from the midday sun’s intensity. A shaded area beneath a canopy or near a north-facing window provides the perfect balance of illumination and protection.
Warm and Humid Conditions
These Southern belles flourish in warm and humid conditions. Temperatures between 65-75°F (18-24°C) promote optimal growth, while high humidity levels mimic their natural forest habitat. You can create a humid environment around your camellias by using a humidifier or placing them on a tray filled with pebbles and water.
Moist but Well-Drained Soil
Camellias require moist soil to thrive, but they also demand proper drainage to avoid waterlogged roots. A well-draining potting mix specifically formulated for acid-loving plants is ideal. You can amend your soil with plenty of organic matter, such as compost or peat moss, to improve moisture retention while ensuring good drainage.
When to Propagate Camellias for Optimal Success
Timing is crucial when it comes to propagating camellia plants to ensure the highest success rates and establish thriving plants. Here’s a breakdown of the best times to propagate camellias using different methods:
Softwood Cuttings
- Ideal Time: Late spring to early summer
Softwood cuttings are taken from new growth that is still flexible and has not yet hardened. In late spring or early summer, when camellias are actively growing, softwood cuttings can be collected and rooted easily in a controlled environment.
Semi-Hardwood Cuttings
- Ideal Time: Late summer to early fall
Semi-hardwood cuttings are collected from slightly mature stems that are less pliable but not fully woody. As camellias slow their growth in late summer and early fall, this is an ideal time to take semi-hardwood cuttings for propagation.
Rhizomes
- Ideal Time: Anytime
Rhizomes are underground stems that produce new shoots and plants. They can be divided and propagated throughout the year, making this method suitable for any time of the year.
Grafting
- Ideal Time: Late winter to early spring
Grafting involves joining two different camellia plants, usually a rootstock and a scion. The best time for grafting is late winter or early spring, when camellias are coming out of dormancy and sap flow is increasing.
Layering
- Ideal Time: Spring or summer
Layering is a technique where a branch is buried in soil to encourage root development. This method can be done in spring or summer when camellias are actively growing and have pliable branches.
By following these timing guidelines, you can increase your chances of successfully propagating camellias and establishing beautiful, thriving plants in your garden.
Additional Considerations for Camellia Propagation
The Species and Cultivar:
- Different camellia species and cultivars have varying propagation requirements and success rates.
- Consult reputable sources to determine the specific needs of the variety you plan to propagate.
Consulting Propagation Specialists:
- Consider seeking guidance from experienced propagation specialists, such as nursery professionals or horticulturalists.
- Their expertise can provide valuable insights and increase your chances of success.
Utilizing Plant Propagation Resources:
- Delve into plant propagation books and online guides to gather comprehensive information.
- These resources offer step-by-step instructions, tips, and troubleshooting advice tailored to different propagation methods.
Other Factors to Consider:
- Time of Year: Align your propagation efforts with the optimal seasons for each method.
- Environmental Conditions: Ensure the propagation environment meets the specific temperature, humidity, and light requirements of camellia plants.
- Materials: Use high-quality tools and materials to minimize damage and promote healthy root development.
By taking these factors into account, you can make informed decisions throughout the camellia propagation process, increasing your chances of nurturing beautiful and thriving plants.
