Ultimate Toaster Cleaning Guide: Step-By-Step Instructions For A Sparkling Appliance
To clean your toaster, first unplug it and let it cool. Use a soft brush or sponge to remove crumbs from the crumb tray, heating elements, and coils. For a deeper clean, mix equal parts vinegar and water or baking soda and water to create a paste. Apply the paste to the interior of the toaster, let it sit for a few minutes, then wipe it down with a damp cloth. Rinse the cloth frequently and allow the toaster to dry completely before plugging it back in.
Essential Cleaning Materials for a Spotless Toaster
Embarking on a cleaning adventure for your trusty toaster? Fret not, as we’ve curated an arsenal of cleaning essentials that will transform your appliance into a gleaming gem.
1. Soft-Bristled Brushes: The Gentle Touch
Imagine a soft caress upon your toaster’s surface. Soft-bristled brushes, akin to the wings of a butterfly, will gently remove crumbs and residue without scratching the delicate interior.
2. Sponges: Absorbing the Mess
Like tiny sponges, these trusty tools will soak up spills and crumbs, leaving your toaster squeaky clean. Choose non-abrasive sponges to prevent any unwanted marks.
3. Toothpicks: Precision Cleaners
Reach into every nook and cranny with the precision of a toothpick. These sharp tools will dislodge stubborn food particles and ensure a deep clean.
4. Dish Soap: The All-Purpose Champion
A dab of dish soap mixed with warm water creates a powerful cleaning solution. It’s effective against grease and grime, leaving your toaster sparkling.
5. Vinegar: The Natural Deodorizer
Vinegar’s antibacterial properties not only remove stains but also eliminate lingering odors. Dilute it with water and say goodbye to unwanted smells.
6. Baking Soda: The Stain Remover
Baking soda is a natural stain remover that neutralizes acids and absorbs odors. Sprinkle it on the affected areas, let it sit, and witness the stains vanish.
Toaster Components to Focus On for Effective Cleaning
When it comes to cleaning your toaster, it’s crucial to focus on specific components to ensure optimal results and maintain its functionality. Let’s delve into the key areas that require your attention:
- Crumb Tray:
The crumb tray is a highly essential component as it collects burnt bread crumbs and other food particles. Regularly emptying and cleaning the crumb tray prevents accumulation, reduces fire hazards, and ensures efficient heating.
- Heating Elements:
The heating elements are responsible for toasting your bread. They are typically made of metal or quartz and become extremely hot when turned on. Caution is necessary while cleaning around these elements to avoid burns. Use a soft-bristled brush or cloth to gently remove any food residue without damaging them.
- Coils:
Some toasters also have coils located near the heating elements. These coils help distribute heat evenly and can also accumulate crumbs and debris. Use a toothpick or a soft brush to carefully clean around the coils to prevent overheating or uneven toasting.
- Exterior Housing:
The exterior housing of the toaster, including the sides, top, and bottom, should also be cleaned regularly to maintain its appearance and prevent dirt and grime buildup. Use a damp cloth or sponge with a mild cleaning solution to wipe down the exterior surfaces. Avoid using abrasive cleaners that can damage the finish.
By focusing on these key components, you can effectively clean your toaster and ensure it operates safely and efficiently for years to come.
Safety Measures to Ensure
- Emphasize the importance of safety precautions, including unplugging the toaster, allowing it to cool, avoiding contact with heating elements, and exercising caution with sharp objects.
Safety First: Ensuring a Risk-Free Toaster Cleaning
When embarking on the task of cleaning your toaster, safety must be your guiding principle. To ensure a hassle-free and hazard-free experience, follow these crucial safety measures religiously.
Unplug the Toaster
Before you proceed with any cleaning, unplug the toaster from the power source. This simple step is paramount to preventing electrical shocks that can be both painful and dangerous.
Allow It to Cool Completely
The heating elements of a toaster can retain heat long after use. Allow the toaster to cool down completely before cleaning to avoid burns. Remember, patience is a virtue in this case.
Avoid Contact with Heating Elements
The heating elements are the heart of your toaster, but they can also be potential sources of injury. Refrain from touching them, even when they are cool, as they may still retain residual heat.
Exercise Caution with Sharp Objects
Some cleaning methods may involve using sharp utensils like toothpicks or brushes. Handle these tools with utmost care to prevent cuts or punctures.
Additional Precautionary Tips:
- Wear gloves to protect your hands from cleaning agents and sharp objects.
- Use a designated sink or bucket to mix cleaning solutions and avoid spills.
- Refer to your toaster’s owner’s manual or manufacturer’s website for specific safety instructions and warnings.
By adhering to these safety precautions, you can minimize the risks associated with toaster cleaning and ensure a safe and successful experience. Remember, prevention is always better than cure.
Additional Resources for Enhanced Toaster Cleaning
To ensure a thorough and efficient toaster cleaning experience, consider utilizing these additional resources:
Owner’s Manuals and Manufacturer’s Websites:
Refer to the user manual for specific cleaning instructions tailored to your toaster model. Manufacturers often provide detailed guidelines and recommendations for safe and effective cleaning.
Cleaning Solutions and Materials:
- Baking soda: A natural deodorizer and cleaning agent that can remove stubborn stains.
- Vinegar: A mildly acidic liquid that can dissolve grease and grime.
Protective Gear:
- Gloves: Protect your hands from cleaning solutions and sharp edges.
Cleaning Tools and Equipment:
- Sink or bucket: To hold cleaning solutions and rinse components.
- Spray bottle: For convenient application of cleaning solutions.
Step-by-Step Guide to Cleaning Your Toaster for Effortless Maintenance
Maintaining a clean toaster is not just about aesthetics; it ensures optimal performance, extends its lifespan, and keeps your toast free of unpleasant odors and flavors. Here’s a step-by-step guide to make cleaning your toaster a breeze:
1. **Unplug and Cool Down:
Safety first! Always unplug your toaster and allow it to cool completely before handling it. This will prevent any electrical accidents or burns.
2. Remove Loose Crumbs:
Shake or gently turn the toaster upside down to empty the crumb tray. Use a soft-bristled brush or a toothpick to remove any stuck crumbs from the heating elements and slots.
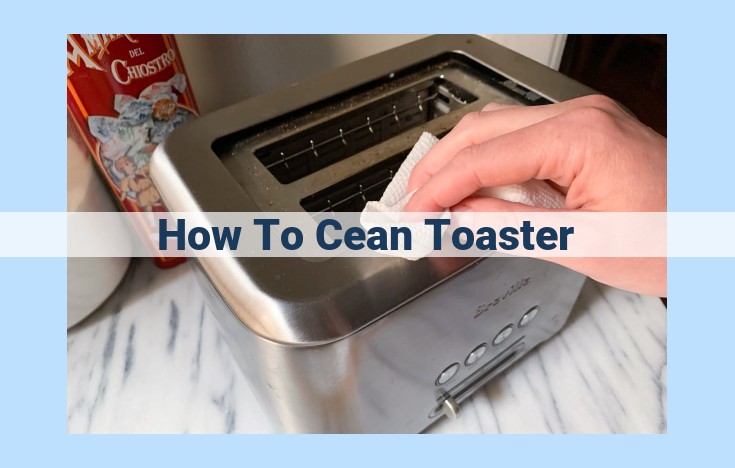
3. Wipe Down Exterior Surfaces:
With a damp cloth, wipe down the exterior of the toaster to remove any dirt or fingerprints. A mild dish soap solution can be used for tougher stains, but be sure to avoid any abrasive cleaners.
4. Deep Clean with Vinegar Solution:
If your toaster has stubborn stains or odors, a vinegar solution can work wonders. Mix equal parts white vinegar and water in a bowl. Dip a soft cloth or sponge into the solution and gently dab the interior surfaces of the toaster, avoiding the heating elements. Leave the solution to sit for a few minutes before wiping it off with a clean, damp cloth.
5. Deep Clean with Baking Soda Paste:
For more stubborn stains, try a baking soda paste. Make a paste by mixing baking soda with a little water. Apply the paste to the stained areas and let it sit for about 15 minutes. Wipe the paste away with a damp cloth and rinse thoroughly.
6. Dry and Reassemble:
Once you’ve finished cleaning, use a dry cloth or paper towels to wipe down all surfaces to remove any excess moisture. Reassemble the crumb tray and plug the toaster back in.
7. Enjoy Your Clean Toaster:
Your toaster is now sparkling clean and ready to produce perfectly toasted slices of bread. By following these simple steps regularly, you can keep your toaster in tip-top condition and enjoy perfectly toasted snacks for years to come.
Maintaining a Clean Toaster for Optimal Performance
Maintaining a clean toaster is crucial for its longevity and optimal performance. Regular cleaning prevents the buildup of crumbs and grease, which can lead to malfunctions and shorten the lifespan of your appliance. Here are a few tips to help you keep your toaster in pristine condition:
Crumb Removal: Regularly remove crumbs from the crumb tray to prevent them from burning and creating unpleasant odors.
Surface Cleaning: Wipe down the exterior of the toaster with a damp cloth to remove dust and spills. Avoid using harsh chemicals or abrasive cleaners, as they may damage the finish.
Deep Cleaning: For a deeper clean, create a solution of equal parts vinegar and water. Apply the solution to a soft cloth and wipe down the interior and exterior of the toaster. Rinse with a damp cloth to remove any remaining residue.
Coil Cleaning: Occasionally, you may need to clean the heating coils. Use a soft-bristled brush to gently remove any buildup. Be careful not to damage the coils as they are delicate.
Benefits of Regular Toaster Maintenance:
- Enhanced Toaster Lifespan: Cleaning your toaster regularly will extend its lifespan by preventing the buildup of crumbs and grease, which can cause malfunctions.
- Optimal Performance: A clean toaster will toast your bread evenly and efficiently, ensuring perfect results every time.
- Reduced Fire Risk: Crumbs and grease buildup can increase the risk of a fire. Regular cleaning eliminates these hazards and ensures the safety of your household.
- Improved Hygiene: A clean toaster is more hygienic, as it prevents the growth of bacteria and mold. This helps to keep your food safe and healthy.
