Sterilize Canning Jars In The Oven: A Detailed Guide For Safe Preservation
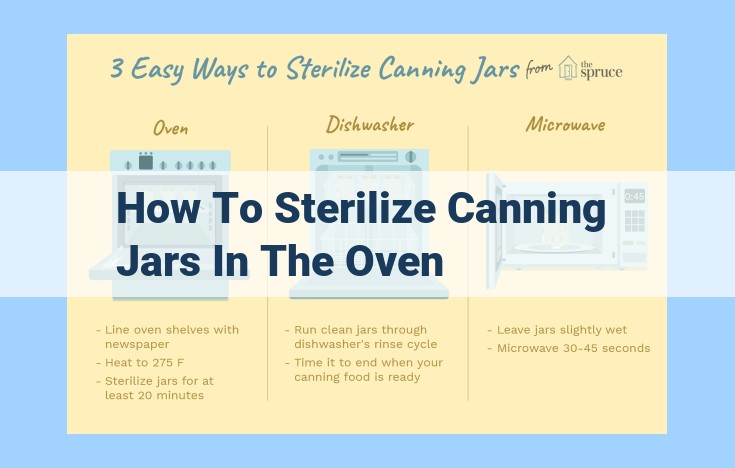
To sterilize canning jars in the oven, you’ll need jars, an oven, and a baking sheet. Preheat the oven to 250°F (121°C). Place the jars upside down on the baking sheet and heat for 10-15 minutes or until dry. Remember to use oven mitts for safety. Once sterilized, the jars can be used to can various foods.
Canning Equipment: The Essential Tools for Preserving Your Harvest
Canning, the ancient art of preserving food, has been passed down through generations. With the right equipment, you can safely and effortlessly extend the shelf life of your fruits, vegetables, and other culinary creations. Let’s dive into the essential tools you’ll need to embark on your canning adventure.
Canning Jars: The Foundation of Preservation
At the heart of canning lies the humble canning jar. These jars come in various shapes and sizes, each designed to accommodate specific types of food. From wide-mouth jars perfect for fruits and vegetables to half-pint and pint jars ideal for jams and jellies, choose jars that suit your canning needs. Ensure your jars are in pristine condition, free from cracks or chips, to prevent breakage during the canning process.
Oven and Baking Sheet: Sterilization Essentials
Sterilization is paramount in canning to eliminate potentially harmful bacteria. Enter the trusty oven and baking sheet. Preheat your oven to the recommended temperature and place your clean jars upside down on a baking sheet. This dry heat sterilization method effectively kills any lurking microbes, ensuring your jars are ready for safe storage of canned goods.
Other Handy Tools: Enhancing Your Canning Experience
Beyond the basics, several other tools can make canning a breeze. Canning lids and rings form a hermetic seal, preventing air from entering and spoiling your preserves. Jar lifters enable you to safely and easily retrieve hot jars from boiling water or the oven. Tongs provide a precise grip on jars, especially when maneuvering them through the sealing process. Sterilization indicator labels serve as a visual cue, changing color to indicate that your jars have reached the desired sterilization temperature.
Food to be Canned: Choosing the Right Produce
Not all foods are created equal when it comes to canning. Choose fresh, ripe produce that is free from bruises or blemishes. Avoid overripe fruits or vegetables, as they may not retain their texture and flavor during the canning process. Follow reliable preserving guidelines from trusted sources to ensure the safety and quality of your canned goods. With the proper equipment and ingredients, you can preserve your harvest and enjoy the fruits of your labor for months to come.
Safety Considerations for Home Canning: The Essential Gear to Protect Yourself
Home canning is a rewarding but potentially hazardous activity. To ensure your safety while preserving your favorite foods, it’s imperative to have the right protective equipment.
-
Oven Mitts: When handling hot jars and trays in the oven, oven mitts are indispensable. They shield your hands from scalding heat, preventing painful burns.
-
Safety Glasses: Canning involves boiling water and hot liquids. Safety glasses protect your eyes from steam, splatters, and potential explosions. Their transparent lenses allow you to maintain clear visibility while safeguarding your precious eyesight.
Essential Steps for Sterilizing Canning Jars
Before diving into the delicious adventure of preserving your homemade culinary creations, ensuring the cleanliness and safety of your canning jars is paramount. This fundamental step paves the way for a successful and worry-free canning experience. Two tried-and-tested methods reign supreme in the world of sterilization: dry heat and wet heat.
Dry Heat Sterilization: Embracing the Power of the Oven
Harnessing the harsh yet efficient might of your oven, this method bathes your canning jars in a searing symphony of dry heat. Temperatures soar to dizzying heights of 240-250°F (115-121°C), banishing any lurking microorganisms that dare to stand in your way. Simply arrange your clean jars upside down on a baking sheet and surrender them to the oven’s fiery embrace for a duration of 15-20 minutes. As the jars bask in this purgatory of heat, their inner sanctums become havens of sterility, free from the clutches of unwanted guests.
Wet Heat Sterilization: Submerging in a Boiling Whirlpool
Alternatively, you can evoke the gentle yet thorough caress of boiling water. Immerse your jars, wrapped in a protective embrace of water, in a spacious pot. Allow the bubbling symphony to engulf them completely, ensuring that no corner remains untouched. As the water reaches its peak performance at a rolling boil, set a timer for 10 minutes. This aqueous odyssey effectively scours the jars clean of any lingering impurities, leaving them impeccably sanitized.
Whichever method you choose, sterilization is the bedrock of safe and successful canning. Embrace these techniques with unwavering care, and your jars will metamorphose into vessels of culinary purity, ready to safeguard your precious creations for seasons to come.
Essential Tools for Canning: Beyond Jars and Equipment
While having the right canning equipment is crucial, there are other tools and materials that play vital roles in ensuring the safety and success of your canning endeavors. Here’s what else you’ll need:
Canning Lids and Rings: The Seal of Approval
Canning lids and rings are the unsung heroes of the canning process. Lids form a hermetic seal when combined with the rings, preventing air and bacteria from entering the jar. By creating a vacuum, they ensure that your canned goods remain fresh and safe for long-term storage.
Choosing the Perfect Food for Canning: Nature’s Bounty
Not all foods are created equal when it comes to canning. Fruits, vegetables, and other acidic foods are your best candidates. These foods have a high acid content that helps inhibit the growth of harmful bacteria. Remember, following approved guidelines from trusted sources is paramount to ensure the safety and quality of your canned creations.
Specialized Tools: A Helping Hand in the Kitchen
Canning involves more than just jars and equipment. Specialized tools like jar lifters and tongs make handling hot jars and lids a breeze. These handy gadgets provide a safe and secure grip, protecting your hands from heat and potential injury.
Sterilization Indicator Labels: Peace of Mind
Sterilization indicator labels are a game-changer for ensuring the effectiveness of your sterilization process. These labels change color when exposed to the correct sterilization temperature, providing visual confirmation that your jars and lids have been properly sterilized. Peace of mind guaranteed!
Preserving Guidelines: The Key to Safety and Success
Preserving guidelines are your roadmap to success in the world of canning. Reliable guidelines from trusted sources like the National Center for Home Food Preservation provide comprehensive instructions and safety precautions to guide you through every step of the canning process, ensuring the safety and quality of your preserved delights.
