How To Paint Milk With Realism: A Step-By-Step Guide For Beginners
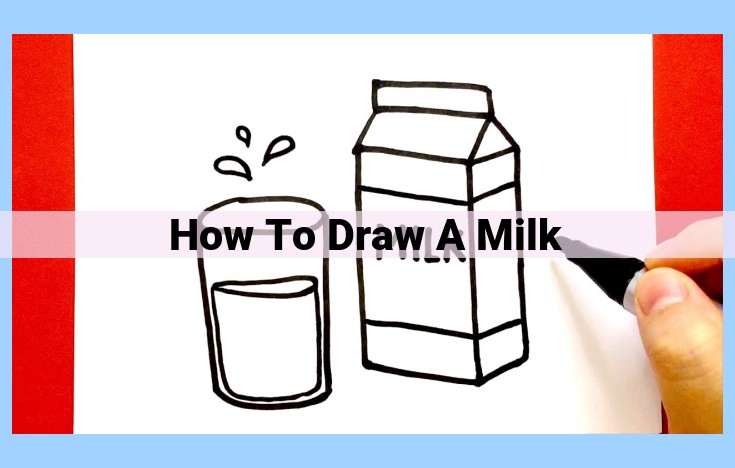
To capture the essence of milk, begin by sketching its basic form with light pencil strokes. Use a soft, round brush and white paint to fill in the shape, leaving some areas slightly transparent to suggest the fluidity of the liquid. Apply light, feathery brushstrokes to mimic the gentle movement of milk, and add subtle shading to create depth and dimension. Experiment with different shades of white and cream to capture the nuances of the milk’s color and texture.
Essential Materials: Your Drawing Toolkit
Embarking on the artistic journey of drawing? Then you’ll need an essential toolkit to unlock your creative potential. These materials are your partners in capturing beauty, expressing your imagination, and exploring the world through your art. Let’s dive into the basics:
-
Paper: Your canvas, the foundation of your creations. Choose paper with a surface that suits your drawing style, whether smooth for precise lines or textured for a unique feel.
-
Pencils: The workhorses of your toolkit, pencils come in a range of hardness grades. Soft pencils (B grades) create darker, softer lines, while hard pencils (H grades) give you crisp, light lines.
-
Eraser: Your trusty companion, the eraser, helps you correct mistakes and refine your sketches. Choose an eraser that gently removes pencil marks without damaging the paper.
-
Charcoal: This versatile material offers a wide value range, allowing you to create dynamic shadows and bold strokes. Charcoal can be used on paper or specialized charcoal paper.
-
Tortillons: These paper-wrapped sticks are essential for blending charcoal and creating soft transitions between tones.
-
Blending Pencils: Similar to tortillons, blending pencils help you achieve smooth transitions in your drawings, creating a more polished look.
-
Q-tips: These handy tools are perfect for adding fine details or gently removing smudges. Their pointed tips allow for precise applications.
With these essential materials in hand, you’ll be well-equipped to embark on your drawing adventures, transforming your ideas into captivating works of art.
Mastering the Fundamental Techniques of Drawing: Shading, Blending, Smudging, Cross-Hatching, and Stippling
Embark on a captivating journey into the realm of drawing, where essential techniques ignite your creativity. Among these techniques, a handful stand out as the building blocks of your artistic expression: shading, blending, smudging, cross-hatching, and stippling.
Shading transforms dull surfaces into vibrant, three-dimensional forms. By modulating the intensity of lines and strokes, you can create the illusion of light, shadow, and depth, lending a sense of realism to your drawings. Master the art of shading to bring objects to life.
Blending seamlessly merges transitions between tones, creating a smooth and ethereal effect. By employing a variety of tools such as blending pencils and tortillons, you can manipulate the subtle gradations of light, deftly capturing the delicate contours of your subjects.
Smudging introduces a touch of softness and movement to your artwork. Gently smudging charcoal or graphite with your fingertips or a blending tool imparts a smoky, ethereal quality, ideal for capturing the fleeting beauty of landscapes or the enigmatic expressions of portraits.
Cross-hatching involves the intersection of multiple lines at an angle to create the illusion of tone and texture. This technique adds intriguing depth and texture to your drawings, evoking a sense of fabric, wood grain, or other intricate surfaces.
Stippling is a meticulous method that employs a series of closely spaced dots to build up form and intensity. By carefully controlling the spacing and density of your dots, you can achieve surprising levels of detail and precision, capturing the subtleties of light and texture with remarkable accuracy.
Practice these fundamental techniques diligently, and watch as your drawings transform from mere lines on a page into eloquent expressions of your artistic vision.
Shading: The Art of Creating Depth and Form
In the realm of drawing, shading stands as a fundamental technique that transforms flat lines into alluring depths and captivating textures. By harnessing the power of light and shadow, shading breathes life into our creations, giving them a sense of volume, perspective, and emotion.
Methods of Shading
Various methods of shading allow artists to explore a wide spectrum of effects. Value scales offer a gradual transition from light to dark, creating subtle gradations that define delicate curves and subtle contours. Directional strokes, on the other hand, apply short, deliberate lines that mimic the flow of light or the texture of a surface. Hatching, a technique that employs parallel lines, fosters a sense of depth through varying line density and spacing. These methods, combined, provide artists with an expressive palette to sculpt their drawings.
Observing Light and Shadow
The key to effective shading lies in observing how light and shadow interact with the subject. Careful attention to the interplay of light sources helps determine which areas receive the most illumination and which recede into shadow. Observing the direction of light and its impact on the subject’s form guides the placement and intensity of shading, creating a realistic illusion of three-dimensionality.
Form and Depth
Through shading, artists transform flat surfaces into objects with volume and depth. By strategically distributing light and shadow, they can accentuate curves, delineate edges, and convey the subtle nuances of different textures. Soft shading blends seamlessly, creating a gentle transition between planes, while sharp, contrasting shading emphasizes contours and defines distinct shapes. This interplay of light and shadow captivates the eye, drawing it into the illusion of depth and realism.
Composition Considerations: Crafting Visually Stunning Drawings
In the realm of drawing, composition is the cornerstone of creating captivating and visually appealing artworks. It orchestrates the elements of a drawing to guide the viewer’s eye, evoke emotions, and convey a narrative. Understanding and mastering composition techniques will elevate your drawings to new heights.
Lighting: Illuminate Your Subject
- Define the Light Source: Determine the position and direction of the light source to establish a sense of depth and volume.
- Cast Shadows: Shadows add contrast and reveal form. Observe the interplay of light and shadow to create a sense of realism.
- Mood and Atmosphere: Lighting can evoke different moods, from serene to dramatic. Use it to enhance the emotional impact of your drawing.
Perspective: Creating Depth and Dimension
- One-Point Perspective: Simulates the view of an object from a single vanishing point, creating a sense of distance.
- Two-Point Perspective: Introduces a second vanishing point, resulting in a more dynamic and realistic view.
- Three-Point Perspective: The most advanced form of perspective, it adds a vertical vanishing point to depict objects in space.
Texture: Adding Visual Interest
- Hatching and Cross-hatching: Parallel or intersecting lines create a sense of texture and depth.
- Stippling: Dots of varying sizes and density create a soft, grainy texture.
- Experiment with Techniques: Use different textures to differentiate objects, enhance realism, and convey a sense of touch.
Values: Creating Contrast and Depth
- Value Scale: Values refer to the lightness or darkness of a tone. Use a value scale to create contrast and convey the illusion of depth.
- Highlight and Shadow: Highlights represent areas of greatest light, while shadows represent areas of least light. Balance these elements to create a sense of form.
- Gradients and Transitions: Smooth transitions between values create a sense of depth and realism.
Illuminating the Canvas: Unlocking the Magic of Lighting in Drawing
In the realm of drawing, lighting plays a pivotal role in transforming a flat sketch into a captivating masterpiece. It’s the alchemist that breathes life into your creations, evoking emotions and guiding the viewer’s gaze. Join us as we explore the enchanting effects of light and unravel its secrets to elevate your artistry.
The Chameleon of Light: Its Impact on Appearances
Just as the chameleon adapts its hue to its surroundings, light shapes the appearance of your subject. Direct lighting, like a spotlight, casts sharp shadows and emphasizes textures, revealing every nuance. Conversely, indirect lighting, such as that from a window, creates softer shadows and a more ethereal atmosphere. Understanding these variations allows you to control the mood and atmosphere of your drawing.
A Brush of Emotion: Light’s Power to Convey
Beyond its physical effects, lighting holds an emotional sway. Warm colors, like golden sunlight, evoke a sense of comfort and joy, while cool colors, such as blue moonlight, create an eerie or mysterious ambiance. By manipulating the tone and direction of light, you can communicate emotions and create a compelling narrative within your artwork.
**Mastering Perspective in Drawing**
Embark on a journey into the captivating world of perspective, an essential element that breathes life into your drawings. Perspective allows you to create an illusion of depth, making your subjects appear to exist in a three-dimensional space. It’s a powerful tool that can transform a flat sketch into a compelling and realistic work of art.
Types of Perspective
There are several types of perspective techniques, each offering unique ways to create a sense of depth.
-
One-Point Perspective: This is the most basic form of perspective, where all parallel lines converge at a single point on the horizon. It’s commonly used to depict objects that are facing directly towards or away from the viewer.
-
Two-Point Perspective: Introduces a second vanishing point, creating an illusion of depth in both the horizontal and vertical planes. This technique is suitable for capturing objects at an angle.
-
Three-Point Perspective: The most complex technique, three-point perspective adds a vanishing point above or below the horizon. This perspective is ideal for drawing buildings, skyscrapers, and other subjects that require an accurate depiction of height.
Understanding Perspective
Comprehending perspective requires an understanding of several key concepts:
-
Vanishing Points: These are the points on the horizon where parallel lines converge. They determine the direction and angle of perspective.
-
Horizon Line: This is the line that represents the level of the viewer’s eye. It helps establish the position of the vanishing points and the overall perspective.
-
Foreshortening: This refers to the effect of objects appearing shorter or narrower as they move further away in perspective.
Applying Perspective
To effectively use perspective in your drawings, keep these tips in mind:
-
Observe Real Objects: Study how objects in the real world behave in different perspectives. This will help you develop an intuition for applying perspective to your drawings.
-
Use a Grid: A grid can be a valuable tool for ensuring the accuracy of your perspective. By dividing your drawing into squares, you can maintain consistent proportions and vanishing points.
-
Build from Simple Shapes: Start by drawing simple shapes, such as cubes and cylinders, in perspective. This will help you understand the basic principles before tackling more complex subjects.
Mastering perspective in drawing is a rewarding skill that can elevate your artwork to new heights. Embrace the principles, study real objects, and practice regularly to unlock the transformative power of perspective in your drawings.
Texture: The Key to Visual Vibrancy in Drawing
In the realm of drawing, texture plays a pivotal role in enhancing visual interest and creating captivating works of art. It transforms flat, lifeless surfaces into tangible, tactile masterpieces that evoke a plethora of emotions.
Mastering various texturing techniques empowers artists to convey the essence of materials, from the rough bark of a tree to the delicate petals of a flower. Experimenting with different methods, such as hatching, cross-hatching, and stippling, allows artists to replicate the unique characteristics of various textures.
Hatching involves creating parallel lines of varying thickness to produce a sense of depth and volume. This technique is particularly effective in portraying textures such as hair, fur, or wood grain.
In contrast to hatching, cross-hatching creates texture by layering lines in multiple directions, resulting in a more complex and nuanced effect. This technique is often used to depict fabrics, brick walls, or intricate textures such as lace or feathers.
Stippling, on the other hand, involves repeatedly placing small dots to create texture and shading. It produces a subtle and delicate effect, ideal for capturing the soft textures of skin, clouds, or water. By varying the density and spacing of the dots, artists can create a wide range of textures, from subtle to bold.
Incorporating texture into drawings not only enhances the visual appeal but also adds depth, realism, and emotional resonance to the artwork. It allows artists to convey the true essence of their subjects, from the ruggedness of a mountain landscape to the delicate beauty of a butterfly’s wing.
Values: The Key to Contrast and Depth in Drawing
In the realm of drawing, values reign supreme, dictating the depth, contrast, and visual interest of a subject. Understanding the concept of value is akin to mastering the language of light and shadow, giving life and dimension to your creations.
What Exactly Is Value?
Value refers to the lightness or darkness of a color or tone. In drawing, it’s the range between pure white and absolute black, encompassing countless shades of gray in between. Every object, every surface has its own inherent value, influenced by the surrounding light, shadow, and distance from the viewer.
The Importance of Value
Values play a crucial role in:
- Creating Contrast: By juxtaposing areas of different values, you can draw attention to specific elements and enhance the overall impact of your drawing.
- Simulating Depth: The gradual transition from light to dark values creates the illusion of depth and spatial relationships within your artwork.
- Establishing Mood and Atmosphere: Values can evoke emotions and convey specific moods. Lighter values often suggest joy and optimism, while darker values lend a sense of mystery or foreboding.
Using a Value Scale
To accurately depict values in your drawings, it’s essential to utilize a value scale. A value scale is a series of graduated tones, ranging from pure white to pure black, with various shades of gray in between. By comparing the value of the subject to the value scale, you can determine the correct value to use in your drawing.
Tips for Mastering Values
- Observe Carefully: Pay close attention to the interplay of light and shadow on your subject. Identify the lightest and darkest areas and note the gradations in between.
- Create a Range of Values: Avoid using only a few values in your drawing. Instead, aim for a full range that includes both light and dark tones, as well as subtle midtones.
- Experiment with Blending: Use a blending stump or tortillon to smooth transitions between values, creating a more seamless and natural look.
- Consider Your Light Source: The direction and intensity of the light source will affect the values in your drawing. Make sure to take this into account when choosing values.
