How To Propagate Ivy Cuttings: A Comprehensive Guide For Success
To propagate ivy, select healthy cuttings from donor plants. Prepare cuttings by cutting stems with sharp tools, apply rooting hormone, and plant in potting mix. Provide optimal conditions for rooting by maintaining warmth, high humidity, and adequate light. Water cuttings regularly and monitor for root development. Transplant into larger containers when roots emerge. Address common challenges like cuttings not rooting or wilting by adjusting conditions or providing solutions.
Essential Entities: Ivy Cuttings and Donor Plants
In the enchanting realm of horticulture, ivy plants hold a special allure, captivating gardeners with their lush foliage and versatile nature. Propagation, the art of creating new plants from existing ones, offers a rewarding way to expand your ivy collection and adorn your surroundings with their verdant beauty. At the heart of this process lies the selection of healthy donor plants and the utilization of ivy cuttings.
Ivy Cuttings: Stems of New Life
Ivy cuttings are essentially specialized stems that, when nurtured under the right conditions, can develop roots and transform into independent plants. These stem cuttings serve as the genetic blueprint for the new ivy, inheriting the characteristics of the parent plant. Thus, choosing a healthy donor plant is crucial to ensure the success of your propagation efforts. Look for plants with vigorous growth, vibrant foliage, and no signs of pests or diseases.
Donor Plants: The Foundation of Success
The donor plant, the source of your ivy cuttings, plays a pivotal role in the propagation process. Selecting a healthy plant with desirable traits is essential. Consider the type of ivy you wish to propagate, as well as its suitability for your climate and growing conditions. Healthy donor plants provide vigorous cuttings with a higher probability of rooting and thriving.
Materials and Techniques: Rooting Ivy Cuttings
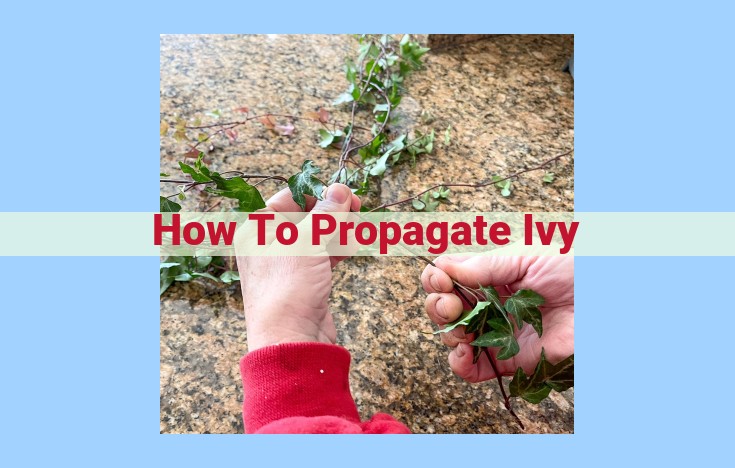
Begin your ivy propagation journey with the essential materials: sharp pruning shears, rooting hormone, well-draining potting mix, and an array of containers to house your new plant babies. Once your tools are ready, embark on the exciting journey of creating new ivy plants from cuttings.
The art of stem cutting propagation begins with selecting healthy, disease-free donor plants. With sharp shears, snip cuttings of healthy stems, approximately 4-6 inches in length, ensuring each cutting has at least 2-3 nodes (areas where roots will emerge). Remove any leaves from the bottom half of each cutting to encourage root development.
To maximize your success, consider treating the cuttings with rooting hormone. This magical powder helps stimulate root growth, increasing the chances of successful rooting. Simply dip the cut end of each cutting into the hormone and tap off any excess.
Now, prepare your homes for your ivy cuttings: containers filled with well-draining potting mix. Make a hole in the soil using a chopstick or pencil, gently insert the cutting, and firm the soil around it. Water the cuttings lightly and keep them warm (<65-75°F/).
Creating a Favorable Environment for Rooting
Ivy cuttings, like delicate seedlings, need a nurturing environment to thrive. Provide them with warm temperatures, high humidity, and bright but indirect light. Humidity plays a crucial role in promoting root development. To create a humidity dome, place a clear plastic bag or lid over the containers, leaving some air holes for ventilation. Alternatively, use a clear plastic wrap to cover each cutting individually.
Maintenance and Care During Rooting
Water the cuttings regularly, but avoid overwatering, as soggy soil can lead to rot. Check the soil moisture by touching it with your finger; if it feels dry to the touch, it’s time to water. Patience is key during the rooting process, as it generally takes several weeks for roots to develop.
Monitor the cuttings closely for signs of root growth. Once roots emerge and become visible through the drainage holes of the container, prepare to transplant them into larger pots or containers. This marks the beginning of a new chapter in your ivy’s life, ready to thrive and bring a touch of greenery to your home.
Discover the Enchanting World of Ivy Varieties: A Guide to Common Types
In the realm of creeping vines and cascading greenery, ivy reigns supreme. With its diverse species and captivating charm, ivy has become a beloved horticultural treasure. Join us as we embark on a journey to explore the most popular ivy varieties, delving into their unique characteristics and unraveling the secrets to their cultivation.
English Ivy: The Epitome of Classic Elegance
- Hedera helix, commonly known as English ivy, epitomizes the classic ivy aesthetic.
- Its glossy, heart-shaped leaves, adorned with intricate patterns, bring a touch of sophistication to any space.
- Boasting remarkable adaptability, English ivy thrives in both indoor and outdoor settings, making it an ideal choice for balconies, trellises, and ground covers.
Algerian Ivy: A Tapestry of Hues
- Introducing Hedera algeriensis, or Algerian ivy, a vibrant tapestry of colors.
- Its leaves exhibit a kaleidoscope of hues, from deep emerald to creamy white, creating a stunning visual impact.
- Perfectly suited for shaded areas, Algerian ivy adds a touch of Mediterranean charm to gardens and patios.
Persian Ivy: A Waterfall of Cascade
- Prepare to be captivated by the graceful cascades of Hedera colchica, aka Persian ivy.
- This ivy variety features elongated, lobed leaves with distinctive silvery veins.
- Its long, trailing stems create a dramatic waterfall effect, making it a perfect choice for hanging baskets and vertical gardens.
Additional Care Considerations
- Environmental Preferences: Most ivy varieties prefer moist, well-drained soil and moderate to bright indirect light.
- Watering: Water your ivy thoroughly when the top inch of soil feels dry to the touch. Avoid overwatering, as it can lead to root rot.
- Special Needs: English ivy may require additional support for climbing surfaces, while Algerian ivy prefers acidic soil. Persian ivy benefits from regular pruning to maintain its cascading form.
From the timeless elegance of English ivy to the vibrant hues of Algerian ivy and the graceful cascades of Persian ivy, the world of ivy varieties offers a captivating range of choices. With proper care and attention, these enchanting vines will transform your surroundings into a verdant oasis, adding beauty, charm, and a touch of nature’s magic.
Creating a Nurturing Environment for Rooting Ivy Cuttings
As you embark on the journey of propagating ivy through stem cuttings, crafting a favorable environment plays a pivotal role in ensuring their successful rooting. Just like nurturing newborns, these delicate cuttings require optimal conditions to thrive and develop strong roots.
The Importance of Warmth and Humidity
Imagine the gentle warmth of a mother’s embrace. Warm temperatures stimulate the metabolic processes within the cuttings, promoting root development. High humidity creates a moist environment, preventing the cuttings from drying out and simulating the humid conditions found in their natural habitats.
Humidity Dome or Plastic Wrap: A Protective Shield
To replicate the high humidity environment, consider creating a humidity dome or using clear plastic wrap. These techniques create a microclimate around the cuttings, trapping moisture and preventing it from evaporating.
Humidity Dome:
- Place the cuttings in a clear plastic container with drainage holes.
- Cover the container with a transparent lid, creating a dome-like structure.
Plastic Wrap:
- Wrap each cutting individually with plastic wrap, ensuring that the leaves remain uncovered for airflow.
- Place the wrapped cuttings in a container with a few centimeters of water.
By maintaining a warm and humid environment, you provide the optimal conditions for your ivy cuttings to thrive and develop strong roots, setting the stage for their future growth and prosperity.
Maintenance and Care During Rooting
As the cuttings embark on their journey to develop roots, diligent care is essential to foster their growth and minimize setbacks. Regular watering is paramount, ensuring the soil remains moist but not waterlogged. Avoid the temptation to overwater, as soggy conditions can suffocate the delicate roots.
Monitoring the cuttings for root development is crucial. Gently tug on the cuttings to assess their progress. Once roots have formed, it’s time to transplant them into larger pots or containers. This provides ample space for the roots to spread and the plant to establish a strong foundation.
Troubleshooting Common Challenges in Rooting Ivy Cuttings
Cuttings Not Rooting
If your ivy cuttings fail to produce roots, there could be several reasons:
- Inadequate moisture: Check the potting mix to ensure it’s consistently moist but not waterlogged.
- Insufficient light: Cuttings need indirect sunlight or artificial light for photosynthesis, which fuels root development.
- Improper cutting technique: Ensure you’re using healthy cuttings and preparing them correctly by removing leaves from the lower stem.
Wilting Cuttings
Wilting indicates that the cuttings are not receiving enough water. Increase watering frequency, but avoid overwatering, as this can lead to root rot. You can also try increasing humidity by covering the cuttings with a plastic bag or humidity dome.
Rotting Cuttings
Root rot is a common issue that occurs when cuttings are overwatered or in poorly draining soil. Remove any rotting sections and repot the cuttings in fresh, well-draining potting mix. Reduce watering frequency and ensure the pot has adequate drainage holes.
