Easy Homemade Pear Sauce: A Delightful Twist On Classic Apple Butter
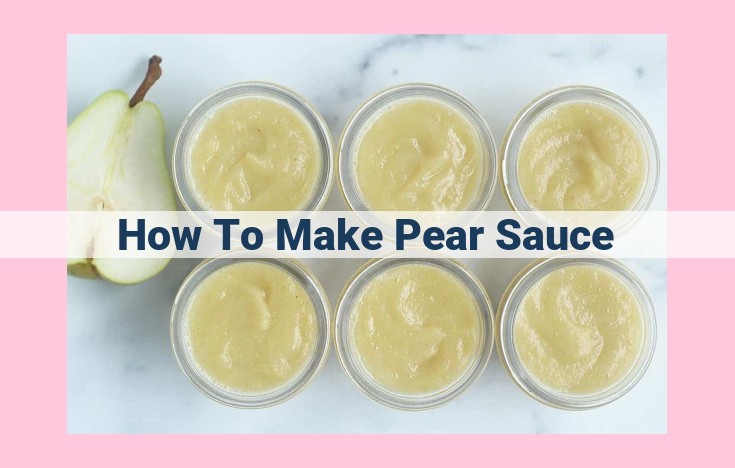
To make pear sauce using the apple butter recipe, substitute pears for apples in the ingredients list. Select ripe pears for optimal flavor and aroma. Follow the preparation steps outlined for apples, including peeling, coring, and slicing. Simmer the pears until softened, then puree using your desired method to achieve the desired consistency. Add optional ingredients such as cinnamon or nutmeg for enhanced flavor, if desired. Store the pear sauce in the refrigerator or freezer for later use.
Apple Butter: A Culinary Adventure
When the leaves turn vibrant hues and the air carries the crisp scent of fall, it’s time to embark on a culinary journey to create a delectable treat: apple butter. This golden-brown spread is not only a testament to the season’s bounty but also a testament to patience and culinary artistry.
Unveiling the Essence of Apple Butter
At its core, apple butter is a harmonious blend of ripe pears and sugar. The choice of pears is pivotal. Ripe pears, with their sweet and juicy flesh, contribute to the velvety texture and robust flavor of the finished product.
Balancing sweetness is an art form. A ratio of 3 pounds of pears to 1 pound of sugar provides a sweet yet not overly saccharine taste. This delicate equilibrium allows the natural flavors of the pears to shine through.
Step-by-Step Guide to Crafting the Autumnal Delight: Apple Butter
Preparation: The Culinary Canvas
Before embarking on our culinary journey, we must meticulously prepare our star ingredients. Select the ripest pears, their golden-hued skin a testament to their peak flavor and tender texture. Once chosen, gather them like precious gems and begin the process of transformation.
With a sharp paring knife, carefully remove the skin, revealing the pear’s glistening flesh beneath. Next, use a coring tool to extract the central core, leaving behind a hollow shell. Slice the pears into uniform wedges, ensuring even cooking and a pleasing bite.
Now, we bring the pears to life in a spacious Dutch oven, a vessel destined to become the cradle of our apple butter. Pour in enough liquid to cover the pears—a symphony of water, apple cider, or a blend of both—and bring the mixture to a gentle simmer. This is the moment of patient alchemy, where the pears surrender their sweet essence to the liquid, creating a fragrant brew. Remember to stir occasionally, preventing the delicate fruit from succumbing to the perils of scorching.
Pureeing the Apples: Achieving the Perfect Consistency
As your fragrant mixture of pears and sugar simmers merrily, the next crucial step in the art of crafting apple butter awaits – pureeing the apples. This transformative process will bestow upon your concoction its signature velvety texture and release the symphony of flavors hidden within.
Embarking on this culinary journey, you are presented with an array of tools to facilitate the pureeing process:
-
Immersion blender: Submerse the wand-like blender directly into the simmering pot and let its whirring blades work their magic. This method offers a convenient and time-saving solution, allowing you to puree the apples right in their cooking vessel.
-
Food processor: Transfer the cooked apples to a food processor and pulse until your desired consistency is achieved. This appliance excels at creating smooth, uniform purees.
-
Blender: If a traditional blender is your weapon of choice, use caution when transferring the hot mixture. Blend in small batches to prevent overheating and potential splattering.
The key to perfecting the texture of your apple butter lies in finding the equilibrium between smooth and chunky. For a classic apple butter experience, aim for a puree that retains a slight rustic charm, allowing small bits of fruit to grace your palate. However, if you prefer a silky-smooth spread, continue blending until no discernible lumps remain.
Remember, the consistency of your apple butter is a matter of personal preference. Experiment with different pureeing times and methods to discover the texture that tantalizes your taste buds the most. Whether you relish a rustic charm or a velvety embrace, the choice is yours to savor.
Optional Enhancements: Elevate Your Apple Butter’s Flavor Profile
While the classic combination of pears and sugar creates a delectable apple butter, there’s a world of flavors waiting to be explored. Unleash your culinary creativity and take your apple butter to new heights with these optional enhancements.
Cinnamon and Nutmeg: A Match Made in Flavor Heaven
Cinnamon and nutmeg are an iconic duo that adds warmth, depth, and a touch of spice to your apple butter. Cinnamon’s sweet and aromatic bark brings a delightful warmth that complements the pears’ natural sweetness. Nutmeg’s nutty and slightly peppery flavor adds a subtle yet irresistible dimension.
Beyond the Classics: Explore New Flavor Horizons
Don’t limit yourself to the traditional spices. Experiment with other flavors to create your own unique apple butter masterpiece. Cardamom’s floral notes, ginger’s spicy kick, or even a hint of chili powder can elevate your creation to something truly exceptional.
Customization at Your Fingertips
The beauty of apple butter lies in its versatility. Adjust the spices to your liking, whether you prefer a subtle hint or a bolder flavor punch. If you’re feeling adventurous, combine spices to create your own signature blend. Remember, the possibilities are endless!
Preserving and Savoring Your Homemade Apple Butter
Storage: Preserving Your Apple Butter’s Delicacy
After all the hard work and anticipation, it’s vital to ensure your apple butter remains at its peak freshness for as long as possible. Proper storage is key!
For short-term storage, keep your apple butter refrigerated in airtight containers. It will happily reside there for up to two weeks, waiting patiently for its delicious fate.
For longer preservation, freezing is your ally. Portion your apple butter into freezer-safe containers or bags, and it will stay frozen for approximately one year. When you’re ready for a taste of summer in the depths of winter, simply thaw it overnight in the refrigerator.
Versatile Delights: Embracing Apple Butter’s Culinary Adventures
Apple butter is not just a spread; it’s a culinary chameleon, ready to elevate countless dishes with its sweet, fruity embrace.
- Spread the Love: Slather it generously on toast, pancakes, waffles, or freshly baked bread. Its smooth, velvety texture will melt in your mouth.
- Enhance Your Sauces: Add a dollop to your favorite sauces for a touch of autumnal flair. It beautifully complements pork, poultry, and even fish dishes.
- Baking Buddy: Incorporate apple butter into cakes, cookies, or muffins for a moist, flavorful twist. Its natural sweetness will make your treats irresistible.
- Condiment Extraordinaire: Serve apple butter alongside grilled meats, cheeses, or charcuterie boards. Its tangy-sweet notes will bring a harmonious balance to any platter.
- Smoothie Booster: Add a scoop to your morning smoothie for an antioxidant-rich and satisfying treat. Its fruity flavor will invigorate your day.
Troubleshooting: Perfecting Your Apple Butter
While making apple butter is a rewarding experience, it’s not without its potential pitfalls. Here are some common issues you may encounter and how to resolve them:
Apple Butter Too Thick
If your apple butter is too thick, it may be due to overcooking. To remedy this:
- Add water or apple cider: Gradually whisk in small amounts of hot water or fresh apple cider until you reach the desired consistency.
- Simmer longer: Continue simmering the apple butter over low heat, stirring occasionally, until it has thickened. Be patient. This may take several additional hours.
Apple Butter Too Thin
On the flip side, if your apple butter is too thin, it’s likely because it was undercooked. To fix it:
- Simmer longer: Return the apple butter to the stovetop and simmer over low heat until it reaches the desired thickness. Remember to stir to prevent scorching.
- Add cornstarch: If you’re short on time, you can thicken the apple butter quickly by whisking in a small amount of cornstarch.
Undesirable Texture
If your apple butter has a grainy texture, it’s because the pears were not fully pureed. To resolve this:
- Puree again: Use an immersion blender or regular blender to puree the apple butter until it’s smooth and velvety.
- Strain: To remove any remaining lumps, strain the apple butter through a fine-mesh sieve.
If your apple butter has a stringy texture, it’s likely because of the pear skins. To prevent this:
- Peel the pears: Before cooking, carefully peel the pears to remove the tough skins.
- Cook longer: Simmering for a longer period of time will help break down the pear skins and create a smoother texture.
By following these tips, you can troubleshoot any issues that may arise and create the perfect apple butter every time.
