A Comprehensive Guide To Rock Painting On Canvas: Techniques, Materials, And Artist Inspiration
Rock painting on canvas involves using brushes and paint to create designs, patterns, or images on rocks, which are then adhered to a canvas. Essential materials include rocks, canvas, paint, brushes, and varnish. Advanced techniques like dot painting and dry brushing enhance detail. Tools like easels, stencils, and sponges assist in creating unique effects. Renowned artists contribute to the art form with their workshops and courses. Choose suitable rocks based on their texture and shape, and select canvas options like stretched canvas or canvas panels to accommodate your artwork.
Essential Materials for Rock Painting: A Beginner’s Guide to Unleashing Your Creativity
Embark on a captivating journey into the world of rock painting! Whether you’re a budding artist or an experienced crafter, gathering the right materials is the cornerstone of success. Let’s explore the essential tools that will empower you to transform ordinary rocks into extraordinary works of art:
1. The Perfect Canvas: Rocks of All Shapes and Sizes
Nature’s canvas, rocks, come in a mesmerizing array of shapes, sizes, and textures. Choose smooth rocks for intricate designs or rough rocks for a rustic touch. Pebbles, river stones, and sea stones offer unique surfaces for expressing your creativity.
2. Paint the Town Vivid: Acrylics, Watercolors, and Beyond
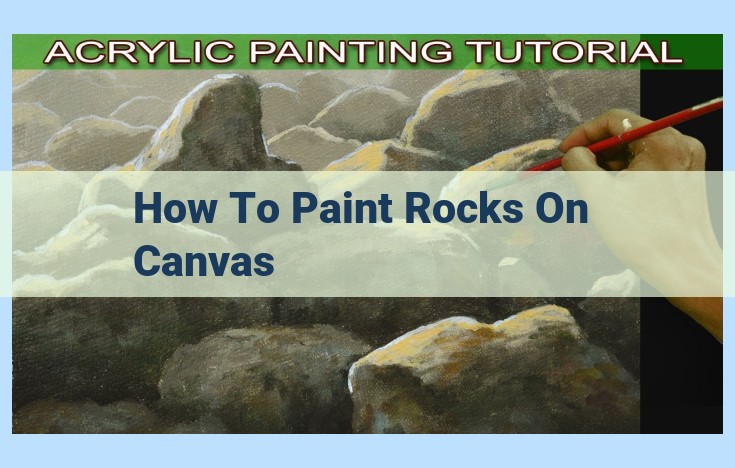
Your palette awaits! Acrylics are versatile and fast-drying, making them ideal for beginners and seasoned artists alike. Explore the delicate transparency of watercolors for ethereal effects. Experiment with oil paints for their rich, vibrant colors and long-lasting finish.
3. Brushes: Precision and Detail at Your Fingertips
Fine-tip brushes allow for intricate detailing, while flat brushes provide broad strokes. Choose brushes with synthetic or natural bristles depending on the paint you’re using. Experiment with different brush sizes and shapes to achieve the desired results.
4. Mix and Match: Essential Palette and Water Container
A palette is your mixing station, where colors come alive. Choose a palette with multiple wells to prevent colors from mixing unintentionally. Water containers keep your brushes clean and ready for the next stroke.
5. Clean Up Crew: Rags and Towels
Inevitably, a few mistakes or spills will occur. Keep a supply of rags or towels nearby to wipe up any accidents or smudges. Clean brushes thoroughly between colors to avoid contamination.
6. Seal the Deal: Protective Varnish
Once your masterpiece is complete, varnish is your secret weapon for preserving its vibrancy. Choose a gloss, matte, or satin finish to enhance the texture and protect your art from the elements.
Advanced Techniques for Rock Painting: Elevate Your Art to New Heights
As you embark on your rock painting journey, mastering advanced techniques will enable you to transcend ordinary creations and elevate your artwork to captivating masterpieces. From the delicate precision of dot painting to the mesmerizing layers of glazing, these techniques will empower you to express yourself with unparalleled depth and nuance.
Dot Painting: The Art of Pointillism in Miniature
Dot painting is a meticulous technique that mimics the pointillist style of painting. Using the tip of a tiny brush, you painstakingly apply hundreds or even thousands of tiny dots to create intricate designs and subtle gradients. This method demands patience and a steady hand, but the results are truly mesmerizing.
Stippling: Creating Depth Through Controlled Texture
Similar to dot painting, stippling involves applying multiple small dots in close proximity. However, instead of creating distinct dots, you blend them together using a light, tapping motion with a dry brush. This technique allows you to build depth and texture by varying the pressure and direction of your brushstrokes.
Dry Brushing: Revealing the Subtly of Shadows and Highlights
Dry brushing involves dipping a brush into paint and then wiping away most of the excess. Using this nearly dry brush, you lightly brush over the surface of the rock, leaving only the slightest hint of color. This technique is ideal for creating subtle shadows, highlights, and weathered effects.
Glazing: Building Layers of Color and Luminosity
Glazing is a layering technique where thin, translucent layers of paint are applied on top of each other. Each layer allows the previous layer to show through, creating a subtle depth and luminosity. Glazing is particularly effective for achieving realistic skin tones and creating vibrant landscapes.
Sponging: Creating Texture and Atmospheric Effects
Using a natural or synthetic sponge, sponging involves dabbing or stippling paint onto the rock’s surface. This creates a textured and mottled effect that can be used to simulate clouds, water, or the passage of time. It’s a particularly effective technique for capturing the atmospheric qualities of a scene.
Inspiration and Resources
- Discuss additional tools and resources that can enhance rock painting, such as easels, palette knives, sponges, stencils, and stamps. Explain their uses and benefits.
Inspiration and Resources: Elevate Your Rock Painting Journey
When embarking on your rock painting adventure, there’s a wealth of tools and resources waiting to ignite your creativity and refine your skills. These resources can transform your painted rocks from basic to breathtaking.
Easels: A Steady Canvas for Intricate Details
Easels provide a stable and adjustable platform for your canvas, allowing you to comfortably paint from any angle. Whether you prefer a traditional wooden easel or a portable lightweight one, an easel frees your hands to focus on the delicate details and intricate designs that set your rock paintings apart.
Palette Knives: A Versatile Tool for Texture and Depth
Palette knives are not just for mixing paints. They can be wielded as sculpting tools to create unique textures and depth on your rock canvas. Use the sharp edge to scrape paint away, revealing underlying layers, or the broad flat surface to smooth and blend colors, adding a touch of professional finesse to your creations.
Sponges: A Gateway to Absorbing Possibilities
Sponges are versatile tools that can transform your rock paintings. Use a damp sponge to gently absorb excess paint, creating soft edges and transitions. Experiment with dry sponges to dab on paint, mimicking the natural textures of rocks and landscapes. The absorption and application capabilities of sponges open up a world of artistic possibilities.
Stencils: A Precision Path to Perfection
Stencils offer a precise way to incorporate intricate designs or lettering into your rock paintings. Place a stencil over your canvas and carefully apply paint. The result is a crisp, defined pattern that will elevate your creations to the next level, adding a touch of precision and professionalism.
Stamps: An Artistic Gateway to Texture and Motifs
Stamps are a creative way to add texture, patterns, and motifs to your rock paintings. Choose from a vast array of stamps, from abstract designs to animal silhouettes. Simply dip the stamp in paint and press it onto your canvas to transfer the design. Experiment with different colors and techniques to create unique and captivating compositions.
Renowned Rock Painting Artists and Instructors
The world of rock painting is graced by talented artists and dedicated instructors who have made significant contributions to this captivating art form. Their innovative techniques and boundless creativity have shaped the landscape of rock painting, inspiring countless enthusiasts to explore their own artistic journeys.
[Artist 1] is a pioneer in the realm of dot painting, a technique that involves applying tiny dots of paint to create intricate designs. Her signature style showcases vibrant colors and mesmerizing patterns, transforming ordinary rocks into miniature masterpieces. She has authored several books and conducts workshops internationally, sharing her passion for the art.
[Artist 2] has mastered the art of stippling, a technique that utilizes a series of dots or short strokes to create smooth transitions and subtle textures. His works often depict landscapes, animals, and surreal scenes, capturing the essence of nature on the humble canvas of a rock.
[Instructor 3] is renowned for her dry brushing technique, which involves applying paint with a nearly dry brush to create weathered and aged effects. Her workshops empower students to create realistic rock paintings that evoke the patina of time and the majesty of natural formations.
[Artist 4] is a versatile artist who combines multiple techniques in her work. Her unique style blends dot painting, glazing, and sponging to create stunning abstract compositions. Her paintings have been featured in exhibitions around the world and have captivated audiences with their vibrant hues and ethereal quality.
These artists and instructors are just a few of the many luminaries who have contributed to the growth and evolution of rock painting. Their passion, dedication, and unparalleled talent inspire and empower aspiring artists to explore the boundless possibilities of this captivating medium.
Types of Rocks for Rock Painting: A Journey Through Nature’s Canvas
When embarking on the enchanting art of rock painting, choosing the perfect canvas is paramount. Nature offers a diverse array of rocks, each with unique characteristics that can enhance the beauty and versatility of your creations.
Smooth Rocks: These rocks, often found along beaches or riverbeds, provide a smooth surface ideal for intricate designs. Their flatness makes them easy to handle and paint, allowing for precise brushstrokes and detailed artwork.
Rough Rocks: Rough rocks, characterized by their rugged texture, add a touch of rustic charm to any rock painting project. The uneven surface creates interesting shadows and highlights, providing an opportunity for depth and dimension.
Pebbles: Tiny and adorable, pebbles are a whimsical choice for rock painting. Their small size allows for delicate designs and intricate patterns. Use them to create charming miniatures or add a touch of finesse to larger projects.
River Stones: Shaped by the gentle currents of rivers, river stones possess a smooth, rounded form. Their oblong shape provides a unique canvas for elongated designs and panoramic landscapes.
Sea Stones: Originating from the depths of the ocean, sea stones are adorned with traces of their marine origins. Their porous surface absorbs paint beautifully, creating vibrant and long-lasting hues. The rounded edges add a touch of softness to any design.
Consider the shape, texture, and size of the rock when selecting the perfect canvas for your rock painting adventure. Experiment with different types to discover their unique possibilities and unlock the full potential of this enchanting art form.
Canvas Options for Rock Painting
When it comes to rock painting, the canvas you choose plays a crucial role in the final outcome of your artwork. Whether you’re a beginner or a seasoned artist, understanding the different canvas options available will help you elevate your painting experience.
Stretched Canvas
Stretched canvas refers to a canvas that has been stretched and secured over a wooden frame. This option provides a firm and stable surface, ideal for larger and more detailed paintings. The thickness of the frame can vary, allowing you to choose a canvas that suits your desired depth and weight.
Canvas Panels
Canvas panels are similar to stretched canvas, but they come with a pre-primed canvas attached to a thin cardboard or wood panel. These panels offer a more portable and lightweight alternative to stretched canvas, making them suitable for plein air painting or painting on the go.
Canvas Board
Canvas boards are a budget-friendly option that consists of a thin canvas glued onto a cardboard or fiberboard base. They are lightweight and easy to transport, making them a good choice for beginners or for small and quick projects. However, canvas boards may not provide the same level of durability or longevity as stretched canvas or canvas panels.
Burlap
Burlap is a coarse, jute-based fabric that can be used as a unique and rustic canvas for rock painting. Its natural texture and organic aesthetic add a distinct charm to any artwork. Burlap is often used for decorative or collage-style paintings.
Choosing the Best Canvas for Your Project
Selecting the right canvas for your rock painting project depends on several factors:
- Size and Detail: Stretched canvas is ideal for larger and more detailed paintings as it provides ample space and stability.
- Portability: Canvas panels and canvas boards are more portable options, suitable for smaller projects or painting outdoors.
- Budget: Canvas boards offer a budget-friendly choice, while stretched canvas and canvas panels provide better durability and longevity.
- Aesthetic: Burlap adds a natural and rustic touch to rock paintings, perfect for decorative or unique projects.
By choosing the appropriate canvas option, you can create a solid foundation for your rock paintings, allowing you to unleash your creativity and produce stunning works of art.
