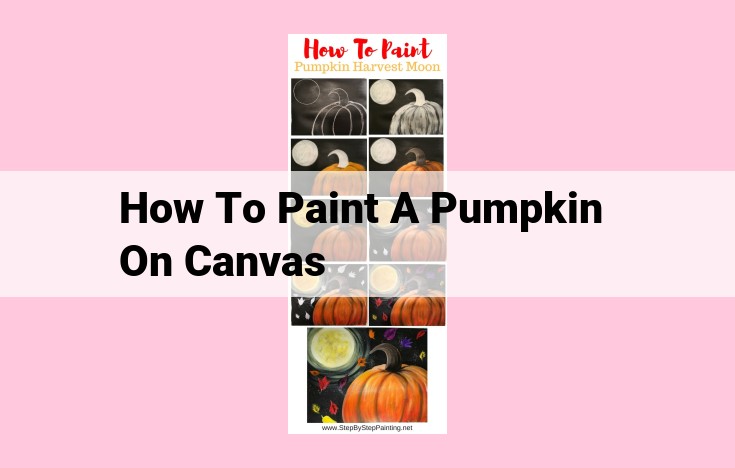
Mastering The Art Of Painting A Enchanting Pumpkin On Canvas: A Comprehensive Guide
To paint a captivating pumpkin on canvas, gather essential materials like canvas, brushes, and paints. Begin by sketching the pumpkin’s form, paying attention to its anatomy. Apply base coats and shades to capture its shape and depth. Use blending techniques to smooth transitions and create realistic textures. Draw inspiration from master painters and observe pumpkins from life to develop unique compositions. Incorporate techniques like realism and impressionism to bring the pumpkin to life.
Essential Materials for Painting Pumpkins: A Comprehensive Guide
Canvas: Opt for a sturdy canvas that can withstand multiple layers of paint without stretching or warping. Cotton or linen canvases provide excellent absorption and durability.
Paint: Choose acrylic paints for their versatility, quick drying time, and ease of blending. Opt for high-quality paints with good pigmentation for vibrant colors.
Brushes: A variety of synthetic hog hair brushes is recommended. Start with a flat brush for base coating, a round brush for details, and an angled brush for blending.
Palette: A white plastic palette allows you to mix colors easily and see true hues. Consider using a palette with compartments to keep colors organized.
Water Container: A squeeze bottle filled with water is essential for thinning paints, cleaning brushes, and creating glazes.
Rags: Soft, lint-free cloths are necessary for wiping excess paint, blending, and cleaning up. Old T-shirts or cheesecloth work well.
Additional Tips:
- Invest in good quality materials. They will last longer and produce better results.
- Consider the size of your canvas. Larger canvases require more paint, brushes, and water.
- Prepare your materials before starting. Lay everything out within easy reach.
- Protect your work area. Cover your table or floor with paper or plastic.
Painting Techniques to Enhance Pumpkin Realism
The Art of Base Coating
Laying down the foundation for your pumpkin masterpiece begins with a solid base coat. Choose a shade that closely resembles the natural color of a pumpkin, typically ranging from warm oranges to deep reds. Apply two or three thin, even coats, allowing each layer to dry thoroughly. This will provide a smooth surface for subsequent painting techniques.
Mastering the Art of Shading
To create the illusion of depth and dimension, shading is paramount. Identify the areas of the pumpkin that naturally receive less light, such as the crevices and underside. Use a slightly darker shade of orange or a touch of brown to gently apply shadows in these areas. Blend the edges of the shadows seamlessly into the base color using a soft brush.
Details that Bring Life
Pumpkin vines and leaves add a touch of realism that brings your painting to life. Use a fine brush to create thin, curling lines for the vines, paying attention to the direction of their growth. For the leaves, use a palette of deep greens mixed with subtle hues of yellow and red to mimic the autumnal foliage.
Blending for a Seamless Finish
To achieve a realistic pumpkin painting, blending is essential. Use a clean brush with a light touch to blend the transitions between different colors and tones. This will create a sense of unity and remove any harsh lines or abrupt color changes. Pay particular attention to the areas where shadows meet highlights for a smooth and natural appearance.
Tips for Enhancing Realism
- Observe Real Pumpkins: Study the shape, texture, and color variations of real pumpkins to capture their true essence.
- Use Reference Photos: Take close-up photographs of pumpkins from different angles to provide a detailed reference while painting.
- Experiment with Lighting: Set up your pumpkin in different lighting conditions to observe how the shadows and highlights change, which will aid in your shading.
- Practice and Patience: Mastering pumpkin realism takes time and practice. Be patient and persistent with your efforts, and don’t be afraid to experiment with different techniques.
Exploring the Anatomy of a Pumpkin
- Introduce the main components of a pumpkin, such as vines, leaves, stems, and the pumpkin itself. Explain how to accurately depict their shape, texture, and arrangement on canvas.
Exploring the Anatomy of a Pumpkin: A Guide to Capturing the Essence on Canvas
The majestic pumpkin, with its vibrant hues and organic forms, has long captivated artists. To paint a truly lifelike pumpkin, it’s crucial to understand its intricate anatomy. Let’s embark on a journey to dissect the components of a pumpkin and learn how to accurately depict them on canvas.
The Majestic Vines
The delicate vines that cradle the pumpkin add a sense of movement and life to the composition. Their slender stems curl gracefully, supporting the weight of the fruit. Pay attention to their direction and curvature, as they contribute to the overall balance and asymmetry of the pumpkin.
The Verdant Leaves
The pumpkin’s broad leaves provide a lush backdrop for the main subject. Capture their serrated edges and the varying shades of green, from the vibrant emerald of new growth to the olive tones of maturity. As you paint, consider the way the leaves fold and drape over each other, creating a sense of depth and texture.
The Sturdy Stem
The sturdy stem connects the pumpkin to the vine, providing it with nourishment and support. Depict its ridged texture and observe how it thickens at the base and tapers towards the tip. Pay attention to the way the stem attaches to the pumpkin, as this can vary depending on the variety.
The Pumpkin’s Essence
The pumpkin itself is the central focus of your painting. Study its shape and contours, taking note of any imperfections or irregularities that add character. Observe the subtle variations in color, from the deep orange of ripe pumpkins to the pale yellow of immature ones. As you paint, consider the highlight and shadow patterns that create the illusion of three-dimensionality.
Bringing It All Together
To create a cohesive composition, carefully arrange these components on canvas. Pay attention to the negative space between them, as it can enhance the overall impact of the painting. Remember, the anatomy of a pumpkin is not just a technical exercise but a journey of capturing its unique beauty and essence.
Art Inspiration from Masters and Movements
Throughout art history, the humble pumpkin has captured the attention of renowned artists, each leaving their unique mark on its portrayal. Let’s explore the influence of Vincent van Gogh, Claude Monet, and Georgia O’Keeffe on the art of painting pumpkins, and how their styles can inspire your own creations.
Van Gogh’s Expressionist Pumpkins
Vincent van Gogh was known for his bold brushstrokes and vibrant colors, which extended to his paintings of pumpkins. His “Pumpkins with Cabbage” depicted the fruits in intense, glowing hues, conveying a sense of urgency and emotion. By experimenting with color and texture, you can emulate van Gogh’s energetic and expressive style in your pumpkin paintings.
Monet’s Impressionist Pumpkins
Claude Monet, a master of Impressionism, captured the changing light and atmosphere of his surroundings. His pumpkin paintings, such as “Pumpkins in the Grass,” depict the fruits as soft, ethereal forms immersed in a haze of light and color. To channel Monet’s style, pay attention to the effects of light and shadow, and use gentle, flowing brushstrokes to create a sense of movement and atmosphere.
O’Keeffe’s Minimalist Pumpkins
Georgia O’Keeffe was known for her highly stylized and minimalist paintings. Her “Summer Squash” series reduced the pumpkin to its essential shapes and lines, focusing on its form and texture. By simplifying your pumpkin subjects and emphasizing their sculptural qualities, you can capture the essence of O’Keeffe’s minimalist aesthetic.
Applying Masterful Techniques to Pumpkin Painting
The styles of these masters offer a wealth of inspiration for your own pumpkin paintings. By understanding their techniques and philosophies, you can incorporate elements of realism, impressionism, and minimalism to create unique and compelling works of art. Experiment with different brushstrokes, color palettes, and compositions to find your own voice and style.
Remember that artistic inspiration can strike from anywhere, so keep your eyes open for pumpkins in nature, photographs, or other art forms. By observing and sketching pumpkins from different perspectives, you can generate original compositions and bring your own vision to this timeless subject.
Sources of Inspiration for Unique Pumpkin Compositions
Finding inspiration for painting pumpkins can be an exciting adventure. Nature offers a boundless source of creativity, from the vibrant orange hues of ripe pumpkins to the intricate patterns on their vines. Venture into nature, observe the shapes, sizes, and details of different pumpkins, and capture their essence through sketches.
Photographs are another excellent resource for inspiration. Explore online galleries or browse magazines for images of pumpkins in various settings. Pay attention to the unique angles, lighting, and compositions used by talented photographers. Analyze how these elements enhance the beauty of the pumpkins and consider how you can incorporate similar techniques into your own artwork.
Finally, don’t overlook the inspiration that can be found in existing paintings. Study the works of renowned masters like Vincent van Gogh, Claude Monet, and Georgia O’Keeffe, who have depicted pumpkins in various styles. Examine their use of color, brushstrokes, and composition to understand how they brought these humble fruits to life on canvas.
By observing nature, studying photographs, and exploring paintings, you can gather a wealth of inspiration for creating original and compelling pumpkin compositions. Remember, the key is to observe closely, sketch often, and allow your imagination to soar.
