How To Tie-Dye Shirts With Food Coloring: A Beginner’s Guide To Vibrant, Diy Designs
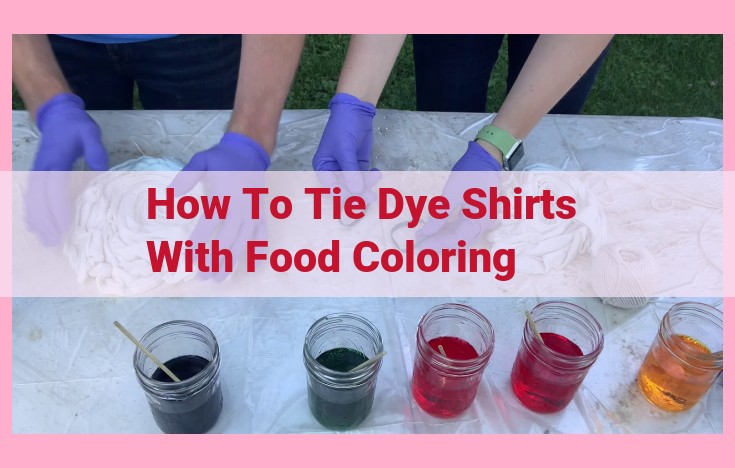
To tie-dye shirts with food coloring, soak them in white vinegar then wring out excess moisture. Gather the fabric using rubber bands to create folds and creases. In separate bowls, mix food coloring, salt, and a little vinegar. Apply colors to different sections of the fabric. Cover and let rest for several hours. Rinse, wash, and dry your tie-dyed shirts to enjoy vibrant, one-of-a-kind designs.
The Ultimate Guide to Tie-Dyeing: Embark on a Colorful Journey
Let’s embark on a vibrant adventure into the enchanting world of tie-dyeing, where colors dance and creativity flows effortlessly! To begin this enchanting expedition, we’ll first gather the essential tools that will transform ordinary fabrics into extraordinary works of art.
- Textiles: Embrace the canvas of your choice, whether it’s cotton, silk, or any natural fiber that eagerly absorbs the vibrant hues.
- Dye: Immerse yourself in the rainbow’s palette with a variety of dyes specifically designed for tie-dyeing. From classic colors to vibrant neons, let your imagination soar with endless possibilities.
- Rubber Bands: These humble yet powerful tools will become your allies in creating intricate patterns and vibrant designs.
- Gloves: Protect your precious hands from the colorful dance with a pair of gloves.
- Soda Ash: This essential ingredient sets the stage for the dyes to bond with the fabric, ensuring vibrant and long-lasting results.
- Washing Machine: Prepare for the grand finale as your washing machine transforms your tie-dyed masterpieces into wearable wonders.
Tie-Dye Techniques: Unleash Your Creativity with Vibrant Designs
Scrunching: The Classic Tie-Dye Method
Scrunching is the most basic and popular tie-dye technique, perfect for beginners. Simply gather the fabric into small, random bunches and secure them with rubber bands. When you submerge the fabric in dye, the areas that are scrunched will create vibrant, irregular patterns.
Shibori: Ancient Japanese Art of Indigo Dyeing
Shibori, a traditional Japanese dyeing technique, utilizes folding and binding methods to create intricate and symmetrical patterns. By folding and pleating the fabric before dyeing, you can achieve designs ranging from simple stripes to elaborate geometric motifs.
Ice Tie-Dyeing: Cool and Unique Effects
Ice tie-dyeing introduces a unique cooling element that creates beautiful, unpredictable patterns. Before dyeing, place crushed ice on top of the fabric and secure it with rubber bands. As the ice melts, it dilutes the dye, resulting in soft, subtle hues with mottled effects.
Reverse Tie-Dyeing: Bleach and Dye for Bold Designs
Reverse tie-dyeing involves bleaching a previously dyed garment and then re-dyeing it. This technique allows you to create striking, high-contrast patterns by selectively bleaching portions of the fabric and then applying a new dye color.
Concepts:
History and Cultural Significance of Tie-Dyeing
Tie-dyeing, an ancient art form that transcends cultures and generations, has its roots in Asia and Africa. Archaeological evidence suggests that this vibrant technique was practiced in India as early as the 6th century AD. Artisans in Japan also embraced tie-dyeing, creating exquisite garments known as shibori that embodied the country’s artistic and cultural heritage.
Over the centuries, tie-dyeing spread to Europe and the Americas, where it became an integral part of counterculture movements such as the hippie era of the 1960s. In the United States, tie-dyeing was embraced as a symbol of peace, individuality, and self-expression. Today, this versatile art form continues to inspire creativity and spread joy around the world.
Natural Dyes in Tie-Dyeing
Natural dyes have played a pivotal role in tie-dyeing throughout history. These eco-friendly and sustainable pigments are derived from plants, minerals, and animals. Indigo, a deep blue dye extracted from the indigo plant, is perhaps the most iconic natural dye used in tie-dyeing. Other popular natural dyes include madder root (red), turmeric (yellow), and logwood (black).
Using natural dyes in tie-dyeing connects us with the ancient traditions of this art form. It allows us to create unique and vibrant designs while minimizing our environmental impact. Natural dyes often impart a subtle and earthy beauty to tie-dyed fabrics, adding to their authentic and organic appeal.
Tie-Dyeing: A Journey Through Creativity and Connection
Dive into the vibrant world of tie-dyeing, where creativity and connection dance together. Explore the origins, techniques, and endless possibilities that make this ancient art form a timeless pastime.
Resources for Your Tie-Dye Adventure:
Tie-Dye Kits: A Gateway to Colorful Creations
- Discover curated kits that provide everything you need for a seamless tie-dye experience, from dyes and fabrics to instructions.
- Unleash your inner artist and experiment with pre-designed patterns or let your imagination soar with free-form designs.
Tie-Dye Parties: A Social Gathering with a Twist
- Host or attend a tie-dye party where the vibrant hues and laughter create a lively atmosphere.
- Share ideas, collaborate on unique designs, and connect with others who share a passion for self-expression.
Workshops: A Haven for Tie-Dye Mastery
- Seek expert guidance from experienced tie-dyers who can share their knowledge and techniques.
- Master different folding and dyeing methods, expand your color palette, and refine your artistic skills.
Influential Artists: Illuminating the Tie-Dye Legacy
- Get inspired by the works of renowned tie-dye artists who have pushed the boundaries of this art form.
- Discover their unique styles, innovative patterns, and the stories behind their vibrant creations.
- Connect with a global community of tie-dye enthusiasts through online forums and social media groups.
Embrace the Joy of Tie-Dyeing
Whether you’re a seasoned pro or a curious beginner, tie-dyeing offers a therapeutic outlet that fosters creativity, connects you with your inner child, and brings joy to your life.
Unleash Your Creativity with Tie-Dyeing
Experiment with different techniques, explore a kaleidoscope of colors, and let your imagination run wild. Tie-dyeing is an art form that embraces individuality and encourages you to express yourself without limitations.
Connect with Yourself and Others
Engage in a mindful activity that promotes relaxation and self-discovery. Share the joy of tie-dyeing with friends and family, creating lasting memories and strengthening bonds.
Discover the Healing Power of Tie-Dyeing
The vibrant colors and rhythmic movements involved in tie-dyeing can have a calming effect on your mind and body. Tap into its therapeutic benefits and experience a sense of tranquility while creating something truly unique.
The Therapeutic, Creative, and Social Benefits of Tie-Dyeing
Tie-dyeing, the enchanting art of transforming fabric into vibrant masterpieces, offers a myriad of benefits that extend beyond its colorful creations. This ancient technique is not only a creative outlet but also a gateway to physical and emotional well-being, fostering social connections and stimulating the mind.
Physical Health:
Immerse yourself in the therapeutic embrace of tie-dyeing. The repetitive motions of scrunching, folding, and binding fabric soothe anxiety, relieve tension, and promote mindfulness. The physical act of creating something tangible brings a sense of accomplishment and boosts self-esteem.
Psychological Well-being:
Unleash your inner artist with tie-dyeing! This creative endeavor engages both hemispheres of the brain, fostering cognitive flexibility and problem-solving skills. Experimenting with colors and patterns stimulates imagination, reduces stress, and evokes joy.
Social Bonding:
Tie-dyeing is a social activity that brings people together. Gather with friends, family, or fellow enthusiasts to share laughter, creativity, and the vibrant results of your collective artistry. This shared experience strengthens social bonds, encourages communication, and creates lasting memories.
Immerse Yourself in the Vibrant World of Tie-Dyeing: A Step-by-Step Guide
Unleash your creativity and embark on a colorful adventure with tie-dyeing! This time-honored art form offers endless possibilities for self-expression and a sense of accomplishment. To guide you on this vibrant journey, here’s a comprehensive step-by-step tutorial for creating a stunning tie-dyed shirt using the most popular technique.
Materials You’ll Need
- White cotton shirt: A crisp, white shirt is the perfect canvas for your tie-dye masterpiece.
- Tie-dye kit: This convenient kit contains all the essential dyes and tools for vibrant results.
- Rubber bands: Use these to secure your fabric and create unique patterns.
- Gloves: Protect your hands from the dyes.
- Basin or bathtub: A large enough basin or the bathtub is ideal for soaking your shirt.
- Salt: Dissolve salt in water to help the dyes adhere to the fabric.
Step 1: Prepare Your Canvas
Wash and dry your shirt to remove any impurities. Dampen it slightly to make the dye more receptive.
Step 2: Explore Your Creativity
Fold, twist, or bunch your shirt to create a variety of patterns. Secure with rubber bands to create sections where the dye will pool.
Step 3: Dive into the Dye
Mix the dye colors according to the kit instructions. Submerge your shirt in the dye solution, ensuring that all parts are evenly soaked. Stir or agitate the shirt for an even application.
Step 4: Let the Colors Set
Allow your shirt to soak for the specified time, usually 6-8 hours. The longer it soaks, the more intense the colors will be.
Step 5: Remove the Rubber Bands
Carefully untie the rubber bands and rinse the shirt thoroughly with cold water to remove excess dye.
Step 6: Fix the Dye
Prepare a salt-water solution and soak the shirt for 30 minutes. This helps set the dyes and prevent color bleeding.
Step 7: Wash and Dry
Wash the shirt in warm water and dry it in the dryer or air-dry it. Your vibrant tie-dyed creation is now ready to shine!
Safety Tips:
- Emphasize the importance of following safety precautions while tie-dyeing.
- Discuss proper ventilation, protective gear, and handling of chemicals.
Safety First in the Colorful World of Tie-Dyeing
Embarking on the vibrant journey of tie-dyeing brings joy and creativity, but it’s crucial to prioritize safety amidst the colorful adventure. Chemicals and ventilation are two key aspects that demand our utmost attention.
Caution with Chemicals
Tie-dyeing involves the use of dyes, which are often chemical-based. To protect your skin, eyes, and respiratory system, it’s imperative to wear gloves, protective eyewear, and a mask. Avoid direct contact with the dyes by handling them with care.
The Importance of Ventilation
The fumes released during tie-dyeing can be harmful if inhaled. Ensure ample ventilation by opening windows or setting up fans. If possible, work outdoors to minimize the risk of exposure to fumes.
Handling Emergencies
In the rare event of a chemical spill or contact, act swiftly. Rinse the affected area thoroughly with water. If you experience any irritation or discomfort, seek medical attention promptly.
Embrace Safety, Enhance Joy
By adhering to these safety precautions, you can confidently explore the vibrant world of tie-dyeing. Proper ventilation and protective gear will safeguard your well-being, allowing you to fully immerse yourself in the creative process. Remember, safety enhances the joy of crafting, so embrace it as an integral part of your tie-dyeing adventures.
Design Ideas: Embark on a Tie-Dye Adventure
Let Your Imagination Run Wild with Inspiring Patterns
Tie-dyeing transcends mere technique; it’s an art form that invites you to express your creativity and explore a boundless realm of designs. Embrace the sponteneity of this vibrant craft, allowing the dyes to dance and create unique, eye-catching patterns.
Scrunch, Fold, and Twist: Unlocking the Secrets of Tie-Dye Magic
The beauty of tie-dye lies in its versatility. Experiment with shibori, an ancient Japanese dyeing technique that involves folding and binding fabric to create intricate geometric patterns. Ice tie-dyeing adds an element of surprise, as ice crystals form unique, frost-like designs.
Reverse Tie-Dye: A Journey into Color Removal
Unleash your inner alchemist with reverse tie-dye, where bleach replaces dyes. This technique allows you to lift vibrant colors from existing fabrics, transforming them into captivating works of art.
Play with Colors: A Symphony of Hues
The possibilities are endless when it comes to color combinations. Mix and match bold primaries, create subtle pastels, or opt for an ombre effect. Experiment with different tie-dye methods to see how colors ooze, blend, and dance on your canvas.
Tips for a Dazzling Tie-Dye Creation
- Embrace the imperfections: Tie-dyeing is an art of embracing the unexpected. Allow the colors to blend and create serendipitous patterns.
- Use a variety of rubber bands and ties: This will give you a range of designs, from tight spirals to loose, flowing patterns.
- Soak your fabric thoroughly: This ensures even distribution of the dyes and prevents unevenness.
- Experiment with multiple colors: Don’t be afraid to experiment with different color combinations and techniques to create unique and captivating designs.
Dive into the World of Tie-Dyeing: A Comprehensive Guide to Unleash Your Creativity
Materials:
Embark on your tie-dyeing adventure with the essential tools:
- Fabric: Choose natural fabrics like cotton, silk, or linen that absorb dyes well.
- Dyes: Explore a vibrant palette of commercial or natural dyes.
- Rubber bands or string: Tie, bind, and create intricate patterns.
- Gloves: Protect your hands from stains.
- Buckets or containers: Mix dyes and soak fabrics.
- Soda ash: Fix dyes permanently.
Techniques:
Discover the magic of different tie-dyeing methods:
- Scrunching: Randomly bunch and tie the fabric for unique patterns.
- Shibori: Fold and bind the fabric using traditional Japanese techniques.
- Ice tie-dyeing: Apply ice to fabrics before dyeing for a frosty effect.
- Reverse tie-dyeing: Bleach a garment and then dye it for a vibrant contrast.
Concepts:
Immerse yourself in the history and cultural significance of tie-dyeing:
- Origin and Evolution: Trace the roots of tie-dyeing from ancient India to bohemian subcultures.
- Natural Dyes: Discover the artistry of using plant-based dyes from nature.
Related:
Explore the vibrant tie-dye community:
- Tie-Dye Kits: Find pre-assembled kits for beginners.
- Parties and Workshops: Connect with fellow tie-dyers and learn new techniques.
- Influential Artists: Be inspired by renowned tie-dye creators.
Benefits:
Embrace the therapeutic and creative benefits of tie-dyeing:
- Stress Relief: The repetitive motions and vibrant colors can soothe the mind.
- Creativity Enhancement: Experiment with patterns and colors to express your individuality.
- Social Bonding: Gather with friends or family for a shared and colorful experience.
Resources:
Explore a wealth of information to further your tie-dyeing journey:
- Books: Find in-depth tutorials and inspirational designs.
- Websites: Access online communities, tutorials, and pattern libraries.
- Social Media: Follow artists and enthusiasts on Instagram, Pinterest, and Facebook for inspiration and tips.
- Videos: Watch step-by-step demonstrations and learn from experienced tie-dyers.
