How To Knit Warm And Cozy Mittens: A Step-By-Step Guide For Beginners
To knit mittens, gather yarn, knitting needles, a tapestry needle, scissors, and a measuring tape. Cast on the required number of stitches and knit in the round. Increase stitches for the thumb gusset, knit a half-circle, and decrease stitches to close it. Knit the rest of the mitten, shape the cuff as desired, and weave in the ends. For fingerless mittens, omit the thumb gusset and knit the sides open instead. Use different stitch patterns or colors to customize your mittens.
Essential Materials: Embark on Your Knitting Journey
In the realm of crafting, knitting stands out as a mesmerizing art form, inviting you to weave threads into intricate creations that adorn your body and home. To embark on this captivating journey, it’s essential to gather the necessary materials:
-
Yarn: This is the lifeblood of your knitting project, available in a dazzling array of colors, textures, and weights. Choose a yarn that suits your project’s purpose and aesthetic.
-
Knitting Needles: These are the tools that guide your yarn, available in various sizes and materials. Select needles that correspond to the yarn weight to achieve the desired gauge, which determines the fabric’s tightness or looseness.
-
Scissors: A sharp pair of scissors is indispensable for cutting yarn and shaping your knitted pieces.
-
Tapestry Needle: This slender needle with a large eye is perfect for sewing up seams and weaving in loose ends, giving your creations a polished finish.
-
Measuring Tape: Accuracy is crucial in knitting. A measuring tape helps you keep track of your progress, ensuring your creations are the perfect size.
Basic Knitting Techniques
Embark on a Cozy Journey: Crafting the Knitted World
Delve into the enchanting world of knitting, where vibrant yarns transform into cozy creations under your nimble fingers. The cornerstone of this fiber art lies in mastering the fundamental stitches that lay the foundation for intricate and captivating designs.
Cast On
Like an enchanting gateway, the cast-on stitch initiates the knitting saga. It prepares the stage for the rows of stitches that will weave together to form your desired fabric.
Knit Stitch
The knit stitch, an essential building block, is the cornerstone of countless knitted masterpieces. Its simple yet elegant formation adds structure and warmth to your creations.
Purl Stitch
The purl stitch, a graceful companion to the knit stitch, introduces texture and interest to your knitting. Its reverse-facing nature creates a charming ribbed effect that enhances any fabric.
Increasing and Decreasing
Discover the art of shaping your knitted creations. Increasing stitches adds width, while decreasing stitches narrows them, giving your knitted items the desired contours.
Ribbing
Experience the versatility of ribbing, a technique that combines knit and purl stitches to create elastic and visually appealing fabric. This simple yet effective method elevates your knitted projects with added texture and dimension.
Seaming
Once your knitted pieces are complete, the final touch lies in seaming them together. This delicate art conceals the joins, leaving you with a seamless and polished creation that reflects your meticulous attention to detail.
Knitting Cozy Mittens: A Guide for Beginners and Beyond
As the icy wind whispers through the air, there’s nothing quite like the warmth and comfort of handmade mittens. Whether you’re a novice knitter or a seasoned pro, creating your own mittens is a rewarding and satisfying experience.
Types of Mittens
From snuggly full mittens to airy fingerless mittens and practical half-fingerless mittens, there’s a style for every taste and activity. Full mittens offer ultimate warmth, while fingerless mittens allow for dexterity and partial exposure when needed. Half-fingerless mittens bridge the gap, providing protection and fingertip mobility.
Creating a Simple Mitten
Let’s embark on the adventure of making a simple mitten. You’ll need medium-weight yarn, size 8 knitting needles, and a tapestry needle for sewing.
Cast On:
- Start by casting on 32 stitches loosely onto your needles.
- Join the stitches in the round, being careful not to twist the stitches.
Knit the Mitten:
- Knit 12 rows of stockinette stitch (knit every round).
- Increase 4 stitches evenly around the next round for the thumb gusset.
- Knit 16 rows straight.
- Begin decreasing for the thumb: knit 2, slip 2, knit 1, pass slipped stitches over knitted stitches until the gusset is closed.
- Continue knitting 12 rows straight.
- Bind off all stitches.
Finishing:
- Bring the two sides of the mitten together and sew up the seam using a tapestry needle and yarn.
- Fold the bottom edge up about 1 inch and sew around to create the cuff.
- Weave in any loose ends.
And voila! You’ve now crafted your very own pair of cozy mittens. Enjoy the warmth and satisfaction of your handmade creation!
Knitting Patterns: A Beginner’s Guide to Crafting Warm, Stylish Mittens
Embrace the cozy warmth of knitted mittens with easy-to-follow patterns that will guide you every step of the way. Whether you’re a seasoned knitter or just starting out, these patterns will empower you to create unique and functional mittens that are perfect for keeping your hands snug and stylish.
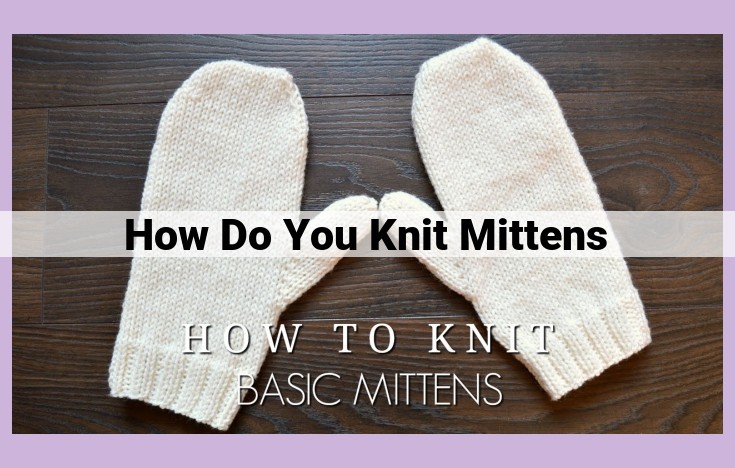
Basic Mittens
Start your knitting journey with the simplicity of basic mittens. These no-frills mittens are a great starting point for beginners, offering a straightforward design that emphasizes comfort and warmth. With step-by-step instructions and clear diagrams, you’ll be able to cast on, knit, and purl your way to a pair of cozy mittens in no time.
Fingerless Mittens
For those who prefer the dexterity of fingerless gloves, fingerless mittens are an excellent choice. These mittens feature open fingertips that allow you to use your hands freely while still providing warmth to your palms and wrists. The patterns included cover both full fingerless and half-fingerless designs, allowing you to customize your mittens to your specific needs.
Step-by-Step Guidance
Each pattern provides thorough instructions that guide you through the casting on, stitching, and finishing processes. Clear diagrams accompany the instructions, ensuring that every step is visually represented for your convenience. This level of detail makes these patterns accessible to knitters of all skill levels, empowering you to create beautiful and practical mittens.
Advanced Knitting Techniques: Elevate Your Knitted Masterpieces
Introduction:
Embark on a journey into the realm of advanced knitting techniques that will transform your creations from basic garments to exquisite works of art. These techniques are the secret to creating polished, durable, and visually stunning knitted items that will turn heads wherever you go.
1. Thumb Gusset:
Unveiling the art of incorporating a thumb gusset is a game-changer for knitting mittens and gloves. This triangular-shaped construction allows for seamless thumb mobility, ensuring a comfortable fit and preventing bunching. Mastering this technique will elevate your mittens from ordinary to exceptional.
2. Cuff:
The cuff acts as the finishing touch to your knitted creations, framing the garment and adding a touch of elegance. Whether opting for a classic ribbed cuff, a delicate lace cuff, or an intricate cable cuff, this technique adds both style and functionality to your projects.
3. Edging:
Embellish your knitted pieces with a variety of edging techniques to create a professional and polished look. From simple picot edging to intricate lace borders, these finishing touches will transform your projects into wearable works of art.
4. Gauge and Tension:
Understanding gauge and tension is crucial for creating knitted items that fit perfectly and have the desired drape. Gauge refers to the number of stitches and rows per inch, while tension is the tightness with which you knit. Mastering these concepts will ensure that your knitted pieces turn out as intended.
5. Finishing Touches:
The final steps of knitting involve blocking and seaming. Blocking helps to shape and relax the knitted fabric, giving it a professional finish. Seaming involves joining knitted pieces together, using various techniques to create invisible or decorative seams. These finishing touches are essential for creating durable and aesthetically pleasing knitted items.
Essential Knitting Accessories: Enhancing Your Knitting Journey
Knitting is more than just needles and yarn; it’s about creating a world of warmth, style, and comfort. And to make this journey even more enjoyable, a few essential accessories can make all the difference. From keeping track of your progress to keeping your stitches in place, knitting accessories can elevate your knitting experience to new heights.
Row Counter: For Flawless Accuracy
Gone are the days of counting rows mentally or marking them on a scrap of paper. A row counter keeps an accurate tally, ensuring your projects turn out just the way you envisioned them. Simply click it with each row, and the counter does the rest, giving you more time to focus on your knitting.
Stitch Markers: Keeping Your Stitches in Check
Stitch markers are the knitting equivalent of bookmarks. They act as placeholders, marking specific stitches or sections of your project so you can effortlessly follow patterns or create intricate designs. From noting the beginning of a round to separating different stitch patterns, stitch markers are indispensable for keeping your knitting organized and mistake-free.
Cable Needle: For Intricate Braids and Textures
Cable needles are specially designed to help you create beautiful braided patterns in your knitting. They hold stitches temporarily while you cross them over, allowing you to effortlessly create intricate cables that add depth and texture to your projects.
Knitting Bag: For On-the-Go Knitting Bliss
If you’re a knitter on the move, a dedicated knitting bag is a must-have. These bags are designed to hold all your essentials, from yarn and needles to accessories and patterns. Look for bags with multiple compartments and pockets to keep everything organized and within easy reach, making knitting on the go a breeze.
Yarn Winder: For Tangle-Free Knitting
A yarn winder is a time-saving tool that transforms tangled skeins of yarn into neat balls. This not only makes your yarn easier to work with, it also helps prevent tangles and knots, saving you precious time and frustration. Investing in a yarn winder is a smart choice if you regularly work with large quantities of yarn.
By incorporating these essential accessories into your knitting routine, you can unlock a world of possibilities. Your knitting will be more organized, your stitches more precise, and your projects more polished. So, embrace these knitting aids and embark on a journey of creativity and comfort, stitch by satisfying stitch.
Blocking: Enhancing the Finesse of Your Knitted Masterpieces
Once your knitted masterpiece is complete, don’t overlook the crucial step of blocking. This transformative process refines the shape and appearance of your creation, elevating it from ordinary to extraordinary.
Blocking involves gently shaping the knitted fabric by soaking it in water, laying it flat on a surface, and pinning or blocking it to the desired dimensions. The water relaxes the fibers, allowing them to settle into their intended form.
Importance of Blocking
- Improves shape: Blocking ensures a balanced and symmetrical shape, correcting any variations in tension or stitch size. It ensures that garments fit better and accessories display their intended contours.
- Enhances appearance: Blocking smooths out any wrinkles or puckers, resulting in a polished and professional finish. It accentuates the stitch definition and creates a more visually appealing piece.
Techniques of Blocking
- Soaking: Submerge the knitted item in lukewarm water for 10-15 minutes.
- Laying Flat: Place the wet fabric on a flat surface, such as a blocking board or a towel-covered table.
- Pinning: Use blocking pins to gently stretch and shape the fabric to the desired dimensions.
- Drying: Allow the item to dry completely in a well-ventilated area, keeping it pinned to maintain its shape.
Yarn Dyeing: Crafting Custom Color Palettes
Unleash your creativity by exploring the world of yarn dyeing. Transform standard yarns into vibrant and unique hues that perfectly complement your knitting projects.
Methods of Yarn Dyeing
- Natural Dyeing: Utilize natural materials such as plants, flowers, and food to extract pigments for dyeing wool, cotton, or silk yarns.
- Acid Dyeing: Employ acid dyes specifically designed for protein fibers like wool or alpaca. They produce bright and vibrant colors that are resistant to fading.
- Fiber-Reactive Dyeing: Use fiber-reactive dyes that bond chemically to cellulose fibers like cotton or bamboo. This technique creates durable and wash-fast colors.
Creating Custom Color Palettes
- Experiment: Don’t shy away from experimenting with different dye combinations to discover your own unique color schemes.
- Consider Fiber Content: The fiber content of the yarn influences the dye absorption. Wool and alpaca hold dyes more easily than cotton or silk.
- Start with Small Batches: Begin by dyeing small batches of yarn to test colors before committing to larger amounts.
Knitting Abbreviations and Terminology: Deciphering the Knitting Language
Familiarize yourself with the knitting abbreviations and terminology that are essential for understanding patterns. These terms describe specific stitches, techniques, and measurements used in knitting.
Common Abbreviations and Terms
- CO: Cast on (create a row of stitches on the needle)
- K: Knit stitch
- P: Purl stitch
- Inc: Increase stitch
- Dec: Decrease stitch
- WS: Wrong side (back of the work)
- RS: Right side (front of the work)
Importance of Understanding Abbreviations
- Accurate Pattern Reading: Abbreviations and terms allow you to follow patterns with clarity and reduce confusion.
- Faster Knitting: Knowing the abbreviations speeds up the knitting process by eliminating the need to constantly search for definitions.
- Improved Communication: Standard abbreviations and terms bridge the communication gap between knitters, making it easier to share patterns and techniques.
By embracing these storytelling elements and incorporating proper formatting, the article provides a comprehensive understanding of advanced knitting concepts, encouraging readers to enhance their skills and create stunning knitted pieces.
