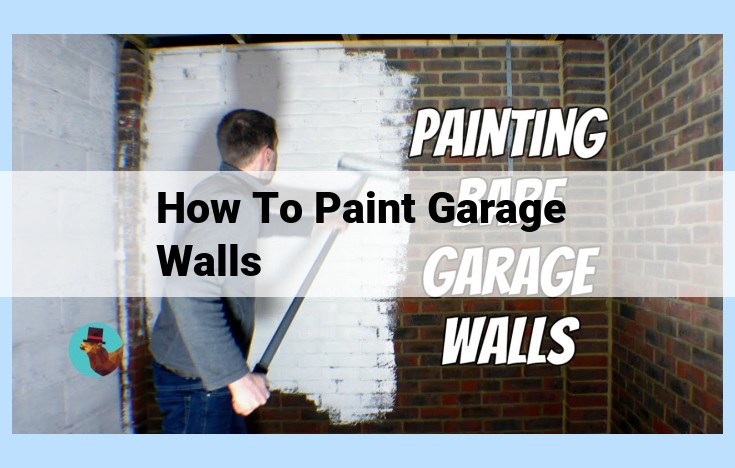
Complete Guide To Painting Garage Walls: Step-By-Step Instructions And Pro Tips
To paint garage walls, gather paint (latex or acrylic, concrete floor paint for floors), a roller and tray, and primer. Ensure proper ventilation and protective gear. Protect surfaces with drop cloths and painter’s tape. Sand concrete walls to remove debris and apply primer for better paint adhesion. Choose a paint finish (glossy or matte) and apply two coats of paint. Use sandpaper to smooth uneven surfaces and consider flooring options like epoxy coatings for durability.
Essential Materials for Painting: A Comprehensive Guide
Embarking on a painting project can be both exciting and daunting. To ensure a successful outcome, it’s crucial to have the right materials at your disposal. In this guide, we’ll delve into the types of paint, primer, and paint roller and tray you’ll need for different surfaces, providing you with the knowledge to achieve a flawless finish.
Paint: The Star of the Show
The type of paint you choose will significantly impact the outcome of your project. Here are the most common types:
-
Latex paint: Water-based and easy to clean, latex paint is ideal for walls, ceilings, and trim. It’s low odor and dries quickly.
-
Oil-based paint: Durable and water-resistant, oil-based paint is suitable for exterior surfaces, such as doors and windows. It provides a glossy finish but can be more challenging to clean.
-
Chalk paint: A matte finish paint best used on furniture and decorative items, chalk paint requires minimal preparation and adhesion to various surfaces.
Primer: The Unsung Hero
Before applying paint, primer acts as a foundation, ensuring proper adhesion and preventing stains from bleeding through. Match the primer to the type of surface you’re painting:
-
Latex primer: A water-based primer suitable for most interior surfaces.
-
Oil-based primer: A solvent-based primer used for exterior surfaces or surfaces with stains or odors.
-
Specialty primers: Specific primers are available for concrete, metal, or glossy surfaces to enhance adhesion.
Roller and Tray: The Dynamic Duo
The paint roller and tray are essential for applying paint evenly. Consider the following:
-
Roller type: Choose a roller that matches the surface texture you’re painting. For smooth surfaces, use a short-nap roller. For rough surfaces, use a long-nap roller.
-
Roller size: The width of the roller should match the size of the area you’re painting.
-
Tray: A paint tray with a well that allows you to dip the roller and remove excess paint will help prevent drips and spills.
Surface Preparation: The Crucial Step to Flawless Painting
Before embarking on your painting adventure, it’s imperative to prepare the canvas upon which your masterpiece will reside. Surface preparation is the foundation that ensures a smooth, long-lasting finish, preventing any unwanted surprises down the road.
Drop Cloths: Protecting Your Precious Possessions
Just as a knight would don his armor before battle, a drop cloth serves as your shield against paint mishaps. Spread it generously over any furniture, flooring, or other surfaces you wish to keep pristine. Its absorbent nature will catch any wayward paint droplets, saving you countless hours of scrubbing and potential damage.
Painter’s Tape: A Precise Boundary for Perfection
Next, enter painter’s tape, the maestro of precision. Along baseboards, moldings, and other edges, where neat transitions are vital, apply this trusty tape. It will create a crisp demarcation line, preventing paint seepage and ensuring a clean, professional-looking finish. Remember to remove the tape immediately after painting to avoid pulling up the paint and marring your masterpiece.
Preparing the Canvas: Creating the Perfect Foundation
Like a sculptor carefully chiseling away at a block of marble, you too must prepare the painting surface. Cleaning is paramount: remove any dust, dirt, or grease that could hinder paint adhesion. In some cases, sanding may be necessary to smooth uneven surfaces or remove old paint.
Priming: The Unsung Hero
Consider primer as the unsung hero of the painting process. It acts as a bridge between the surface and the paint, enhancing paint adhesion and creating a uniform base color. Apply a generous coat of primer to ensure a smooth, even finish that will make your paint colors sing.
Finishing Touches: Adding the Perfect Sheen to Your Canvas
When your painting project nears completion, it’s time to consider the finishing touches that will elevate your masterpiece. The choice of finish not only affects the aesthetics of the painting but also its durability and maintenance.
Glossy Finishes: A Gleaming Radiance
A glossy finish imparts a brilliant, almost mirror-like sheen to your painting. It reflects light, creating a dramatic, eye-catching effect. This finish is ideal for paintings that you want to stand out, such as framed portraits, landscapes, and abstract expressions.
However, glossy finishes are not without their drawbacks. They can magnify imperfections and show brushstrokes, so it’s crucial to ensure a smooth, even paint application. Additionally, glossy surfaces require more cleaning and maintenance to retain their shine.
Matte Finishes: A Subtle Sophistication
In contrast to glossy finishes, matte finishes provide a flat, velvety appearance that absorbs light. They conceal imperfections, creating a subdued, sophisticated look. Matte finishes are well-suited for paintings that you want to blend into their surroundings, such as wall murals, interior designs, and religious icons.
Matte finishes are also easy to clean and maintain, as they don’t attract dust or show fingerprints as easily as glossy finishes. However, they may appear less vibrant than glossy finishes, so it’s important to consider the overall desired effect before choosing.
Satin Finishes: A Compromise Between Glossy and Matte
For those who seek a compromise between glossy and matte finishes, satin finishes offer a subtle, satiny sheen. They reflect less light than glossy finishes but more than matte finishes, providing a balanced, versatile look. Satin finishes are suitable for various painting applications, including cabinetry, furniture, and woodwork.
By understanding the characteristics of different finishes, you can make an informed decision that will enhance the appearance and longevity of your painting. Whether you prefer the radiance of gloss, the sophistication of matte, or the versatility of satin, the finishing touch will complete your painting and bring your artistic vision to life.
**Safety Considerations for Painting Projects**
When embarking on a painting project, it’s essential to prioritize safety to protect yourself from potential hazards. Proper ventilation and protective gear are non-negotiable for a safe painting experience.
Ventilation
Ensure adequate ventilation in the painting area. Open windows and doors to allow fresh air to circulate and prevent the accumulation of paint fumes and solvents. Insufficient ventilation can lead to dizziness, headaches, and even respiratory issues.
Protective Gear
Don gloves, a mask, and eye protection while painting. Gloves protect your hands from skin irritation and solvents, while a mask prevents inhalation of paint fumes and dust particles. Eye protection is crucial to shield your eyes from paint splatters and airborne particles.
Remember that safety comes first. Take the necessary precautions to minimize risks and enjoy a comfortable and hazard-free painting experience.
Additional Tools and Supplies
Beyond the essentials, a few additional tools and supplies can enhance your painting experience and achieve professional-looking results.
Smoothing Imperfections: Sandpaper
Sandpaper comes in various grits, from coarse to fine. It’s crucial for preparing surfaces by smoothing out imperfections, removing old paint, and creating a good bond for the new paint. Use coarser grits for removing rough surfaces and finer grits for final sanding.
Concrete Wall Preparation: Essential Tips
If tackling concrete walls, specific techniques are necessary for successful painting. First, use a concrete cleaner to remove dirt and grease. Next, apply a bonding primer specifically designed for concrete surfaces to improve paint adhesion. Follow up with a cement patch to fill any cracks or holes.
Flooring Options: Enhancing Your Spaces
Painting floors can transform rooms and add a touch of personality. Consider durable options like epoxy or polyurethane-based paints for areas with high foot traffic like kitchens or garages. For a budget-friendly solution, opt for latex floor paint that can withstand moisture and wear.
