Expert Guide To Planting Tulip Bulbs For Stunning Blooms
- Planting the Bulbs
<
ul>
Essential Elements for Thriving Planted Bulbs
When embarking on the rewarding journey of bulb planting, it’s essential to understand the key aspects that will determine the health and beauty of your blooming masterpieces. These elements lay the foundation for a vibrant and flourishing display that will enchant your senses and elevate your garden’s allure.
Selecting the Appropriate Flowering Part
Your desired bloom time and effect should guide your bulb selection. Early bloomers, like crocuses and snowdrops, herald the arrival of spring with their cheerful hues. Mid-season bloomers, such as daffodils and tulips, create a vibrant tapestry of colors. Late bloomers, including lilies and hyacinths, extend the floral extravaganza well into summer. Plan your planting accordingly to achieve a continuous symphony of blooms throughout the seasons.
Understanding the Anatomy of a Bulb
Bulbs are fascinating botanical structures consisting of several components that play vital roles. The basal plate forms the base of the bulb and produces roots. The embryo, nestled within the bulb, develops into the flower and leaves. Tunic layers protect the bulb from damage and dehydration. Scales, which are modified leaves, store nutrients and provide energy for growth. By understanding the anatomy of a bulb, you can provide optimal conditions for its development.
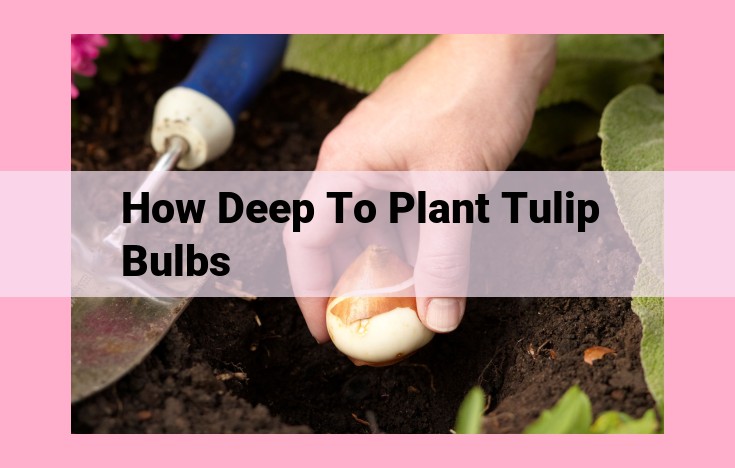
Determining Optimal Planting Depth
The planting depth of your bulbs is crucial for their success. Larger bulbs, such as lilies and tulips, require a deeper planting to ensure root development and stability. Smaller bulbs, like crocuses and grape hyacinths, can be planted closer to the surface. As a general rule, plant bulbs at a depth of twice their own height. Well-drained soil is essential to prevent waterlogging, which can lead to bulb rot.
Essential Elements of Successful Bulb Planting
As the first whisper of spring unfolds, seasoned gardeners eagerly prepare their canvas for a symphony of colors and textures that will herald the arrival of warmer days. Among the vital elements that contribute to the success of your bulb planting endeavors, selecting the appropriate flowering part is paramount. Your choice will determine the bloom time and the captivating visual impact your garden will exude.
Understanding Flower Structure and Bloom Time
Before embarking on your bulb-planting journey, delve into the intricate anatomy of a flower. Each component plays a vital role in the enchantment it holds. The sepal forms the outermost protective layer, guarding the delicate petals within. These colorful petals, arranged in varying forms, create the breathtaking display that captivates our eyes.
At the heart of the flower lies the pistil, the female reproductive organ, which consists of the style and stigma. The stamen represents the male counterpart, comprising the anther and filament. These structures work harmoniously to produce seeds for the continuation of the plant’s life cycle.
The bulb, itself a miniature powerhouse, encompasses all the essential components for successful growth and reproduction. Within its layered scales resides the embryo, the nascent plant, which will unfurl into a vibrant spectacle once conditions are favorable.
Matching Bloom Time to Your Garden’s Rhythm
The choice of flowering part directly influences the timing of your floral symphony. Spring-blooming bulbs, such as tulips, daffodils, and hyacinths, herald the arrival of new life, their vibrant hues painting the canvas of the awakening garden. Summer-blooming bulbs, exemplified by lilies, gladiolus, and dahlias, extend the floral extravaganza, adding depth and richness to the landscape. Fall-blooming bulbs, including crocuses and colchicums, provide a poignant farewell to the fading year, their colors echoing the hues of autumn leaves.
By carefully selecting bulbs with staggered bloom times, you can create a breathtaking tapestry of color that unfolds throughout the seasons. Early-blooming bulbs announce the arrival of spring with a vibrant burst, while late-blooming varieties extend the floral enchantment into the cooler months. Imagine the splendor of tulip fields ablaze with color, followed by the stately elegance of lilies swaying in the summer breeze, and finally, the cheerful crocuses bidding farewell to the fading year.
Matching Blooms to Your Garden’s Style
The visual impact of your bulb display is not merely dictated by bloom time but also by the shape, size, and color of the flowers. Trumpet-shaped blooms, such as daffodils, radiate a cheerful exuberance, while cup-shaped blooms, typified by tulips, exude an air of regal elegance. Star-shaped blooms, as seen in hyacinths, offer intricate geometric beauty.
The size of the blooms also plays a significant role in the overall effect. Large, showy flowers, like those of lilies, create a dramatic statement, while smaller blooms, such as crocuses, add a delicate charm to the garden.
Color is the final brushstroke in the artistic masterpiece of your bulb display. Choose bulbs in vibrant hues to create a bold and eye-catching effect, or opt for softer pastels for a more subtle and romantic ambiance. By carefully considering the shape, size, and color of your bulbs, you can tailor your garden to reflect your unique style and vision.
Understanding the Anatomy of a Bulb: The Foundation for Success
Before embarking on the rewarding journey of bulb planting, it’s crucial to gain a deep understanding of the bulb’s anatomy. This knowledge will guide you in selecting healthy bulbs, preparing them for planting, and providing them with optimal conditions to flourish.
The Core: The Basal Plate
The basal plate is the heart of the bulb, acting as the anchor from which roots emerge and shoots develop. It comprises multiple concentric layers, each composed of scale leaves that protect the delicate inner tissues.
The Powerhouse: Scale Leaves
Scale leaves are modified leaves that store nutrients and energy essential for the bulb’s growth and development. They overlap like protective scales, forming a bulb tunic. The outer scales are usually dry and fibrous, while the inner scales are fleshy and rich in starch and sugar.
The Growth Point: Embryo
Nestled within the scale leaves is the embryo, a miniature plant containing the shoot tip and root primordia. The shoot tip will give rise to the stem, leaves, and flowers, while the root primordia will develop into roots.
The Conductor: Vascular Bundles
Vascular bundles are the channels through which water and nutrients flow throughout the bulb. These bundles consist of xylem, responsible for transporting water, and phloem, which carries nutrients.
Health Check: Inspecting Bulbs
When selecting bulbs, carefully inspect them for signs of damage or disease. Avoid bulbs with soft spots, bruises, or mold. Healthy bulbs should be firm, plump, and free from pests.
Determining the Optimal Planting Depth: A Tale of Bulb Size and Soil Conditions
When it comes to planting bulbs, finding the sweet spot for planting depth is crucial for their success. The key lies in understanding the nuances of different bulb sizes and soil conditions.
The Role of Bulb Size:
The size of your bulb plays a significant role in determining the ideal planting depth. Larger bulbs, such as tulips, daffodils, and hyacinths, possess more energy and nutrients, allowing them to push through deeper layers of soil. As a rule of thumb, plant large bulbs 2-3 times their own height, measuring downwards from the base of the bulb.
Smaller bulbs, like crocuses, snowdrops, and grape hyacinths, have a more delicate nature. Planting them too deep can limit their ability to reach the surface for sunlight and flowering. Aim to plant them 1.5-2 times their height, encouraging effortless emergence.
Exploring Soil Conditions:
Soil conditions also influence the optimal planting depth. Well-drained soils allow water to pass through easily, minimizing the risk of bulb rot. In such soils, you can plant bulbs slightly deeper, providing them with a stable foundation.
In contrast, heavy or clay soils retain water more, increasing the likelihood of waterlogging. To prevent bulb damage, plant bulbs closer to the surface in these soils. This allows excess moisture to drain away, ensuring their well-being.
Tips for Optimal Depth:
- General rule: Plant bulbs 2-3 times their height deep for large bulbs and 1.5-2 times their height deep for small bulbs.
- Soil considerations: Plant bulbs slightly deeper in well-drained soils and closer to the surface in heavy or clay soils.
- Measuring accurately: Use a ruler or bulb planter to ensure precise planting depths.
- Firming gently: Once bulbs are in place, gently firm the soil around them to prevent air pockets.
Preparing Your Bulbs for Planting: A Comprehensive Guide to Ensure Bulb Health and Success
Before you embark on the exciting journey of planting bulbs, it’s crucial to prepare them properly to ensure their health and beauty. This involves meticulous steps that will set the stage for a vibrant and successful display in your garden.
Step 1: Inspection and Selection
Begin by carefully inspecting your bulbs for any signs of damage or disease. Healthy bulbs should be firm, free of soft spots, and without any visible blemishes. If you notice any concerns, it’s best to discard those bulbs to prevent potential problems down the road.
Step 2: Removing Outer Layers and Roots
Gently remove any loose or papery outer layers from the bulbs. These layers may harbor pests or diseases and should be removed to provide a clean planting surface. Additionally, trim off any dead or damaged roots. Healthy roots will be white or cream-colored and firm to the touch.
Step 3: Treating with Fungicide
To further protect your bulbs from fungal diseases, consider treating them with a fungicide. This is especially recommended if you’re planting in areas with high soil moisture or poor drainage. Follow the instructions on the fungicide label carefully to ensure proper application.
Inspecting and selecting healthy bulbs without signs of damage or disease
Inspecting and Selecting Healthy Bulbs
As you embark on your bulb-planting journey, it’s crucial to choose healthy and disease-free bulbs that will thrive in your garden. Each bulb is a treasure waiting to burst forth in vibrant blooms, so let’s ensure they have the foundation for success.
Begin by inspecting the bulbs thoroughly. Look for any signs of damage or abnormalities, such as:
- Bruises or cuts: Fresh wounds may attract pests or diseases.
- Soft spots: These indicate decay or rot.
- Mold or mildew: White or gray fuzzy growth can spread and harm the bulb.
- Insect damage: Check for holes or tunneling, which can weaken the bulb.
Healthy bulbs will be firm to the touch and have smooth, unblemished exteriors. They will also have intact roots and a firm base. If you encounter any bulbs with suspicious features, discard them to prevent the spread of disease.
Remember, prevention is key. By selecting healthy bulbs, you’re setting the stage for a stunning display of blooms in the future.
Removing Loose Outer Layers and Roots
Before planting your bulbs, it’s crucial to inspect them thoroughly. Healthy bulbs should be firm, without any signs of bruising or rot. If you notice any suspicious spots, discard the bulb as it may not thrive in the ground.
Next, gently brush away any loose outer layers or roots from around the bulb. This may seem like an unnecessary step, but it allows the new roots to emerge more easily. Think of it like giving your bulb a fresh start.
Some bulbs, especially larger ones, may have developed small, fibrous roots. Do not trim these roots. They are essential for the bulb’s ability to absorb water and nutrients. Instead, gently tease them apart and spread them out when planting. This will help the bulb establish itself more quickly.
By preparing your bulbs properly, you’re giving them the best chance to thrive. Healthy, well-cared-for bulbs will produce beautiful flowers that will brighten your garden for seasons to come.
Treating Bulbs with Fungicide for Optimal Growth
When embarking on the journey of bulb planting, ensuring the health of your precious bulbs is paramount. Among the various preparatory steps, treating bulbs with fungicide or other protective measures is crucial to safeguard them against potential threats that lurk in the depths of the soil.
Like valiant knights defending their realm, bulbs require protection against insidious foes that may jeopardize their growth and beauty. Fungicide is a potent weapon in this battle, disarming menacing fungi that eagerly seek to feast on your precious bulbs. By administering this preventative measure, you shield your bulbs from diseases such as basal rot, stem rot, and powdery mildew, ensuring they have the best chance to thrive.
In addition to fungicide, other protective measures can bolster the defenses of your bulbs. Dusting them with sulfur or dipping them in a solution of water and hydrogen peroxide can further deter disease and promote healthy growth. These simple steps will pave the way for your bulbs to blossom into vibrant and captivating displays that will delight your senses.
Choosing the Right Planting Site for Your Bulbs:
When selecting the perfect spot for your bulbs, there are several key factors to consider that will determine their thriving and blooming success.
Sunlight Requirements:
Different bulb species have varying sunlight preferences, ranging from full sun to partial shade or even full shade. Consider the expected bloom time of your bulbs. Spring-blooming bulbs, like tulips and daffodils, typically require full sun or partial shade, while summer-blooming bulbs, such as lilies and gladiolus, prefer full sun. By understanding these requirements, you can choose a location that provides the optimal amount of sunlight for your chosen bulbs.
Soil Conditions:
The soil in which you plant your bulbs also plays a crucial role in their health. Good drainage is essential to prevent bulbs from rotting. Amend heavy clay soil with organic material, such as compost or sand, to improve drainage. Soil pH is another important factor to consider. Most bulbs thrive in slightly acidic to neutral soil (pH 6.0 to 7.0). If your soil is too acidic, add lime to raise the pH. If it’s too alkaline, add sulfur to lower the pH.
Space Considerations:
When planting bulbs, it’s important to consider their size and the spacing required for proper growth. Larger bulbs, like tulips and daffodils, should be spaced 4-6 inches apart, while smaller bulbs, like crocus and snowdrops, can be spaced closer together, about 2-3 inches apart. Proper spacing allows for good air circulation, prevents overcrowding, and reduces competition for nutrients and water.
Sunlight Requirements of Different Bulb Species
The amount of sunlight your bulbs need directly influences their growth and bloom. Some bulbs thrive in full sun, basking in at least six hours of direct sunlight daily, while others prefer partial shade, requiring only a few hours of direct sunlight each day.
For sun-worshipping bulbs, like daffodils, tulips, and hyacinths, choose a location where they can bask in the sun’s warmth for most of the day. These bulbs will produce sturdy stems, vibrant blooms, and lush foliage when given ample sunlight.
Conversely, shade-loving bulbs, like lilies, hostas, and ferns, find solace in the filtered light of partial shade. They do best with a few hours of morning or late afternoon sunlight, as too much direct sunlight can scorch their delicate leaves and inhibit their growth.
When choosing the perfect spot for your bulbs, consider their natural habitats. For example, daffodils and hyacinths often grow in meadows and along roadsides, suggesting their preference for full sun. Conversely, lilies and ferns thrive in the dappled sunlight of forest floors.
Remember, sunlight is a vital ingredient in the recipe for beautiful, blooming bulbs. By understanding the sunlight requirements of different bulb species, you can create an ideal environment for them to flourish and bring joy to your garden with their vibrant hues and sweet fragrance.
Soil Conditions: The Key to Thriving Bulbs
When choosing the perfect home for your blooming beauties, consider the soil conditions that will provide them with the ideal foundation for success.
Drainage: Bulbs abhor waterlogged environments that can stunt their growth and promote rot. Ensure your soil’s drainage capabilities are up to par by opting for well-draining soil or amending it with organic matter such as peat moss or compost.
pH: The acidity or alkalinity of your soil greatly influences bulb health. Most bulbs thrive in slightly acidic to neutral pH levels (between 6.0 and 7.0). Perform a soil test to determine your pH levels and adjust accordingly.
Fertility: Nutrient-rich soil is the secret to vibrant blooms. Before planting, incorporate a balanced fertilizer into your soil to provide bulbs with the essential nutrients they need to develop strong root systems and produce spectacular flowers.
Space considerations for bulb size and spacing
Sub-heading: Space Considerations for Bulb Size and Spacing
When preparing your planting site, it’s crucial to consider the size and spacing requirements of your bulbs to ensure optimal growth and flourishing blooms. Larger bulbs like tulips, daffodils, and hyacinths require a wider berth compared to smaller bulbs like crocuses and snowdrops.
Adequate spacing not only prevents overcrowding and competition for nutrients and water but also allows for proper air circulation, reducing the risk of fungal diseases. As a general rule, space bulbs approximately two to three times their own width apart. This distance ensures each bulb has ample room to develop a healthy root system and produce vibrant blooms.
For example, if planting tulip bulbs, which typically measure around 2 inches in diameter, you should space them about 4 to 6 inches apart. This spacing allows their roots to spread out and access the necessary nutrients and moisture from the soil. By ensuring proper spacing, you create a thriving environment where your bulbs can showcase their full potential and grace your garden with a dazzling display.
Planting Bulbs: A Step-by-Step Guide to Success
Laying the Foundation for Blooming Beauty
When it comes to planting bulbs, the key to flourishing blooms lies in understanding their unique needs and preparing them carefully. By selecting bulbs that match your desired bloom time and effect, grasping bulb anatomy, and determining the optimal planting depth, you set the stage for a vibrant display.
Preparing Your Bulbs for Stardom
Before embarking on the planting journey, inspect your bulbs meticulously for any signs of damage or disease. Gently remove loose outer layers or roots, and consider treating them with a fungicide to protect them from potential threats.
Choosing the Perfect Stage
The right planting site holds the secret to bulbous bliss. Sunlight requirements vary among species, so research their preferences to ensure they receive adequate illumination. Soil conditions are also crucial – consider drainage, pH, and fertility to provide a nurturing environment. Don’t forget about spacing – give bulbs ample room to grow and show off their brilliance.
The Art of Planting
Now, it’s time to witness the magic unfold. Dig holes at the appropriate depth and spacing, ensuring your bulbs have enough room to expand and thrive. Gently place the bulbs in the holes with their pointy ends facing the sky – this is where the magic happens. Fill the holes with soil and firm it gently around the bulbs to provide support.
Watering and Mulching: The Finishing Touches
Proper hydration is essential for bulbous prosperity. Water your newly planted bulbs thoroughly to settle the soil and promote root development. Mulching adds an extra layer of care, retaining moisture, suppressing weeds, and insulating the bulbs from extreme temperatures.
Embrace the joy of bulb planting and watch your garden transform into a breathtaking canvas of colors and textures. With meticulous preparation and these simple steps, you’ll witness the splendor of blooming bulbs season after season.
Planting Bulbs: A Guide to Bulb Planting Success
Planting bulbs is a rewarding gardening endeavor that can add vibrant colors and delightful fragrances to your outdoor space. To ensure the health and beauty of your planted bulbs, it’s essential to follow these key steps:
1. Essential Elements of Successful Bulb Planting
-
Select the appropriate flowering part for your desired bloom time and effect: Different bulb species bloom at various times of the year, so choose bulbs that align with your desired flowering window. Consider the height, shape, and color of the blooms to create a stunning visual display.
-
Understand the anatomy of a bulb and its various components: Bulbs are fascinating plant structures consisting of a basal plate, roots, and a central growing point. Understanding their anatomy will help you handle and plant them correctly.
-
Determine the optimal planting depth based on bulb size and soil conditions: The depth at which you plant your bulbs is crucial. Generally, plant larger bulbs deeper than smaller ones. Also, consider the soil conditions, as well-drained soil often allows for deeper planting.
2. Preparing Your Bulbs for Planting
-
Inspect and select healthy bulbs without signs of damage or disease: Before planting, carefully inspect your bulbs for any visible signs of damage or disease. Discard any bulbs that appear soft, discolored, or moldy.
-
Remove any loose outer layers or roots from around the bulb: Gently remove any loose outer layers or roots from around the bulb. This will help prevent rot and promote healthy growth.
-
Treat bulbs with fungicide or other protective measures if necessary: To further protect your bulbs from diseases, consider treating them with a fungicide or other approved protective measures. This is especially important if you are planting in areas with a history of bulb diseases.
3. Choosing the Right Planting Site
-
Sunlight requirements of different bulb species: Some bulbs prefer full sun exposure, while others thrive in partial shade. Determine the sunlight requirements of your chosen bulb species to ensure they receive the optimal amount of light.
-
Soil conditions, including drainage, pH, and fertility: Bulbs generally prefer well-drained soil with a pH close to neutral. Amend your soil with organic matter, such as compost or manure, to improve fertility and drainage.
-
Space considerations for bulb size and spacing: Consider the size of your bulbs and the spacing recommendations for your chosen species. Proper spacing ensures that your bulbs have enough room to grow and develop healthy root systems.
4. Planting the Bulbs
-
Dig holes at the appropriate depth and spacing: Use a bulb planter or trowel to dig holes to the recommended depth and spacing for your bulbs. Ensure that the holes are deep enough to accommodate the bulb’s height plus an additional 2-3 inches.
-
Place the bulbs in the holes with the pointy end facing upwards: Gently place the bulbs in the holes with their pointy end facing upwards. This is where the new shoots will emerge from.
-
Cover the bulbs with soil and firm it gently: Fill the holes with soil and gently firm it around the bulbs. Avoid compacting the soil too tightly.
Placing the Bulbs in the Holes with the Pointy End Facing Upwards
As you gently lower each bulb into its designated hole, ensure that the pointy end is facing upwards. This is crucial because it’s where the new shoot will emerge, reaching for the sunlight. Imagine the bulb as a tiny seed, the pointy end its determined sprout, eager to break through the soil and greet the world.
Remember, the bulb’s anatomy is a marvel of nature. Its base, known as the basal plate, anchors the bulb in the soil, providing stability. From here, contractile roots extend downwards, seeking nourishment from the depths of the earth. And on the crown, where bulb lovers like us find our fascination, the shoot and flower buds patiently await their moment to shine.
So, as you carefully place the bulbs in their holes, visualize the beauty that will unfold. Each pointy end is a promise of vibrant colors, delicate fragrances, and a reminder of nature’s unwavering cycle.
Covering the Bulbs with Soil and Firming It Gently
As you gently lay the bulbs in their designated holes, with their pointy tips saluting the sky, it’s time to shower them with a cozy blanket of soil. This protective layer will shield them from harsh elements and provide the ideal environment for their slumbering roots to awaken.
Firming the Soil:
Once the bulbs are snugly tucked in, it’s crucial to gently press the soil down around them. Avoid excessive force, as you don’t want to suffocate their delicate sprouts. Instead, use a light touch to ensure the soil is firmly secured, providing support and stability for the bulbs as they embark on their transformative journey.
By providing a secure and nurturing environment for your bulbs, you’re setting the stage for a vibrant and bountiful display come springtime. The soil’s tender embrace will protect their precious beginnings, allowing them to thrive and emerge as a symphony of colors and fragrances that will fill your garden with joy.
The Vital Importance of Watering and Mulching after Bulb Planting
Watering:
After planting your bulbs, it’s crucial to provide adequate hydration. This is especially important during the early stages of growth, when the roots are still developing and need a steady supply of moisture to thrive. As a general rule, water your bulbs deeply and infrequently. Allow the soil to dry out slightly between waterings. Avoid overwatering, as this can lead to bulb rot.
Mulching:
In addition to watering, mulching around your bulbs offers several crucial benefits that can boost their health and vitality. A layer of mulch helps to:
- Retain moisture: Mulch acts as a protective barrier, preventing moisture from evaporating from the soil. This is particularly beneficial during hot, dry conditions.
- Suppress weeds: Mulch creates a physical barrier that inhibits weed growth, reducing competition for water and nutrients.
- Insulate the soil: Mulch provides insulation, protecting bulbs from extreme temperature fluctuations. This is especially important in areas with cold winters, as it helps protect bulbs from freezing damage.
Choosing the Right Mulch:
When selecting mulch for your bulbs, consider using organic materials such as compost, shredded leaves, or bark. These materials decompose over time and enrich the soil with nutrients. Avoid using inorganic mulches such as gravel or plastic, as they can compact the soil and impede root growth.
Recommended watering schedule to ensure proper hydration
Recommended Watering Schedule for Healthy Bulbs
Planting Season:
After planting your bulbs, thoroughly water the soil to settle it around the bulbs and eliminate air pockets. This initial watering is crucial for establishing good contact between the bulbs and the soil, ensuring they receive adequate moisture.
Fall and Winter:
During fall and winter, water your bulbs sparingly. Allow the soil to dry out slightly between watering to prevent rot. Avoid overwatering, as this can lead to bulb damage and disease.
Spring:
As spring approaches, increase the frequency of watering as the bulbs begin to sprout and grow. Water deeply and regularly, allowing the water to penetrate several inches into the soil. Consistency is key. Aim to provide enough water so that the soil remains moist but not waterlogged.
Blooming Period:
During the blooming period, continue to water regularly, especially if there is a lack of rainfall. Adequate moisture will help extend the life of the blooms and ensure optimal flower production.
After Blooming:
After the bulbs have finished blooming, gradually reduce watering. Allow the foliage to die back naturally. Once the bulbs go dormant in summer, withhold water completely, as excessive moisture can cause bulb rot.
The Vital Benefits of Mulching for Thriving Bulbs
As you care for your newly planted bulbs, there’s an indispensable step that can significantly enhance their success: mulching. This protective layer offers a myriad of benefits that will nurture your bulbs and ensure their vibrant blooms come springtime.
Moisture Retention: A Lifeline for Bulbs
Bulbs require a consistent supply of moisture to thrive, particularly during their active growth phase. Mulch acts as a barrier, reducing evaporation and maintaining moisture levels in the soil. This is especially important in areas with fluctuating temperatures and limited rainfall, where bulbs may struggle to absorb enough water.
Weed Suppression: A Garden’s Ally
Weeds can compete with bulbs for nutrients, water, and sunlight, hindering their growth and diminishing their beauty. Mulch creates a physical barrier that suppresses weed germination and reduces their ability to establish themselves. This allows your bulbs to flourish without the threat of unwanted competition.
Insulation: A Winter Haven
As temperatures dip during colder months, mulch provides a blanket of insulation for bulbs. It shields them from extreme cold, protecting their delicate roots and preventing frost damage. This insulation is particularly beneficial in regions with harsh winters, where bulbs need extra protection to survive.
Additional Advantages of Mulching
- Reduced soil erosion: Mulch helps to hold soil in place, preventing erosion caused by wind and rain.
- Improved soil structure: Organic mulch, such as compost or shredded leaves, gradually decomposes and adds nutrients to the soil, enhancing its fertility.
- Aesthetic appeal: A layer of mulch adds a decorative touch to your garden, creating a polished and inviting look.
By embracing the benefits of mulching, you can provide your bulbs with the optimal environment to flourish. This simple yet effective step will not only protect your bulbs but also support their vibrant growth and stunning blooms for seasons to come.
