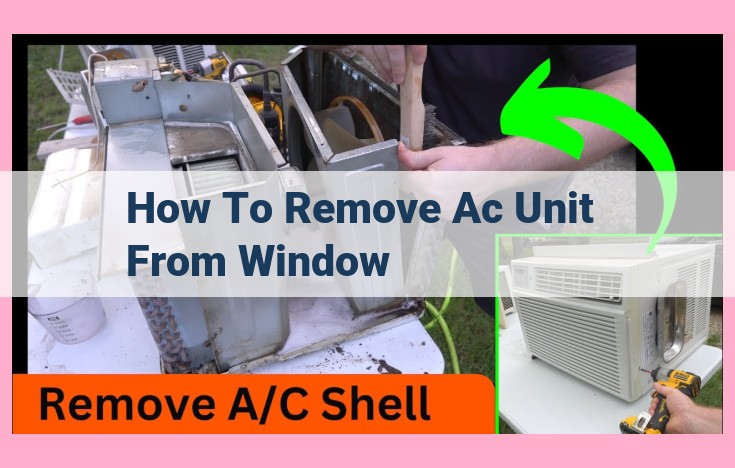
Diy Guide: Removing A Window Ac Unit Safely And Efficiently
To remove a window AC unit, gather tools (screwdrivers, wrenches, pliers) and turn off power. Prepare the window opening by sealing it and installing a window board. Disconnect the electrical wires, remove the mounting screws, and carefully slide the unit out of the window. Handle the unit with care to avoid damage and ensure safety by wearing protective gear.
Essential Tools for Air Conditioner Removal: An Exhaustive Guide
When the days grow warmer and the mercury rises, many of us turn to our trusty air conditioners to keep us cool and comfortable indoors. However, when the season comes to an end, it’s time to pack away these cooling companions. One crucial step in this process is safely removing the air conditioner from your window.
To ensure a successful and accident-free removal, having the right tools is paramount. Here’s a comprehensive list of the essential tools you’ll need:
-
Screwdrivers: Both Phillips head and flathead screwdrivers are indispensable for removing mounting screws that secure the air conditioner to the window frame.
-
Wrenches: Adjustable open-end wrenches come in handy for loosening bolts and nuts on the electrical connections.
-
Pliers: Long-nose pliers are useful for gripping wires and cutting zip ties, while slip-joint pliers can help tighten nuts.
-
Hex key: This tool is specifically designed to turn hexagonal bolts, which may be present on some air conditioners.
-
Hammer: A small hammer can assist in loosening stubborn screws or tapping the unit into place.
-
Level: A torpedo level can help you ensure that the air conditioner is level when mounted in the window. This prevents water from pooling inside the unit, leading to potential damage.
-
Window board: A window board provides support for the air conditioner and prevents air leakage around the edges of the unit. It’s typically made of wood or vinyl and can be purchased online or at hardware stores.
Gathering these essential tools before beginning the removal process will streamline the task and help you avoid any mishaps. Remember to always prioritize safety by wearing work gloves and eye protection when working with electrical components.
Air Conditioner Components
Understanding the intricate components of a window air conditioner is crucial for efficient removal and maintenance. These components work harmoniously to provide the cool breeze that makes summer bearable.
The condenser coils, located at the back of the unit, are responsible for releasing heat to the outside. As refrigerant passes through these coils, it condenses and releases heat, thereby cooling the air inside the room.
On the other hand, the evaporator coils, situated on the front of the unit, absorb heat from the indoor air. The refrigerant, now in liquid form, travels through these coils and absorbs heat, converting back into a gas.
Fan motors are an integral part of the air conditioning system, circulating air through the condenser and evaporator coils. These motors ensure proper heat exchange and efficient cooling.
Additionally, thermostats play a vital role in controlling the temperature by monitoring the indoor air and turning the unit on or off as needed.
Understanding the functions of these components is essential for proper air conditioner removal and maintenance, ensuring optimal performance and extending its lifespan.
Safety Precautions for Air Conditioner Removal
When removing an air conditioner unit, safety should always be the top priority. Here’s a comprehensive guide to help you avoid accidents and ensure a safe removal process:
Turn Off Power
Before disconnecting the air conditioner, it’s crucial to turn off the power at the circuit breaker or fuse box. This will prevent electrical shock and potential injury.
Wear Protective Gear
Protect yourself by wearing work gloves and safety glasses to shield your hands and eyes from sharp edges or falling debris. Additionally, consider wearing a dust mask to minimize the inhalation of dust and allergens.
Handle Unit Carefully
Air conditioners are typically heavy and bulky, so handle them with utmost care. Avoid lifting the unit by the electrical cord or by yourself. If possible, use a dolly or have a partner assist you to prevent strains or injuries.
Proper Lifting Technique
When lifting the unit, bend your knees and lift with your legs, not your back. Keep the unit close to your body and avoid twisting or jerking motions. If you need to carry the unit over a long distance, take frequent breaks and avoid overexertion.
Prepare Your Window Opening for a Seamless Air Conditioner Removal
Removing an air conditioner from a window requires careful preparation to ensure a smooth and safe process. Before you embark on this task, it’s crucial to prepare your window opening meticulously to prevent air leakage and provide ample support for the unit.
Sealing Around the Window Opening
First and foremost, it’s essential to seal any gaps or cracks around the window opening to prevent warm or cold air from entering your home. Use weatherstripping or caulk to fill in these spaces, creating a tight seal that will minimize energy loss. Pay particular attention to the areas where the air conditioner will be placed, ensuring a snug fit to prevent any air from escaping.
Installing a Window Board
Next, you’ll need to install a window board or support bracket to provide additional support for the air conditioner. This board will act as a platform for the unit to rest on, distributing its weight evenly and reducing the risk of it falling out of the window.
To install the window board, follow these steps:
- Measure the width of your window opening.
- Cut the window board to the measured width.
- Slide the board into place, ensuring it’s centered and fits snugly against the window frame.
- Secure the board in place using screws or nails.
By preparing your window opening in this manner, you’ll create a secure and airtight environment for your air conditioner, ensuring optimal performance and minimizing energy loss.
Disconnecting Electrical Wires: A Crucial Step for Safe Air Conditioner Removal
As you embark on the task of removing your window air conditioner, it’s imperative to approach the electrical wires with utmost care. Disconnecting them correctly ensures your safety and prevents damage to the unit and your home’s electrical system.
Step 1: Prepare for Safety
Firstly, turn off the power to the air conditioner at the circuit breaker or fuse box. This vital step eliminates any risk of electric shock while working on the wires. Wear protective gloves and safety glasses for added protection.
Step 2: Locate the Wires
Open the electrical panel of the air conditioner. Inside, you will find the wires connecting the unit to the electrical supply. Typically, there are three wires: a black wire (hot), a white wire (neutral), and a bare copper wire (ground).
Step 3: Disconnect the Wires
Disconnect the wires one at a time, starting with the black (hot) wire. Use an electrician’s screwdriver to loosen the terminal screw and gently pull the wire out. Repeat this process for the white (neutral) wire.
Finally, disconnect the bare copper (ground) wire by loosening its terminal screw. Handle all wires carefully to avoid damage or accidental short circuits.
Step 4: Secure the Wires
Once all wires are disconnected, secure them to prevent accidental contact. Tape them together using electrical tape or use wire nuts. This keeps them neat and prevents any loose ends from creating hazards.
Safety Tips for Disconnecting Electrical Wires
- Always turn off the power before touching any wires.
- Wear protective gear to minimize the risk of electric shock.
- Label the wires before disconnecting them for easy identification during reinstallation.
- If you encounter any issues or are uncertain about any step, consult a qualified electrician.
Remember, disconnecting electrical wires requires precision and caution. By following these steps and prioritizing safety, you can ensure a smooth and successful air conditioner removal process.
Removing Mounting Screws: A Crucial Step in Air Conditioner Removal
When it’s time to pack away your window air conditioner for the season, removing the mounting screws is a critical step that requires proper technique. These screws play a vital role in securing the unit firmly in place within the window frame. Here’s how to locate and remove them safely:
Locate the mounting screws on the side or top of the air conditioner unit. They are typically concealed behind tabs or covers. Use a screwdriver or wrench to gently pry open these covers and expose the screws.
Once the screws are visible, inspect them closely. If any of them appear rusty or damaged, consider replacing them with new ones of the same size and type. This will ensure the stability and safety of your air conditioner during future installations.
Using the appropriate screwdriver or wrench, carefully loosen the screws by turning them counterclockwise. Do this gradually, avoiding excessive force that could damage the screws or the unit. Continue turning until the screws are completely disengaged from the window frame.
Once all the mounting screws have been removed, support the weight of the air conditioner unit with one hand while gently pulling it towards you with the other. Be cautious as you slide the unit out of the window, ensuring it does not swing or tilt awkwardly.
Important Note:
Before removing the mounting screws, always unplug the air conditioner from the electrical outlet and turn off the power supply. This precaution prevents the risk of electrical shocks and potential damage to the unit. Additionally, wear protective gloves to shield your hands from any sharp edges or debris that may be present.
Step-by-Step Guide to Sliding Your Air Conditioner Out of the Window
Prepare Yourself:
Before you begin, ensure you have disconnected the electrical wires and removed the mounting screws holding the unit in place. Don’t rush, and take your time to avoid any accidents.
Grip and Slide:
Using both hands, firmly grasp the sides of the air conditioner. Carefully tilt the unit slightly towards you, creating a small gap at the bottom. Gently slide the unit a few inches towards you.
Tilt and Slide Further:
Continue tilting the air conditioner towards you while simultaneously sliding it further out of the window. Be mindful of the weight of the unit and don’t let it topple outwards. Slide the unit out until the back of the unit is completely clear of the window frame.
Avoid Damage:
As you slide the unit out, pay attention to any obstacles that could cause damage. If you encounter any resistance, stop and investigate before proceeding. Protect the unit by using a soft blanket or cloth to cover any sharp edges or protrusions.
Clear the Window Frame:
Once the unit is completely out of the window, thoroughly inspect the window frame for any remaining screws or debris. Remove any obstacles that could hinder the reinstallation of your air conditioner or cause air leakage.
