Diy Headband: A Comprehensive Guide To Crafting A Comfortable And Stylish Accessory
To craft a headband, gather your fabric, thread, elastic, and embellishments. Choose the right needle and stitch type for your fabric. Measure, cut, and sew the fabric piece into a loop. Insert elastic for a comfortable fit. Enhance your headband with embellishments like beads or ribbons for a personalized touch.
Fabric: The Foundation of Sewing
Embark on an enthralling journey into the vibrant world of fabrics, where each thread tells a unique tale. Like a painter’s canvas, fabric serves as the foundation upon which your sewing dreams take form. Its myriad types, diverse properties, and endless possibilities ignite creativity and inspire endless masterpieces.
Natural Fibers: A Symphony of Nature
Nature’s gentle touch finds expression in an array of natural fibers. Cotton, a versatile chameleon, adapts effortlessly to casual wear and elegant evening gowns alike. Its breathability and comfort make it a summer’s delight, while its absorbency keeps you cozy in the winter’s embrace. Linen, with its timeless elegance and alluring wrinkles, adds a touch of rustic charm to any outfit. Its exceptional strength and cooling properties make it an ideal companion for warm climates. And how can we forget the luxurious caress of silk, a queen among fabrics? Its shimmering surface reflects ambient light, creating an ethereal glow that captivates the eye.
Synthetic Fibers: A Modern Marvel
Science strides forth in the realm of fabrics, unleashing a plethora of synthetic marvels. Polyester, a durable and wrinkle-resistant wonder, boasts an impressive resistance to fading and stains. It’s the perfect choice for activewear and outdoor adventures. Nylon, renowned for its strength and elasticity, finds its place in sturdy backpacks, delicate lingerie, and everything in between. And spandex, with its unparalleled stretchability, embraces and enhances every curve, making it an indispensable ally in the world of dance and fitness.
Blends: A Harmonious Convergence
Like a culinary masterpiece that combines flavors, fabric blends offer a captivating harmony of different fibers. Cotton-polyester blends unite the comfort of cotton with the durability of polyester, creating a balanced fabric that’s both soft and long-lasting. Linen-silk blends marry the breezy freshness of linen with the luxurious drape of silk, resulting in a fabric that’s both breathable and elegant. Blends offer endless possibilities, allowing you to tailor your creations to specific needs and preferences.
Choosing the Perfect Fabric
Navigating the fabric maze requires an eye for detail and an understanding of your project’s requirements. For airy summer dresses, opt for lightweight fabrics like cotton or linen. For more formal occasions, consider the sophisticated sheen of silk or satin. Durable fabrics like denim or canvas withstand the rigors of everyday wear, while stretchy fabrics like spandex offer freedom of movement. Remember, the perfect fabric is the one that harmonizes with your vision and elevates your sewing journey.
Thread: The Essential Backbone of Sewing
The humble thread may seem like an ordinary element in the world of sewing, but its significance is profound. It’s the thread that binds together the fabric, transforming it from a mere material into a wearable masterpiece or a decorative adornment. However, choosing the right thread for your project can be a daunting task, given the vast variety available.
Types of Thread
-
Cotton Thread: Renowned for its versatility, cotton thread is ideal for most fabrics. It’s available in various weights and colors, providing a wide range of options.
-
Polyester Thread: Durable and colorfast, polyester thread excels in projects that require strength and resistance to fading. It’s particularly suitable for outdoor use and machine embroidery.
-
Nylon Thread: Known for its exceptional strength and elasticity, nylon thread is ideal for projects that undergo significant stress or stretch, such as swimwear and activewear.
How to Choose the Right Thread
The key to choosing the right thread lies in considering the fabric and the intended use of your project. For instance:
-
Thin, lightweight fabrics like silk or chiffon require a fine thread to prevent puckering.
-
Medium-weight fabrics like cotton or linen prefer a medium-weight thread for balanced strength and durability.
-
Thick, sturdy fabrics like canvas or denim necessitate a heavy-weight thread to withstand the strain.
-
Projects exposed to wear and tear demand a strong thread like polyester or nylon to ensure longevity.
-
Projects with high-visibility stitching benefit from thread that matches the fabric color or provides a contrasting decorative accent.
Remember, the right thread can enhance the aesthetic appeal and durability of your sewing creations. By choosing wisely, you’ll not only strengthen your stitches but also add an element of artistry to your projects.
Choosing the Perfect Needle for Your Sewing Project
Embarking on a sewing journey requires not only the right materials but also a keen understanding of the tools you’re using. Needles, the unsung heroes of your sewing kit, play a pivotal role in determining the success of your project.
Selecting the appropriate needle for your specific needs is paramount. They come in a vast variety of sizes, types, and shapes, each tailored to specific fabrics and sewing techniques. Size refers to the diameter of the needle, measured in millimeters (mm). Smaller needles (e.g., 60/8) are suitable for delicate fabrics like silk and chiffon, while larger needles (e.g., 100/16) are ideal for thicker materials like denim and canvas.
Types of needles vary depending on their shape and purpose:
- Ballpoint needles have a rounded tip, making them perfect for sewing on knit fabrics without snagging or breaking the fibers.
- Sharps needles have a pointed tip, ideal for piercing tightly woven fabrics like cotton and linen.
- Universal needles are a versatile option that can handle various fabrics, making them suitable for beginners.
Choosing the right needle for your project involves carefully considering the following factors:
- Fabric type: Different fabrics require different needle sizes and types to ensure smooth sewing and prevent damage. For instance, silk requires a fine needle, while denim needs a heavy-duty needle.
- Thread size: The thickness of the thread should match the size of the needle. Larger needles require thicker thread, while smaller needles need thinner thread.
- Sewing technique: Some techniques, like embroidery, require specialized needles with unique features, such as a finer tip or a larger eye for accommodating embroidery floss.
By carefully selecting the appropriate needle for your project, you can ensure not only the success of your sewing endeavor but also the longevity of your needle and sewing machine. Remember, the right needle makes all the difference in achieving beautiful, professional-looking results.
Scissors: Types of scissors, their functions, and proper handling techniques
Scissors: The Essential Tool for Sewing Success
In the realm of sewing, scissors stand as indispensable companions, precision instruments that shape fabrics and transform them into wearable wonders. From the moment you lay your hands on a new piece of material, a reliable pair of scissors will guide your every cut.
Types of Scissors
The sewing world offers a vast array of scissors, each designed for a specific purpose.
-
Fabric Scissors: These are the workhorses of any sewing kit, crafted with precision blades that glide through fabrics effortlessly. Their long, sharp edges ensure clean, even cuts.
-
Pinking Shears: Featuring serrated blades, these scissors create a distinctive zigzag edge that prevents fraying and adds a decorative touch to seams.
-
Trimming Scissors: With delicate blades, these scissors are ideal for trimming small pieces of fabric, threads, and embellishments.
Functions of Scissors
Each type of scissors has its own unique functions:
-
Cutting: Of course, the primary role of scissors is to cut fabrics. From cutting out patterns to trimming excess fabric, scissors are essential for shaping and refining your creations.
-
Snipping: Trimming Scissors excel at snipping threads, removing stray threads, and making intricate cuts.
-
Notching: Pinking Shears are often used for notching fabrics, creating small, evenly spaced cuts that help prevent fraying.
Proper Handling Techniques
To ensure optimal performance and longevity, handle your scissors with care:
-
Use the Right Scissors: Choose the appropriate scissors for the task at hand to achieve the best results.
-
Hold Correctly: Grip the scissors with your thumb inside the lower handle and your fingers on the upper handle, using a comfortable hold.
-
Cut Straight: Align the scissors perpendicular to the fabric and cut in a straight line to avoid jagged edges.
-
Sharpen Regularly: To maintain their precision, sharpen your scissors periodically using a whetstone or scissors sharpener.
By following these tips, you’ll turn your scissors into trusted allies, helping you cut and shape your sewing projects with ease and confidence.
Measuring Like a Master: A Guide to Using a Measuring Tape for Sewing Accuracy
When venturing into the world of sewing, precision is paramount. Just as architects rely on measuring tapes to design magnificent structures, seamstresses and tailors depend on this humble tool to create garments that drape and fit flawlessly. In this comprehensive guide, we’ll delve into the art of using a measuring tape, ensuring your sewing projects are a testament to your unwavering attention to detail.
Choosing the Right Measuring Tape
Navigating the diverse array of measuring tapes available can be daunting. For sewing endeavors, opt for a flexible, durable tape with clear and precise markings. Spring-loaded tapes retract easily, allowing for quick and effortless measurements. Consider purchasing a tape with both inch and centimeter markings for versatility.
Accurate Measurement Techniques
To obtain accurate measurements, follow these indispensable steps:
- Start at the Correct Point: Align the zero mark of the tape at the starting point of your measurement.
- Hold the Tape Straight: Ensure the tape is taut and parallel to the edge you’re measuring.
- Read at the Correct Mark: Note the measurement where the tape ends on the garment’s edge or seam.
Measuring Different Parts of a Garment
Depending on the garment you’re creating, various measurements are crucial:
- Bodice: Measure the shoulder width, bust and waist circumferences, and bodice length.
- Skirts: Determine the waist and hip circumferences, skirt length, and hem allowance.
- Sleeves: Measure the armhole depth, bicep and wrist circumferences, and sleeve length.
- Pants: Obtain the waist and hip circumferences, inseam (distance from crotch to hem), and leg openings.
Tips for Measuring Irregular Shapes
Curves and other irregular shapes require a bit more finesse. Use a flexible measuring tape to gently follow the contour of the garment. Measure along the longest part of the curve for the most accurate results.
Mastering the art of using a measuring tape is foundational in the realm of sewing. By adhering to these techniques, you’ll ensure the precise cutting and stitching that elevates your creations to garments of impeccable fit and style. So, embrace the measuring tape as your trusty guide, and let it lead you down the path of sewing excellence.
Ironing Board and Iron: Setting up an ironing board, ironing different fabrics, and preventing wrinkles
Ironing: A Journey to Pristine Garments
Embark on a sartorial adventure with us as we explore the world of ironing, an essential technique that transforms rumpled fabrics into impeccable masterpieces. Just as a sculptor molds clay, ironing empowers you to shape and refine your garments, creating a canvas of polished elegance.
Preparing Your Canvas: The Ironing Board
Your ironing board is your trusted companion, providing a stable surface for your creations. Setting it up is a breeze: adjust the height to your comfort level and ensure stability to prevent wobbles during ironing. Remember to cover the board with a clean ironing board cover for protection.
Mastering Your Weapon: The Iron
The iron is your precision tool, capable of revitalizing even the most wrinkled fabrics. Fill the iron’s reservoir with clean, distilled water to generate steam. Set the temperature according to the fabric type, consulting the care label for guidance.
The Art of Ironing: Techniques for Every Fabric
Ironing is an art form that demands a gentle touch and an understanding of different fabrics. For cotton and linen, use a high heat setting with steam to achieve crisp, wrinkle-free results. Treat silk and synthetics with care, using low heat and a dry iron to avoid damage. Remember to press with the grain of the fabric, following its natural direction.
Preventing Wrinkles: A Cornerstone of Fabric Care
Wrinkles are the nemesis of polished garments. To prevent them, iron fabrics slightly damp as moisture helps relax fibers. Fold and store garments properly to minimize creasing. If wrinkles persist, use a spray bottle with water or a wrinkle release product to re-dampen the fabric and re-iron.
With the art of ironing mastered, you possess the power to transform your wardrobe into a symphony of smooth, elegant garments. Ironing is not merely a chore; it is a transformative process that empowers you to create a polished, confident style. So, embrace the iron and embark on a journey to wrinkle-free perfection!
Elastic: The Stretchy Secret to Comfortable Garments
In the realm of sewing, elastic reigns supreme as the unsung hero of comfortable garments. It’s a versatile material that adds flexibility and ease of movement to your creations, making them perfect for everything from casual wear to activewear.
Types of Elastic
There’s a whole world of elastic to choose from, each with its unique properties and uses. Here are some of the most common types:
-
Fold-over elastic: As its name suggests, this elastic is folded over and sewn into the hem, waistband, or other areas where extra stretch is needed. It’s ideal for garments like socks, underwear, and waistbands of skirts and pants.
-
Flat elastic: This type is thin and flexible, making it perfect for gathering fabric without adding bulk. It’s commonly used in waistbands, necklines, and sleeves.
-
Non-roll elastic: As its name implies, this elastic won’t roll up when sewn into the garment, ensuring a smooth and professional finish. It’s often used in headbands and other accessories.
Sewing with Elastic
Working with elastic requires some special techniques to ensure it remains stretchy and secure. Here’s how to sew with elastic like a pro:
-
Use a zig-zag or stretch stitch: These stitches allow the elastic to stretch without breaking.
-
Stretch the elastic while sewing: As you sew, gently pull on the elastic to evenly distribute the stretch throughout the seam.
-
Avoid over-stretching: Stretching the elastic too much can weaken it and reduce its longevity.
-
Use a needle designed for stretch fabrics: This will prevent the needle from breaking or skipping stitches on stretchy material.
Applications of Elastic
The uses of elastic are boundless. Here are a few ideas to get you started:
-
Waistbands: Elastic in waistbands provides a comfortable and adjustable fit.
-
Elastic casings: By creating a channel of fabric, you can insert elastic for a secure and stretchy closure.
-
Headbands: Elastic headbands are perfect for keeping hair out of your face while adding a touch of style.
-
Sleeve cuffs: Elastic cuffs keep sleeves in place and add a touch of comfort.
-
Embellishments: Elastic can be used to create unique embellishments, such as bows or straps.
By mastering the secrets of elastic, you can take your sewing projects to the next level and create garments that are both comfortable and stylish. So don’t be afraid to embrace the power of stretch!
Buttons: A Guide to Selection and Sewing
Buttons, a simple yet versatile embellishment, elevate garments with function and flair. With an array of shapes, sizes, and materials, navigating the world of buttons can be daunting. But fear not, this guide will unravel the secrets of button selection and sewing, transforming you into a button-savvy seamstress.
Choosing the Perfect Buttons
- Material: Buttons come in an array of materials, including plastic, metal, wood, and natural fibers like bone and horn. Consider the fabric, style, and durability required for your project.
- Shape and Size: Buttons vary in shapes, such as round, square, oval, and rectangular. The size should complement the garment, with smaller buttons for delicate fabrics and larger buttons for heavier items.
- Color and Texture: Buttons can match or contrast with your fabric, adding a subtle accent or making a bold statement. Textured buttons add depth and interest.
Sewing Buttons Securely
- Thread: Use a strong thread that matches the color of the button and fabric.
- Needle: A sharp needle is essential for piercing through the button and fabric multiple times.
- Placement: Mark the placement of the button on the fabric with a pencil or tailor’s chalk.
- Method: Various sewing techniques exist, including simple stitches, shank buttons, and crocheted loops. Choose the method that best suits your project.
- Finishing: Once the button is sewn in place, reinforce the threads by tying them off or using a buttonhole stitch.
Button Variations
Beyond the basics, there’s a world of button variations to explore:
- Decorative Buttons: Buttons adorned with beads, sequins, or intricate designs add a touch of glamour.
- Toggle Buttons: Buttons with loops on either side that create a functional and stylish closure.
- No-Sew Buttons: Buttons with adhesive backing eliminate the need for sewing, making them ideal for temporary embellishments.
Remember, the perfect buttons will elevate your sewing creations, adding both style and practicality. So, embrace the art of button selection and sewing, and let these tiny treasures transform your garments into works of art.
Embellishments: Unlocking Creative Expression in Sewing
Embellishments are the dazzling stars that transform ordinary sewing projects into captivating works of wearable art. From the shimmering brilliance of beads to the delicate allure of ribbons, these adornments add a touch of personality and flair to any creation.
Beads:
Like tiny gems, beads come in a myriad of shapes, sizes, and colors. From intricate seed beads to eye-catching cabochons, they can be sewn on individually or strung together to create stunning accents. Use beads to enhance neckline details, embellish cuffs, or create eye-catching patterns on bags and accessories.
Ribbons:
Ribbons, with their flowing grace, add a touch of elegance and whimsy to sewing projects. Woven in silk, velvet, or cotton, they can be used to create decorative trims, tie bows, or add a touch of color to seams. Ribbons are perfect for enhancing the feminine charm of dresses, skirts, and blouses.
Sequins:
Sequins, like miniature mirrors, reflect light to create a dazzling effect. They can be sewn on in rows, clusters, or scattered randomly to add a touch of sparkle and glamour. Sequin embellishments are ideal for evening gowns, prom dresses, and other formal attire.
Incorporating Embellishments:
Incorporating embellishments into your sewing projects is a personal expression of your creativity. Some popular techniques include:
- Hand Sewing: Use a needle and thread to carefully sew on beads, sequins, and other embellishments, ensuring secure attachment.
- Machine Sewing: Use a special presser foot to sew on ribbons or other embellishments with ease and precision.
- Adhesive: Attach embellishments using fabric glue or fusible webbing for a quick and convenient solution.
Experiment with different combinations of embellishments to create unique and eye-catching designs. Remember, the key is to find a balance between subtle elegance and bold statement pieces. By incorporating embellishments into your sewing projects, you unlock a world of creative expression and transform ordinary garments into extraordinary works of art.
Sewing with Confidence: Mastering the Straight Stitch
Embark on the enchanting journey of sewing, where creativity and functionality intertwine. As you delve into this beloved craft, the straight stitch emerges as the essential technique that underpins every seam. Let’s unravel the secrets of this fundamental stitch, empowering you with the confidence to conquer any sewing project.
To begin, familiarize yourself with the sewing machine’s dials and settings. Locate the stitch selector and choose the straight stitch symbol. This stitch consists of a series of evenly spaced dots that create a durable and versatile seam.
Thread the machine with a thread that matches your fabric’s color and weight. Ensure the thread is taut but not too tight. Secure the fabric under the presser foot, and select the appropriate stitch length for your project. A shorter stitch length provides a stronger seam, while a longer stitch length creates a more relaxed and decorative effect.
Gently hold the fabric with your left hand and guide it under the presser foot with your right. Engage the machine’s foot control to start sewing, and maintain a steady pace. Keep your eyes on the needle and follow its path as it creates the straight stitch.
Adjust the speed as needed: a slower speed provides greater control for precise seams, while a faster speed is suitable for longer stretches of sewing. Practice varying the stitch length and tension to achieve different effects and accommodate different fabrics.
Remember, mastering the straight stitch takes patience and practice. Experiment with various fabrics and settings to find what works best for your projects. With time, you’ll become confident in your ability to sew straight seams with precision and ease. So, embrace the adventure of sewing, and let the straight stitch be your guiding thread on this rewarding journey.
Mastering the Zig-Zag Stitch: An Essential Tool for Seamless Finishes and Creative Embellishments
In the realm of sewing, the zig-zag stitch reigns supreme as a versatile technique that transforms everyday projects into extraordinary creations. Unlike its straight-line counterpart, the zig-zag stitch weaves a distinctive path, creating a series of V-shaped loops that lend both strength and flexibility to your handiwork.
Unveiling the Uses of the Zig-Zag Stitch
The zig-zag stitch serves a myriad of purposes, making it an indispensable tool in every sewer’s arsenal. Its ability to stretch and contract makes it perfect for finishing raw edges, preventing them from unraveling and adding a professional touch to your garments. Additionally, the zig-zag stitch excels in reinforcing seams, ensuring they withstand the rigors of daily wear and tear.
Fine-tuning Your Zig-Zag Stitch
To harness the full potential of the zig-zag stitch, it’s crucial to adjust its settings according to your project’s needs. The width and length of the stitch can be tailored to create different effects. A wider stitch provides more stretch, while a narrower stitch offers a more subtle finish. By experimenting with these settings, you can achieve the perfect balance of functionality and aesthetics.
Embellishing with Zig-Zag Stitches
Beyond its practical applications, the zig-zag stitch opens up countless possibilities for creative embellishments. Its decorative nature makes it an ideal choice for creating intricate designs, adding a touch of whimsy to your projects. From outlining embroidery patterns to adding texture to appliqués, the zig-zag stitch transforms ordinary fabrics into works of art.
Tips for Mastering the Zig-Zag Stitch
- Use the correct needle: A sharp needle specifically designed for zig-zag stitching will prevent skipped stitches and ensure smooth results.
- Choose the right tension: Too much tension can cause puckering, while too little tension can lead to weak stitches. Adjust the tension until the thread lies flat on the fabric.
- Test your stitch settings: Before stitching on your actual project, practice on a scrap of fabric to fine-tune your settings and ensure the desired outcome.
- Avoid over-stretching the fabric: While the zig-zag stitch provides flexibility, excessive stretching can weaken the threads and damage your project.
By embracing the versatility of the zig-zag stitch, you can elevate your sewing skills to new heights, creating projects that are both functional and aesthetically pleasing. Its unique ability to strengthen, finish, and embellish makes it an essential tool for every seamstress and crafter alike.
Gathering: The Art of Embracing Fullness in Fabric
In the world of sewing, gathering stands as a quintessential technique that transforms flat fabric into enchanting cascades of fullness. It’s a magical process that breathes life into garments, adding volume and creating the graceful drape we so often admire.
Techniques for Gathering Fabric
-
Loosely Gathering: Using a long stitch length, simply sew a line of stitches parallel to the edge of the fabric. Gently pull the bobbin thread to cinch up the stitches, creating soft and delicate gathers. This method works well when you want a more subtle effect.
-
Ruched Gathering: Sew two parallel lines of stitches close together. Pull on both threads simultaneously to gather the fabric, forming a series of tiny ruffles. This technique is perfect for adding a touch of playful texture to your creations.
-
Double Hand Gathering: This technique requires patience but yields beautiful results. Hold the fabric in both hands, with the thumb of one hand on one edge and the index finger of the other hand on the opposite edge. Pull the fabric away from your body while sliding your thumbs and fingers towards each other. Repeat this process along the entire length of the fabric.
-
Elastic Thread Gathering: Thread a needle with elastic thread and sew a line of stitches along the edge of the fabric. Leave the elastic ends slightly longer. Gently pull on the elastic threads to gather the fabric to your desired fullness. This method is ideal for waistbands and other elastic closures.
Benefits of Gathering
Enhanced Volume and Shape: Gathering adds volume to fabric, creating the illusion of fullness. It can transform a simple skirt into a flowing ball gown or give a blouse a flattering peplum effect.
Draped Effects: Gathered fabric gracefully drapes over the body, lending garments a touch of elegance and sophistication. It’s perfect for creating flowing dresses, billowing tops, and ethereal curtains.
Decorative Touches: Gathering can also be used as a decorative element. Ruched gathered fabric adds texture and visual interest to plain fabrics, while double hand gathering creates delicate pleats that evoke a vintage charm.
Tips for Gathering:
- Use a light touch when pulling the threads, as pulling too tightly can damage the fabric.
- Experiment with different stitch lengths and tension settings to achieve various effects.
- Practice on scrap fabric before attempting it on your final project.
- Gather small sections of fabric at a time to maintain control and prevent puckering.
Embrace the art of gathering and unleash your creativity. By mastering this essential technique, you’ll elevate your sewing skills and create garments that are both beautiful and captivating.
Pleating: A Symphony of Fabric Folds
In the realm of sewing, pleating transforms ordinary fabric into extraordinary works of art. This technique involves creating delicate folds in fabric, creating an accordion-like effect. From crisp and geometric to soft and flowing, pleats add depth, texture, and visual interest to garments and accessories.
Types of Pleats
A diverse range of pleats exist, each with its unique characteristics:
- Knife pleats: Sharp, prominent folds with a knife-edge crease.
- Box pleats: Equally spaced, inverted pleats that create a rectangular shape.
- Accordion pleats: Continuous, accordion-like folds that provide maximum fullness.
- Gathered pleats: Loosely formed pleats that create a soft, billowing effect.
- Sunburst pleats: Fan-shaped pleats that radiate from a central point.
Methods for Creating Pleats
While several methods can be used to create pleats, two common techniques stand out:
- Hand pleating: A meticulous process that involves folding and sewing each pleat by hand.
- Machine pleating: Uses a special attachment on a sewing machine to automate the pleating process.
Pleating in Practice
Pleats find applications in a wide array of sewing projects. For garments, they add volume to skirts, create movement in dresses, and enhance the appearance of blouses and shirts. Accessories also benefit from pleats: headbands gain texture, tote bags acquire a touch of elegance, and pillowcases exude a luxurious feel.
Tips for Pleating Success
Achieving perfect pleats requires meticulous attention to detail. Here are some valuable tips:
- Use lightweight to medium-weight fabrics that hold their shape well.
- Pre-wash and iron your fabric to remove any wrinkles or distortions.
- Mark your pleats accurately using a ruler or measuring tape.
- Sew along the fold of each pleat to ensure a crisp appearance.
- Press your pleats thoroughly to enhance their definition and lasting power.
By mastering the art of pleating, you can elevate your sewing projects from ordinary to extraordinary. Embrace the beauty of fabric folds and transform your creations into eye-catching masterpieces.
Appliqué: Embellishing with Fabric Shapes
Embroidered appliqués add a touch of whimsy and personalization to any sewing project. Whether it’s a playful animal figure on a child’s dress or an intricate flower motif on a quilt, appliqués bring a unique charm to your creations.
Cutting Fabric Shapes:
The first step in creating an appliqué is to cut out the desired shapes from your chosen fabric. Use sharp scissors and a steady hand to ensure clean and precise edges. You can use pre-printed fabric, purchase appliqué shapes, or create your own designs by tracing patterns onto fabric.
Attaching Appliqués:
Once your fabric shapes are cut, it’s time to attach them to the base fabric. There are several methods you can use, depending on the size and complexity of the appliqué. For small appliqués, you can simply use fabric glue. For larger or more intricate designs, hand-stitching or machine sewing is recommended.
Hand-Stitching Methods:
Appliqué Stitch: This is the most common hand-stitching method for appliqués. It involves using tiny blind stitches to secure the appliqué to the base fabric along the edges. This creates a subtle and professional-looking finish.
Blanket Stitch: This stitch is slightly more visible than the appliqué stitch, but it adds a decorative border to the appliqué. It can be used to create both straight and curved edges.
Machine Sewing Methods:
Zigzag Stitch: Using a zigzag stitch on your sewing machine is a quick and easy way to attach appliqués. Select a narrow stitch width and sew around the edges of the appliqué.
Satin Stitch: A satin stitch is a beautiful and durable stitch for attaching appliqués. It creates a smooth, glossy finish that looks similar to embroidery.
Finishing Touches:
Once your appliqués are attached, you may want to add additional embellishments. You can stitch on beads, sequins, or ribbons for added texture and dimension. You can also use paint or fabric markers to add details to your appliqués.
Appliqué is a versatile technique that allows you to add unique designs to your sewing projects. With patience and a little practice, you can create beautiful and eye-catching appliqués that will enhance the look of your garments, accessories, and home décor.
Embroidering with Joy: A Beginner’s Guide to Basic Stitches
Embroidery, the art of adorning fabric with needle and thread, has captivated crafters for centuries. It’s a versatile and rewarding hobby that can transform simple projects into exquisite works of art. Whether you’re a seasoned seamstress or a curious novice, mastering basic embroidery stitches will unlock a world of creative possibilities.
Getting Started with Embroidery
Before embarking on your embroidery journey, gather essential materials such as a sharp needle, colorful threads, and high-quality fabric. Choose a simple pattern that aligns with your skill level and start practicing on a scrap piece of fabric.
Basic Embroidery Stitches
- Running Stitch: The simplest stitch, it’s perfect for outlines and delicate details.
- Backstitch: A versatile stitch that creates a continuous line, ideal for borders and filling in shapes.
- Satin Stitch: A smooth, silky stitch that mimics the look of satin fabric.
- Split Stitch: A decorative stitch that adds texture to leaves and petals.
- French Knot: A tiny, raised knot that resembles a tiny flower or berry.
Embroidery Inspiration
Once you’ve mastered the basics, explore the limitless creative possibilities of embroidery. Add personal touches to clothing, accessorize with embroidered jewelry, or create stunning home décor. Experiment with different threads, fabrics, and embellishments to bring your unique style to life.
Tips for Embroidery Success
- Use a sharp needle: A dull needle will damage fabric and make stitching difficult.
- Tension is key: Maintain even tension in the thread to ensure consistent stitches.
- Don’t rush: Embroidery requires patience and precision. Take your time and enjoy the process.
- Use a thimble: Protect your fingers from needle pricks and improve grip.
- Experiment with stitches: Don’t be confined to the basics. Explore new stitches to expand your embroidery skills.
Embroidery is a delightful and accessible craft that can bring joy and creativity into your life. Whether you’re sewing a heartfelt gift for a loved one or creating a masterpiece for your home, embracing the art of embroidery will lead you on an endless journey of artistic discovery.
Button Sewing: A Beginner’s Guide to Sewing Buttons Securely and Neatly
Buttons, those small yet essential embellishments, add both functionality and style to our garments. Sewing them on securely and neatly can seem daunting for beginners, but with the right techniques, you can master this skill with ease.
Materials You’ll Need:
- Buttons
- Thread that matches the button color or fabric
- Needle
- Scissors
- Fabric scraps or a small piece of cardboard
Step-by-Step Instructions:
1. Choose **The Right Button and Thread:
Select a button that complements your garment’s style and fabric. Choose thread that matches the button color or fabric to create a seamless look.
2. **Mark The Button Placement:
With a fabric marker or tailor’s chalk, mark the exact spot where you want to sew the button. For a secure hold, it’s recommended to sew through multiple layers of fabric.
3. **Prepare The Needle:
Thread the needle with a double strand of thread, leaving a 6-inch tail. Tie a small knot at the end of the thread to prevent it from unraveling.
4. **Sew The First Stitch:
Insert the needle from the back of the fabric, through the first hole in the button. Bring the needle back up through the second hole on the same side of the button.
5. **Secure With A Shank:
To create a small shank that will prevent the button from being pulled through the fabric, wrap the thread around the thread tail from the first stitch 2-3 times.
6. **Repeat Stitching:
Bring the needle back up through the next hole on the button, wrapping the thread around the shank each time. Repeat this process for all the remaining holes.
7. **Secure The Button:
Once you’ve stitched through all the holes, bring the needle back through the first hole you started with. Tie off the thread securely with a double knot.
8. **Trim The Excess Thread:
Cut off any excess thread, leaving a small tail that you can tuck under the button.
Tips for Neat and Secure Button Sewing:
- Use a sharp needle and thread that matches the weight of the fabric.
- Stitch evenly and ensure each stitch is secure.
- Create a small shank to prevent the button from being pulled through.
- Tie off the thread with a double knot to ensure it doesn’t unravel.
- Practice on a scrap of fabric before sewing on the actual garment.
Elastic Casing: Enhancing Comfort and Versatility
Creating an elastic casing is an essential technique for adding stretchy, adjustable closures to garments like waistbands, leg bands, and cuffs. This elastic channel allows for comfortable movement and a customized fit.
Choosing the Right Elastic:
Select elastic that matches the weight and stretchiness of your fabric. Woven elastic provides durability, while braided elastic offers more flexibility. For a more adjustable casing, consider fold-over elastic, which can be folded in half for tighter tension.
Creating the Casing:
- Measure and Mark: Determine the desired length and width of the elastic casing. Mark these measurements on the wrong side of your fabric.
- Fold and Stitch: Fold the fabric along the marked lines, wrong sides together. Stitch along the edges, leaving a small opening for inserting the elastic.
- Thread the Elastic: Use a safety pin or bodkin to thread the elastic through the casing. Adjust the tension as needed.
- Secure the Ends: Overlap the ends of the elastic by at least ½ inch and stitch them together securely. Fold the excess fabric over the stitched end and topstitch to close the opening.
Applications of Elastic Casings:
Elastic casings are not just limited to waistbands. They can also be used for:
- Leg Bands of Pants or Shorts: Provide a snug and comfortable fit without restricting movement.
- Cuffs on Sleeves or Pants: Create a gathered or shirred effect, adding style and adjustability.
- Belts: Make adjustable belts to complement any outfit.
- Headbands: Offer a secure and comfortable fit that can be customized to different head sizes.
Additional Tips:
- Use a presser foot with a guide to sew the casing evenly.
- Test the tension of the elastic before sewing it into the casing to ensure a comfortable fit.
- Reinforce the stitching around the opening where the elastic is inserted to prevent fraying.
- Decorate the casing with ribbon, trim, or other embellishments for added style.
Mastering the technique of creating an elastic casing empowers sewers to create garments and accessories that are both comfortable and customizable. Whether it’s for a cozy headband or a fitted waistband, elastic casings add a touch of versatility and comfort to any sewing project.
Thin Headbands: Materials and steps for making simple, narrow headbands
Create Your Own **Chic Thin Headbands: A Step-by-Step Guide for Beginners**
Are you ready to elevate your fashion game with stylish and *effortless_** thin headbands? Whether you’re a seasoned seamstress or a complete novice, this comprehensive guide will walk you through the process of crafting your own custom headbands from scratch.
Materials You’ll Need:
- Fabric of your choice (cotton, linen, silk, etc.)
- Scissors
- Measuring tape or ruler
- Thread
- Sewing machine
- Bobby pins or clips
- Iron and ironing board
Step-by-Step Instructions:
-
Measure and Cut the Fabric: Determine the desired length and width of your headband. Typically, thin headbands range from 1.5 to 2 inches wide and 20 to 24 inches long. Cut two pieces of fabric to these dimensions.
-
Fold and Sew the Edges: Fold each raw edge of both fabric pieces inward by 1/4 inch and press with an iron. Fold the edges again by another 1/4 inch and press. Stitch along the folded edges using a straight stitch, close to the edge.
-
Join the Fabric Pieces: Place the two fabric pieces right sides together and sew along one of the short ends using a 1/2-inch seam allowance. Repeat for the other short end, leaving an opening in the middle for turning.
-
Turn and Press: Use a bobby pin or small hook to gently turn the headband right side out through the opening. Press the headband flat with an iron.
-
Close the Opening: Fold the raw edges of the opening inward and stitch them together using a ladder stitch or a blind stitch. This will create a neat and invisible closure.
-
Customize Your Headband (Optional): Add a personal touch to your headband by embellishing it with beads, sequins, embroidery, or other decorations.
Tips for Beginners:
- Choose a lightweight and soft fabric that drapes well.
- Use a sharp needle and thread strong enough to support your fabric.
- Practice sewing on a scrap piece of fabric before starting your headband.
- Don’t be afraid to make mistakes! Even seasoned sewers make them occasionally.
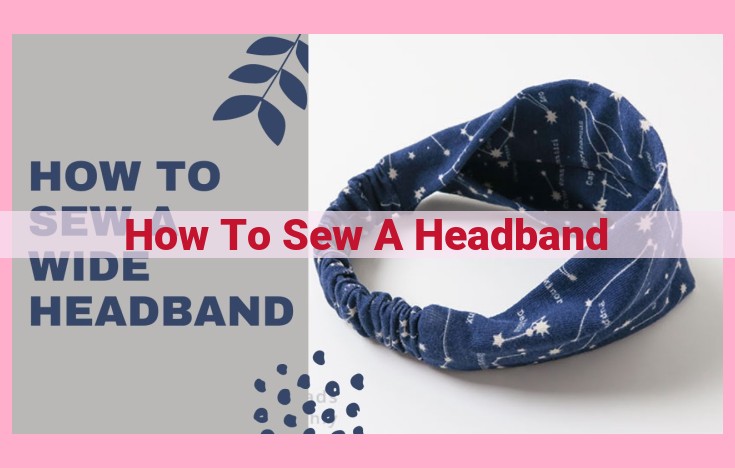
Thick Headbands: Techniques for Creating Padded or Wider Headbands with Various Fabrics
Indulge in the world of crafting as we unveil the techniques for creating thick headbands with grace and ease. These headbands exude comfort, offering a soft cushion against your delicate skin, while their grandeur adds a touch of elegance to any ensemble. Let us guide you through the magical journey of transforming ordinary fabrics into extraordinary hair accessories.
Embrace the Comfort of Padding
- Foam Padding: Elevate your headband’s coziness by adding a layer of foam padding. Cut the foam to the desired shape and size, ensuring it conforms perfectly to the headband’s base. Secure it firmly with adhesive or fabric glue, creating an ultra-soft and plush experience.
- Batting Warmth: Wrap your headband with batting for an insulating touch. This fluffy material provides added warmth, making your headband ideal for chilly winter days. Stitch the batting in place, ensuring it stays put and maintains its insulating properties.
Unleash the Beauty of Fabrics
- Velvet Luxe: Experience the epitome of luxury with velvet headbands. Their plush texture and vibrant colors add a touch of sophistication to any outfit. Experiment with various velvet shades and patterns to match your wardrobe’s diverse palette.
- Suede Sophistication: Suede’s soft and supple surface exudes an air of refinement. Choose from earthy tones to vibrant hues, allowing your headband to complement a wide range of styles. Its durability ensures lasting wear, making it a timeless accessory.
- Leather Elegance: Embrace the timeless allure of leather. Its rich texture and sturdy nature create headbands that are both stylish and durable. Opt for classic black or brown leather, or experiment with bold colors and exotic finishes to make a statement.
Embrace the Art of Construction
- Versatile Elastic Band: Choose an elastic band that provides both comfort and flexibility. Adjust its tension to ensure a snug fit without causing discomfort. This will create a headband that adapts to your head shape, offering a customized fit.
- Secure Stitching: Utilize strong thread to ensure your headband’s longevity. Stitch carefully, paying attention to the fabric’s texture and thickness. Use a sewing machine for even, precise stitches or hand-stitch for a more personal touch.
- Embellished Elegance: Enhance your headband’s aesthetics with embellishments. Add beads, sequins, or embroidery to create a unique and eye-catching accessory. Let your creativity soar and personalize your headband to suit your taste and style.
Step into the world of thick headbands, where comfort and fashion intertwine. Embrace the techniques outlined here, experiment with different fabrics and padding options, and unleash your creativity to design headbands that are both stylish and uniquely yours.
Knotted Headbands: Embrace the Art of Tying
In the realm of headwear, knotted headbands stand out as an epitome of style and comfort. Whether you’re seeking a touch of elegance or a dash of playfulness, these ingenious accessories can transform your look effortlessly.
Join me on an enchanting journey into the world of knotted headbands. Together, we’ll explore the intricate art of tying and discover an array of techniques to create unique and captivating headpieces.
Classic Knot
Let’s start with the timeless classic. Gather two ends of your headband and cross them over each other, creating a simple overhand knot. Tighten gently to secure. This versatile knot suits all headband widths and adds a subtle touch of sophistication.
Double Knot
For added stability and a more dramatic effect, try the double knot. Cross the ends over twice before tightening, forming a secure and chic double loop. This knot is ideal for wider headbands or those made from thicker fabrics.
Bow Tie Knot
Embrace the playful spirit with the bow tie knot. Cross one end over the other twice, forming a loose loop. Take the second end and thread it through the loop, then pull it back through the center. Adjust the loops to create a coquettish bow that adds a touch of whimsy to your ensemble.
Turban Knot
Step into the world of exotic allure with the turban knot. Position the headband at the back of your head and bring the ends forward. Cross them over each other and wrap them around the base of your skull, concealing the ends. Tuck in the remaining fabric to create a sleek and turban-inspired look.
Criss-Cross Knot
If you crave a bit of flair, the criss-cross knot is your go-to. Divide your headband into three sections. Cross the left section over the middle, then the right section over the middle. Repeat this criss-cross pattern until you reach the end, ensuring each section stays on top. This knot adds a touch of geometric intrigue to your headband.
Embellished Knots
Let your creativity soar with embellished knots. Incorporate beads, sequins, or bows into your knots to add a touch of sparkle or texture. You can also attach small charms or pendants to the headband for a more personalized look.
Tips for Tying Knotted Headbands
- Use a firm but not too tight knot to ensure comfort and prevent headaches.
- Experiment with different knot placements on your head to find the most flattering position.
- Choose a headband material that complements your hair color and adds a splash of vibrancy to your outfit.
- Accessorize your knotted headband with matching jewelry or a scarf to complete your look.
With these knotting techniques at your fingertips, you’re ready to embrace the captivating world of knotted headbands. Whether you’re seeking a subtle statement or a bold expression, these versatile accessories offer endless possibilities to enhance your style and feel effortlessly chic. So gather your headbands, let your creativity flow, and embrace the art of tying!
Twisted Headbands: A Creative Twist on Hair Accessories
Embark on an exciting journey into the world of twisted headbands, where creativity and style intertwine. These charming headbands, adorned with contrasting fabrics, are a true testament to the art of sewing.
Design Inspiration: A Tapestry of Colors and Textures
Let your imagination soar as you explore a myriad of design ideas for twisted headbands. Bold and vibrant fabrics dance together in harmonious contrast, creating an eye-catching spectacle. Soft and silky textures intertwine with crisp and structured ones, adding depth and dimension to each creation.
Crafting the Perfect Twist: A Step-by-Step Guide
-
Gather your materials: contrasting fabrics, scissors, a sewing machine, thread, and an iron.
-
Cut two strips of fabric to your desired length and width. The longer the strips, the wider the headband will be.
-
Place the strips perpendicular to each other and align their centers.
-
Twist one strip clockwise and the other counterclockwise, Intertwine them tightly and pin in place.
-
Secure the twisted strips together by sewing a straight stitch close to the edge of the fabric.
Finishing Touches: Enhancing Your Masterpiece
Once your headband is twisted and sewn, it’s time to add the final flourishes that will elevate its charm.
-
Ironing: Press the headband with a warm iron to flatten any creases and give it a professional finish.
-
Embellishments: Adorn your headband with beads, sequins, or ribbons to add a touch of whimsy and elegance.
-
Personalization: Customize your headband by stitching your initials or a favorite quote on it. This will make it a truly unique and meaningful accessory.
Twisted headbands are a delightful blend of creativity and craftsmanship. They offer endless possibilities for customization, allowing you to create hair accessories that perfectly complement your personality and wardrobe. Whether you prefer bold contrasts or subtle harmonies, there’s a twisted headband waiting to enhance your style.
Shirring Headbands: Add Volume and Texture to Your Wardrobe
Embark on a delightful journey into the world of shirring headbands, where fabric transforms into delicate ruffles and enchanting textures. With these easy-to-follow techniques, you’ll create headbands that elevate your style and celebrate your creativity.
Unveiling the Magic of Shirring Techniques
Shirring is a sewing technique that gathers fabric to form beautiful, accordion-like pleats. This technique adds volume and texture to your headbands, creating a stunning visual effect.
Step-by-Step Guide to Shirring Headbands
-
Choose your fabric: Opt for a lightweight, gather-friendly fabric like chiffon or silk.
-
Prepare the fabric: Fold the fabric in half lengthwise and mark the center. Using a sewing machine, sew two parallel lines of zigzag stitches along the marked line.
-
Gather the fabric: Gently pull on the bobbin threads of the zigzag stitches to gather the fabric.
-
Secure the gathers: Once the desired level of fullness is achieved, secure the gathers by sewing a straight stitch along the top and bottom edges of the shirred section.
-
Create the headband: Join the two ends of the shirred fabric to form a loop. Overlap the ends slightly to create a comfortable fit.
-
Add your own touch: Embellish your headband with beads, sequins, or any decorative elements that reflect your personal style.
Experiment with Variations
Don’t limit yourself to the basics! Experiment with different fabrics and shirring techniques to create headbands that express your unique taste.
-
Wide shirred headbands: Use a wider strip of fabric and gather it more loosely for a dramatic and voluminous look.
-
Twisted shirred headbands: Twist the shirred fabric before joining the ends to create a distinctive and stylish headband.
-
Multi-layered shirred headbands: Layer multiple strips of shirred fabric to add extra dimension and visual interest.
Elevate Your Accessory Game
Shirred headbands offer versatility and charm to your wardrobe. Whether you’re dressing up for a special occasion or adding a touch of elegance to your everyday look, these headbands are sure to become your go-to accessory.
Indulge in the joy of sewing and create shirred headbands that reflect your personality and embrace your creativity. Let your imagination soar as you experiment with colors, fabrics, and embellishments. The world of shirred headbands awaits your artistic touch!
Embellish Your Style with Bow Headbands: A Comprehensive Guide
Step into the enchanting world of bow headbands, where creativity meets comfort and style takes center stage. Whether you’re a seasoned seamstress or an aspiring crafter, this guide will provide you with all the essential techniques and inspirations to create captivating headbands adorned with beautiful bows.
Tying Techniques for a Tailored Touch
Craft exquisite bow headbands with a variety of tying methods:
- Classic Bow: This timeless look is created by simply crossing the ribbon over itself and forming a knot.
- Double Bow: Add a touch of sophistication by making two bows and attaching them together.
- Asymmetrical Bow: Play with proportions by creating bows with uneven loops, resulting in a whimsical and eye-catching design.
- Triple Bow: Elevate your headband with a cascade of three bows, adding dimension and drama.
Sewing Techniques for Strength and Refinement
For a more durable and polished look, consider sewing your bows onto the headband:
- Hand Sewing: Use needle and thread to securely attach the bow to the headband, ensuring a firm hold.
- Machine Sewing: Employ a sewing machine to swiftly and evenly stitch the bow onto the headband, creating a precise and professional finish.
- Embellishments: Enhance your bow with beads, sequins, or other adornments, adding a touch of glamour and personalization.
Fabric Choices for Endless Possibilities
Explore a myriad of fabrics to create headbands that match your unique style:
- Silk: Embrace the luxurious feel and elegant drape of silk for a sophisticated and timeless headband.
- Cotton: Choose breathable and absorbent cotton for comfortable everyday wear.
- Velvet: Indulge in the soft, velvety texture of velvet, perfect for adding a touch of warmth and elegance.
- Lace: Intricate lace adds a delicate and feminine touch to your headband.
Let your imagination soar as you experiment with different bow designs, fabrics, and embellishments. With the techniques outlined here, you can effortlessly create bow headbands that will turn heads and elevate your style.
Adorning Your Headbands with Ears: Unleash Your Creativity
Dive into the whimsical world of headband embellishments! If you’re tired of plain and ordinary headbands, it’s time to let your imagination soar and add a touch of playful charm to your headwear. Animal ears or other enchanting additions can transform your headbands into captivating accessories that will turn heads wherever you go.
Animal Safari on Your Headband:
Channel your inner wildlife enthusiast by adding adorable animal ears to your headband. From sleek cat ears to playful bunny ears or exotic tiger stripes, the possibilities are endless. Simply cut out shapes from felt or fabric, stitch them together, and secure them onto your headband. You’ll have a unique and eye-catching accessory that will make you the star of any jungle-themed party or Halloween gathering.
Fantasy Extravaganza:
Let your imagination run wild and embrace mythical creatures on your headbands. Craft ethereal unicorn horns, majestic dragon wings, or enchanting fairy ears. Use iridescent fabrics, sparkling sequins, and gleaming wire to create magical headpieces that will transport you to a realm of fantasy and wonder. These whimsical additions will ignite your creativity and spark conversations wherever you go.
Nature’s Embrace:
Bring the beauty of the natural world to your headbands with floral embellishments. Delicate petals, blooming flowers, and lush greenery can transform a simple headband into a walking garden. Cut out fabric shapes, stitch them together, and arrange them into enchanting floral designs. You’ll have a headband that celebrates the beauty of nature and adds a touch of freshness to any outfit.
Geometric Glamour:
Embrace the sleek and modern with geometric embellishments. Angles, lines, and geometric shapes can add a touch of sophistication to your headbands. Use metallic studs, colorful beads, or contrasting fabric to create eye-catching patterns. These geometric accents will elevate your headbands from ordinary to extraordinary, making them perfect for formal occasions or any time you want to add a touch of edge to your look.
Personal Touches:
Make your headband truly unique by adding personal embellishments. Sew on your favorite buttons, charms, or trinkets that hold special meaning to you. You can also embroider your initials or a special message onto your headband. These personal touches will create a one-of-a-kind accessory that will reflect your style and individuality.
Remember, the key to creating eye-catching headbands with ears is to let your creativity shine through. Experiment with different materials, colors, and shapes, and have fun with the process. Your unique headpieces will not only enhance your outfits but also become conversation starters that will leave a lasting impression.
Headbands with Embellishments: Adorn Your Headbands with Shimmer and Style
For a touch of glamour and personality, embellishments can transform your headbands into captivating accessories. Unleash your creativity and express yourself with these inspiration-packed ideas.
Beads:
– Scattered Sparkle: String tiny beads along the headband’s length for a subtle yet eye-catching effect.
– Clustered Charm: Create playful focal points by grouping beads together in shimmering clusters.
– Geometric Patterns: Arrange beads in geometric shapes, such as stars, hearts, or chevrons, for a structured and sophisticated look.
Sequins:
– Shimmering Stripes: Embroider rows of sequins along the headband’s edges for a glamorous accent.
– All-Over Sparkle: Cover the entire headband with sequins for a dazzling and festive effect.
– Intricate Designs: Use sequins to create intricate patterns, such as flowers, butterflies, or celestial bodies.
Other Embellishments:
– Ribbons: Tie or weave ribbons around the headband for a pop of color and added texture.
– Lace Inserts: Delicate lace panels can enhance the headband with a touch of elegance and sophistication.
– Pom-poms: Playful pom-poms instantly cheer up a headband, making it perfect for casual wear.
Tips for Embellishing:
– Securely Sew: Use strong thread and small stitches to ensure your embellishments stay in place.
– Consider Placement: Plan the placement of embellishments carefully to create a balanced and visually appealing design.
– Experiment with Combinations: Mix and match different embellishments to create unique and eye-catching combinations.
By incorporating embellishments into your headbands, you can elevate them from simple accessories to stunning statement pieces that will complement any outfit and add a touch of sparkle to your style.
