How To Paint Hardwood Floors For A Stunning Transformation
To paint hardwood floors, gather essential materials (sandpaper, paint, polyurethane, brushes/rollers) from painting supplies stores. Wear protective gear and prepare the floor by sanding. Prime the surface, then apply paint and polyurethane using specific techniques. Consider paint colors and finishes. Clean up properly and ventilate the area.
Essential Materials and Equipment for Flawless Hardwood Floor Refinishing
Embark on your hardwood floor refinishing journey by gathering the essential materials that will transform your space into a work of art. The cornerstone of your toolkit is the hardwood floor itself, the canvas upon which your masterpiece will be painted.
Next, arm yourself with paint, the lifeblood that will bring your vision to fruition. Choose wisely, considering the desired color and finish. From warm, inviting shades to sleek, modern hues, the possibilities are endless.
To ensure a smooth and long-lasting finish, primer is your indispensable ally. It creates a stable base for the paint to adhere, preventing peeling and chipping down the line.
Polyurethane, the final touch, provides a protective barrier against wear and tear, preserving your newly refinished floor for years to come. Choose from a range of sheen levels to achieve the perfect balance of durability and aesthetics.
Elevate your painting experience with quality paintbrushes and rollers. Their smooth bristles and even application will bring out the best in your paint, creating a flawless finish.
Sandpaper in various grits will become your trusted companion throughout the refinishing process. It will remove old paint, smooth uneven surfaces, and prepare the floor for its transformation.
To keep dust at bay, tack cloths are essential for removing any lingering debris. Their clingy surface traps fine particles, leaving the floor pristine for painting.
Drop cloths will shield your surroundings from paint splatters, safeguarding furniture and walls from accidental spills.
Respirators and sanders are vital safety gear that protect your lungs and health during the sanding process. Invest in these essential items to ensure a safe and successful refinishing experience.
Don’t forget your vacuum cleaner to keep the work area clean and dust-free throughout the project.
A bucket, stirring stick, and painter’s tape round out your arsenal, providing practical assistance and added precision.
Finally, ensure your floor is perfectly level using a level. This seemingly simple tool will ensure that your newly painted floor is flat and visually pleasing.
Essential Materials and Equipment for Refinishing Hardwood Floors
Essential Materials:
- Hardwood floors: Choose the type of hardwood that best suits your needs and budget, such as oak, maple, or cherry.
- Paint: Opt for a high-quality paint specifically designed for hardwood floors. Consider factors like durability, color, and finish.
- Primer: Apply a coat of primer before painting to enhance paint adhesion and coverage.
- Polyurethane: This clear finish protects the painted floor from wear and tear. Choose a polyurethane with the desired sheen (e.g., satin, semi-gloss, or gloss).
Essential Equipment:
- Paintbrush/roller: Use a brush for detailed areas and a roller for larger surfaces. Select brushes and rollers compatible with your chosen paint.
- Sandpaper: Purchase sanding blocks or electric sanders with various grits (fine, medium, and coarse) for surface preparation.
- Tack cloth: Remove dust and debris from the floor before painting or applying polyurethane.
- Drop cloths: Protect your furniture and surrounding areas from accidental paint spills.
- Respirator: Wear a respirator to avoid inhaling harmful fumes from paint and polyurethane.
- Sander: Electric sanders speed up the sanding process, but manual sanders provide more control.
- Vacuum cleaner: Thoroughly vacuum the floor before and after sanding to remove dust and debris.
- Bucket: Use a bucket for mixing paint and polyurethane.
- Stirring stick: Stir paint and polyurethane thoroughly to ensure an even consistency.
- Painter’s tape: Protect baseboards and moldings from paint or polyurethane.
- Level: Check the floors for levelness before painting to ensure a smooth finish.
The Importance of Personal Protective Equipment (PPE) in Hardwood Floor Refinishing
When embarking on a hardwood floor refinishing project, it’s crucial to prioritize your safety by employing proper personal protective equipment (PPE). This essential gear shields you from the hazards inherent in this task, ensuring your well-being throughout the process.
Protecting Your Lungs: Respirator
Dust particles from sanding and polyurethane fumes can irritate your respiratory system. A respirator effectively traps these contaminants, safeguarding your lungs from harm. Choose a model with the appropriate filter for your specific project.
Shielding Your Eyes: Safety Goggles
Sandblasting and paint particles can pose a threat to your eyes. Wear safety goggles to protect them from irritation and potential injury. Ensure the goggles fit snugly to prevent particles from seeping in.
Protecting Your Skin: Gloves and Coveralls
Chemicals in paint and polyurethane can cause skin irritation. Gloves create a barrier between your skin and these substances, minimizing exposure. Wear coveralls to prevent paint splashes from landing on your clothing.
Preventing Slips and Falls: Non-Slip Footwear
Slick floors from paint or polyurethane can increase the risk of accidents. Non-slip footwear provides traction, enhancing stability and reducing the likelihood of slips or falls.
Choosing the Right PPE for Your Task
The specific PPE you need will depend on the scope of your project. For minor touch-ups, a dust mask and gloves may suffice. However, for extensive refinishing, a full respirator, goggles, coveralls, and non-slip footwear are essential.
Remember, using PPE is not just a recommendation; it’s a necessity for a safe and successful hardwood floor refinishing project. Prioritize your well-being by donning the appropriate protective gear and enjoy the peace of mind it brings.
Techniques for Refinishing Hardwood Floors Like a Pro
Painting
To begin, apply a coat of high-quality paint specifically designed for hardwood floors using a brush or roller. Use smooth, even strokes and allow the paint to dry completely before proceeding.
Sanding
Next, sand the floor using a sander to remove the old paint or finish. Start with a coarse grit sandpaper and gradually move to a finer grit to achieve a smooth surface. Be sure to vacuum the floor after sanding to remove any dust.
Priming
After sanding, apply a coat of primer to the floor. This will help to create a smooth, uniform surface for the paint or polyurethane and improve adhesion. Allow the primer to dry completely.
Applying Polyurethane
Finally, apply polyurethane to the floor to protect it and give it a glossy finish. Use a brush or roller, and apply thin, even coats. Allow each coat to dry completely before applying the next. Depending on the desired finish, multiple coats of polyurethane may be necessary.
Tips for a Professional-Looking Finish
- Use high-quality paints, primers, and polyurethane specifically designed for hardwood floors.
- Wear proper personal protective equipment (PPE), including a respirator, gloves, and safety glasses, to protect yourself from fumes and dust.
- Allow ample drying time between each step for optimal adhesion and durability.
- Sand in the direction of the wood grain to prevent scratches.
- Use a tack cloth to remove any remaining dust before applying paint or polyurethane.
- Apply polyurethane thinly and evenly to avoid runs or bubbles.
- Allow the floor to cure completely for the recommended time before walking on it or replacing furniture.
**Refinishing Hardwood Floors: A Step-by-Step Guide to a Professional-Looking Finish**
As your loyal companions in home improvement, we understand the desire to breathe new life into your treasured hardwood floors. They’ve witnessed countless memories and endured countless footsteps, so it’s only natural to want to restore their former glory. With our expert guidance, we’ll embark on a journey to refurbish your hardwood floors, transforming them into a dazzling centerpiece of your home.
**Materials and Equipment: Gathering the Essential Tools**
Before we dive into the transformation, let’s gather our trusty companions: hardwood cleaner, paint (choose a shade that complements your décor), primer, polyurethane, paintbrush or roller, sandpaper, tack cloth, drop cloths, respirator, sander, vacuum cleaner, bucket, stirring stick, painter’s tape, and level. These essential tools will ensure a meticulous and professional-looking finish.
**Step 1: Laying the Foundation with Meticulous Preparation**
Begin by thoroughly cleaning the floor with hardwood cleaner. Once dry, don any PPE to protect yourself from dust and fumes. Carefully remove any fixtures or furniture that may hinder your progress.
**Step 2: Sanding to Perfection: A Smooth Canvas for Beauty**
Equip your sander with 120-grit sandpaper and start sanding in the direction of the wood grain. Work in small sections, gradually moving to finer grits (150 and 220) to achieve a smooth and even surface. Utilize the tack cloth frequently to remove dust and debris.
**Step 3: Priming for Success: A Foundation for Adhesion**
Stir the primer thoroughly and apply a thin, even coat using a paintbrush or roller. Allow the primer to dry completely before proceeding.
**Step 4: Painting with Precision: The Canvas Comes to Life**
Once the primer has dried, it’s time to transform your floors with paint. Stir the paint well and apply a thin, even coat in the direction of the wood grain. Allow the first coat to dry thoroughly before applying a second coat for full coverage.
**Step 5: Sealing the Deal with Polyurethane: Protection and Shine**
After the paint has dried, it’s time to seal and protect your masterpiece with polyurethane. Apply a thin, even coat using a paintbrush or roller, working in the direction of the wood grain. Allow the first coat to dry completely before applying a second coat for maximum durability and shine.
**Step 6: Finishing Touches: A Testament to Precision**
Once the polyurethane has dried, remove any painter’s tape and touch up any imperfections. Congratulations! Your hardwood floors now gleam with a professional-looking finish, ready to impress all who behold their beauty.
**Tips and Tricks for a Flawless Finish**
- Ventilate your space: Open windows and doors to ensure proper ventilation while working with paint and polyurethane.
- Take your time: Rushing through the process can lead to a less-than-desired finish. Allow ample time for each step to dry thoroughly.
- Use a level: Ensure your sanded floor is level before painting to avoid potential imperfections.
- Experiment with colors: Don’t be afraid to play with different paint colors and finishes to find the perfect match for your décor.
- Protect your floors: Once your floors are refinished, protect them from scratches and wear by using rugs and furniture pads.
With these steps and tips in mind, you’re well on your way to giving your hardwood floors the makeover they deserve. Enjoy the satisfaction of creating a stunning and inviting space that will serve as the backdrop for countless future memories.
Selecting Paint Colors and Finishes for Hardwood Floors
When embarking on your hardwood floor refinishing journey, paint selection is paramount to achieving your desired aesthetic and ensuring the floor’s functionality. Navigate the vast array of hues and finishes available, each offering distinct characteristics that can dramatically transform your space.
Neutral Hues: Timeless Elegance
- White: Brightens and expands spaces, creating an airy and inviting ambiance.
- Gray: Sophisticated and versatile, complemented by both warm and cool accents.
- Black: Bold and dramatic, anchoring the room with a touch of intrigue.
Colorful Accents: Bold Statements
- Blue: Calming and serene, evokes a sense of tranquility and relaxation.
- Green: Refreshes and revitalizes, connecting you with nature’s tranquility.
- Red: Energizing and passionate, infuses spaces with warmth and vibrancy.
Gloss vs. Satin: Sheen Considerations
The sheen of your paint influences the floor’s appearance and durability.
- Gloss: Highly reflective, giving floors a shiny and formal look. Provides exceptional resistance to wear and tear.
- Satin: Soft and subtle sheen, providing a more muted and understated effect. Balances durability and elegance.
Choosing the Right Finish
- Lacquer: Quick-drying, high-gloss finish that offers superior hardness and durability.
- Polyurethane: Oil-based or water-based finish, offering excellent protection and a wide range of sheens.
- Oil: Penetrates the wood, creating a rich and natural look with minimal sheen.
Ultimately, your paint choice should align with your desired style, room usage, and lifestyle. Consult with a professional or research different options to find the perfect combination that transforms your hardwood floors into a masterpiece.
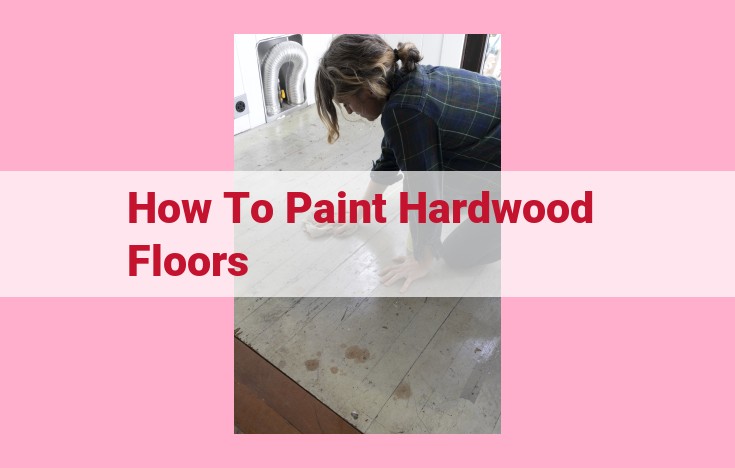
Preparation of the Floor
Before beginning the refinishing process, proper preparation of the floor is essential. Clean the floor thoroughly to remove any dirt, debris, or wax. Use a slightly damp cloth or mop, but avoid over-saturating the wood. Once the floor is clean, allow it to dry completely.
Next, sand the floor to remove any existing finish or imperfections. Start with a coarse-grit sandpaper, such as 80-grit, and gradually move to a finer grit, such as 120-grit or 150-grit. Sanding should be done in the direction of the wood grain to avoid damaging it.
Once the floor is sanded, vacuum it thoroughly to remove any sanding dust. Use a tack cloth to pick up any remaining dust or debris. Finally, apply painter’s tape to protect any areas that should not be painted, such as baseboards or walls.
Ventilation
Proper ventilation is crucial when working with paints and chemicals. Open windows and doors to allow for good air circulation. Consider using a fan to increase airflow if necessary. Wear a respirator to protect yourself from inhaling harmful fumes.
Cleanup Techniques
Once the refinishing is complete, clean up thoroughly to remove any remaining paint or debris. Use a damp cloth to wipe down all surfaces that were painted or sanded. Dispose of all used materials and equipment properly.
Remember, taking the time to properly prepare the floor, ensure adequate ventilation, and clean up effectively will help you achieve a professional-looking and durable refinished hardwood floor.
