Diy Chalkboard Paint: Create Washable Writing Surfaces
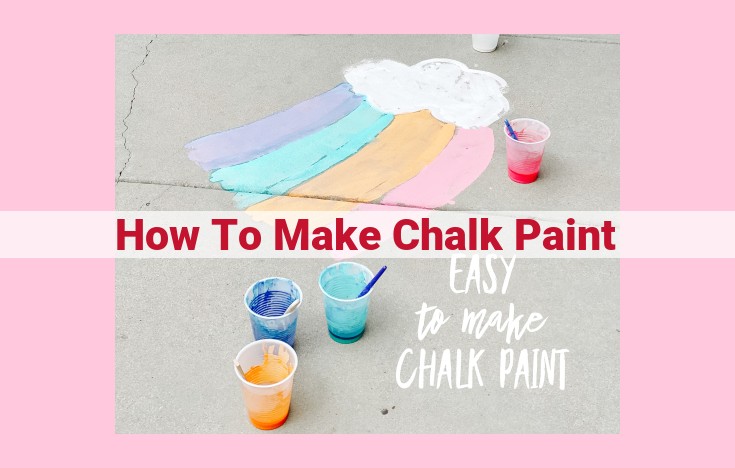
To make chalkboard paint, mix calcium carbonate, plaster of Paris, and water in a bucket. Whisk until smooth. Apply thin layers of paint to the desired surface, allowing each layer to dry. Use it to create writable surfaces on furniture, walls, or crafts. Allow the paint to cure for optimal durability. For a smooth finish, paint in even strokes and avoid overworking the surface. Experiment with colors and decorative accents. Clean with a damp cloth and repair or touch up as needed.
Understanding Chalkboard Paint:
- Define chalkboard paint and its components.
- Explain its unique properties and uses.
Understanding Chalkboard Paint: A Guide to Its Composition and Applications
Embark on a journey into the fascinating realm of chalkboard paint, a versatile and imaginative tool that transforms ordinary surfaces into extraordinary expressions.
Composed of calcium carbonate (think of it as the backbone of the paint) and plaster of Paris, chalkboard paint possesses unique properties that set it apart from traditional paints. Its matte finish mimics the beloved texture of a classic chalkboard, offering a receptive surface for vibrant chalk marks.
Beyond its nostalgic charm, chalkboard paint boasts a remarkable versatility that knows no bounds. It effortlessly adheres to various surfaces, including wood, metal, and walls, inviting you to unleash your creativity on furniture, walls, and even crafts. Transform a plain dresser into a whimsical chalkboard for daily reminders or adorn your kitchen with a chalkboard wall, perfect for scribbling down recipes or leaving affectionate messages.
Required Materials and Tools for Chalkboard Paint Creation
When embarking on your chalkboard paint adventure, it’s imperative to gather the right ingredients and tools. The foundation of chalkboard paint lies in three essential materials:
- Calcium Carbonate: This fine white powder forms the base of the paint, providing its characteristic bright white color and matte finish.
- Plaster of Paris: Serving as the binder, plaster of Paris adds durability and adherence to the paint, ensuring it adheres to various surfaces.
- Water: As the liquid medium, water activates and combines the other ingredients, giving the paint its workable consistency.
To achieve a smooth and even application, you’ll need a few handy tools:
- Bucket or Container: A sturdy bucket or container with adequate capacity is essential for mixing the paint ingredients thoroughly.
- Whisk: A whisk is an indispensable tool for blending the ingredients into a lump-free, uniform mixture.
- Measuring Tools: Accurate measuring cups and spoons ensure precise proportions of each ingredient, resulting in a balanced paint consistency.
With these materials and tools in hand, you’re well-equipped to unleash your creativity and transform ordinary surfaces into a canvas for expression.
Preparation and Application: A Step-by-Step Guide
Mixing the Ingredients:
To create your very own chalkboard paint, gather your essential materials: calcium carbonate, plaster of Paris, and water. Precise quantities depend on the desired amount of paint. In a spacious bucket, whisk together the calcium carbonate and plaster of Paris until they form a smooth powder. Gradually add water while whisking vigorously to prevent lumps. The ideal consistency should resemble thin pancake batter.
Applying the Paint:
Before applying the paint, ensure that your surface is clean and free from any dirt or debris. For a flawless finish, apply the paint in thin, even layers. Use a brush or roller, moving in smooth and consistent strokes. Allow each layer to dry completely before applying the next. Depending on the surface and desired opacity, you may need 2-3 coats.
Tips for Success:
For a glassy smooth finish, sand the final layer lightly with fine-grit sandpaper. To create custom colors, add a few drops of acrylic paint to the mixture. For a distressed look, apply the paint in uneven strokes and sand heavily after it dries. With a little patience and attention to detail, you can transform any surface into a unique and functional chalkboard.
Versatile Applications of Chalkboard Paint
Chalkboard paint has emerged as a versatile medium that transcends its traditional use on school blackboards. Its unique properties and ease of application make it a popular choice for a wide range of creative projects, transforming ordinary surfaces into interactive and artistic masterpieces.
Furniture Makeovers:
Chalkboard paint breathes new life into old furniture pieces. From chairs to tables to dressers, apply it to create a functional and stylish statement. Its porous surface encourages customization with chalk drawings, notes, or motivational quotes, making each piece a one-of-a-kind treasure.
Wall Art:
Unleash your inner artist by turning walls into giant chalkboards. Paint an entire accent wall or create a dedicated space for brainstorming, leaving messages, or showcasing your artistic creations. The non-porous nature of the paint ensures that your chalk drawings can be wiped clean and replaced with fresh inspiration at any time.
Craft Projects:
Chalkboard paint finds its way into countless craft projects, adding a touch of whimsy and practicality to everyday items. Paint small wooden boxes to store trinkets or create personalized coasters that can double as notepads. The possibilities are endless, inviting you to experiment and express your creativity.
Inspirational Projects:
Incorporate chalkboard paint into your daily routine to foster inspiration and productivity. Paint a small chalkboard on your desk for quick reminders, create a weekly menu board in the kitchen, or design a motivational wall in your study. With its ability to be constantly updated, chalkboard paint empowers you to stay organized, inspired, and connected to your thoughts.
Drying Time and Curing: A Crucial Process for Chalkboard Paint Mastery
After the excitement of applying your chalkboard paint, it’s now time for patience and care. The drying and curing process is paramount to ensure the longevity and optimal performance of your chalkboard surface.
Understanding the Drying Process
As the chalkboard paint is applied, the water content begins to evaporate. This evaporation process leads to the formation of a solid film on the surface, effectively creating the chalkboard. The drying time varies depending on factors such as temperature, humidity, and the thickness of the paint application.
The Importance of Curing
Once the paint has dried, it enters its curing stage. Curing is a chemical process where the paint bonds firmly to the surface, gaining strength and durability. Proper curing ensures that the chalkboard paint adheres well, resists scratches and stains, and provides a smooth writing surface.
The curing time can take anywhere from a few days to a few weeks. It’s crucial to allow the paint to cure fully before subjecting it to heavy use. Using the chalkboard surface prematurely can damage the paint and interfere with its performance.
Tips for Optimal Curing
To ensure proper curing, follow these tips:
- Control the Environment: Maintain a temperature between 60°F and 80°F (16°C and 27°C) during the curing process. Avoid extreme heat or cold, as it can hinder curing.
- Provide Ventilation: Adequate airflow helps evaporate moisture and speeds up the curing process. Consider opening windows or using fans during the curing period.
- Avoid Heavy Use: Resist the temptation to write or draw on the chalkboard surface until it has completely cured. Heavy use can disturb the bonding process and damage the paint.
- Touch Up if Needed: After the curing process, inspect the chalkboard surface for any missed spots or areas that need touch-ups. Apply a second coat of paint to these areas and allow for additional curing, ensuring a uniform finish.
By following these tips, you can ensure that your chalkboard paint achieves its full potential, providing you with a durable and enjoyable writing surface for years to come.
Crafting the Perfect Chalkboard Canvas: Achieving a Smooth, Flawless Finish
When transforming surfaces into expressive chalkboard masterpieces, achieving a smooth, non-streaky finish is paramount. Unleash your inner perfectionist with these practical tips:
-
Stir with Love: Before diving into application, meticulously stir the paint to ensure its consistency. A smooth, lump-free mixture will gracefully glide onto surfaces, preventing unsightly streaks and clumps.
-
Thin is In: Don’t be afraid to dilute the paint with a bit of water. A thinner consistency will make it easier to apply evenly, preventing thick, uneven layers that are prone to streaking.
-
Brush Stroke Mastery: Embrace the art of painting in long, even strokes. Avoid short, choppy strokes that can create an unsightly textured surface.
-
Cross-hatch Technique: For a professional-looking finish, employ the cross-hatch technique. Apply the first coat in one direction, letting it completely dry. Then, apply a second coat perpendicular to the first, ensuring a smooth and even coverage.
Express Your Creativity with Custom Colors and Accents
Chalkboard paint transcends the boundaries of traditional black. Explore a kaleidoscope of custom colors to match your décor or express your artistic whims. Simply mix the paint with acrylic paint or fabric dye in small quantities until you achieve your desired hue.
Add a touch of sparkle and shimmer by incorporating glitter or metallic powders into the paint. For decorative accents, use stencils or masking tape to create elegant patterns or playful designs.
Maintaining and Preserving Your Chalkboard Surfaces
Chalkboard paint has become an increasingly popular choice for adding a touch of creativity and functionality to various surfaces. However, to ensure the longevity and optimal performance of your chalkboard creations, proper maintenance and care are essential.
Cleaning:
Keep your chalkboard surfaces clean and free of smudges for optimal writing and erasing experiences. Utilize a damp cloth or sponge to gently wipe away chalk dust or any other residue. Avoid using abrasive cleaners or harsh chemicals, as they can damage the paint’s surface.
Repairing and Touching Up:
If you notice any chips, scratches, or other imperfections on your chalkboard, don’t fret. Repairing and touching up is a straightforward process that will keep your surface looking fresh and functional.
- Clean the damaged area to remove any dust or debris.
- Apply a small amount of chalkboard paint directly to the affected area, using a fine-tipped brush.
- Allow the paint to dry completely before using the chalkboard again.
Extending the Life of Your Chalkboard:
To further enhance the durability and longevity of your chalkboard, consider the following tips:
- Proper Curing: Allow the paint to cure for the recommended time before using the chalkboard. Curing ensures the paint is fully hardened and can withstand regular use.
- Avoid Direct Sunlight: Prolonged exposure to direct sunlight can cause the paint to fade or discolor. Place your chalkboard in a shaded area or protect it with a clear sealant.
- Use Chalk Only: Only use chalk or chalk markers on your chalkboard. Other writing instruments, such as permanent markers or pens, can damage the surface.
- Erase Regularly: Regular erasing prevents chalk buildup and keeps the surface smooth and responsive.
- Store Chalk Appropriately: Store chalk in a dry place to prevent it from absorbing moisture and becoming less effective.
By following these simple maintenance practices, you can ensure that your chalkboard surfaces remain vibrant, functional, and a source of creative expression for years to come.
