Seo-Optimized Title:comprehensive Guide: Gluing Diamond Painting Canvas To A Frame For A Stunning Display
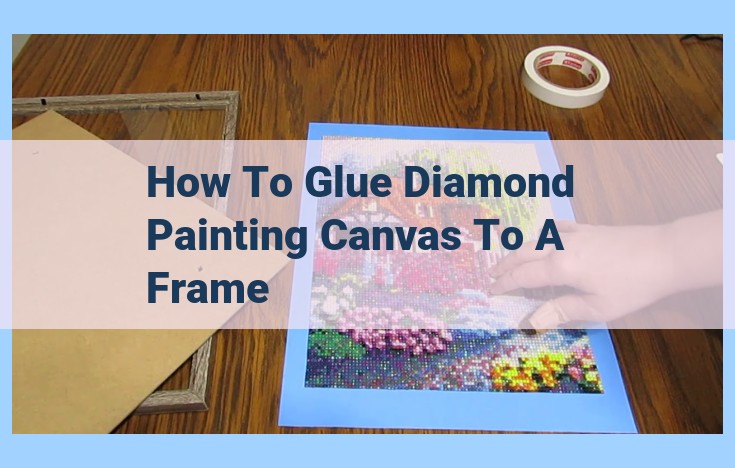
To glue a diamond painting canvas to a frame, apply a thin layer of glue evenly over the back of the canvas using a paintbrush or sponge. Carefully place the canvas inside the frame and align it against the edges. Use weights or clamps to hold the canvas in place while it dries. Allow ample time for the glue to set fully before removing the weights or clamps.
Diamond Painting Canvas: Canvas that holds the design and adhesive for the diamonds.
Essential Materials for Diamond Painting: The Diamond Painting Canvas
In the realm of diamond painting, the canvas serves as the vibrant foundation upon which your artistic masterpiece takes shape. It’s more than just a blank surface; it’s a canvas adorned with intricate designs and meticulously applied adhesive to guide the placement of your glittering diamonds.
This adhesive holds the key to transforming your canvas into a shimmering work of art. It’s a specially formulated substance that firmly grips each diamond, ensuring it adheres securely and maintains its brilliance. As you meticulously apply each diamond, the canvas becomes a vibrant tapestry, gradually revealing the hidden image that awaits.
Whether you’re a seasoned diamond painting enthusiast or embarking on your first artistic adventure, choosing the right canvas is crucial. It’s the foundation of your creation, so look for a high-quality canvas with a design that captures your imagination. Let your creativity soar as you transform this blank canvas into a dazzling masterpiece that will illuminate your home and bring joy to your heart.
Picture Frames for Diamond Painting: Enhancing Your Art, Protecting Your Creation
As you embark on the enchanting journey of diamond painting, the right picture frame can elevate your finished masterpiece into a cherished work of art. A well-chosen frame not only secures your creation but also displays it in its full glory, protecting it from damage and enhancing its visual appeal.
Choosing the Perfect Frame
Selecting the ideal picture frame for your diamond painting is crucial. Consider the design of your artwork and choose a frame that complements its aesthetics. A classic wooden frame exudes elegance and sophistication, while a sleek metallic frame adds a touch of modern flair. You can opt for ornate frames with intricate carvings or minimalist frames with clean lines that emphasize the painting itself.
Size and Style
The size of your frame should correspond to the dimensions of your diamond painting. A frame that is too small will crowd the artwork, while a frame that is too large will dwarf it. The style of the frame should also harmonize with the subject matter of the painting. For example, a landscape painting might be framed in an open-grained wooden frame with a rustic finish, while a portrait could be framed in an intricate gilded frame that adds an air of grandeur.
Protection and Preservation
Picture frames play a vital role in protecting your diamond painting from external elements. A glass pane prevents dust, dirt, and moisture from damaging the delicate surface. Framing also stabilizes the canvas, preventing it from warping or sagging over time. By investing in a high-quality frame, you ensure the longevity and preservation of your artistic creation.
Adhesives for Diamond Painting: Essential Choices for a Flawless Masterpiece
When it comes to diamond painting, the adhesive you choose plays a crucial role in determining the longevity and beauty of your masterpiece. In this article, we delve into the world of diamond painting glues, exploring different methods and helping you make the right choice for your project.
Wet Glue Method: A Precise and Durable Bond
The wet glue method involves applying a liquid adhesive directly to the canvas. This method offers excellent adhesion, allowing diamonds to be securely and precisely positioned. The adhesive typically requires drying time, so it’s essential to work in sections to avoid smudging.
Dry Glue Method: Convenience and Simplicity
The dry glue method utilizes glue sheets or adhesive dots to attach diamonds to the canvas. This method eliminates the need for liquid glue, making it more convenient and less messy. Glue sheets or dots are typically pre-cut to the size of the diamonds, ensuring a uniform and orderly finish.
Choosing the Right Glue for Your Project
The choice between wet and dry glue depends on your project’s size, complexity, and preferred working style. For smaller or more intricate projects, the wet glue method offers greater precision and control. For larger projects or those seeking a faster and easier process, dry glue may be a better option.
Additional Tips for Adhesive Success
- Use high-quality glue: Choose a glue specifically designed for diamond painting, as it will provide the best adhesion and durability.
- Apply glue evenly: Avoid applying too much glue, as it can cause clumping and smudging.
- Allow adequate drying time: Follow the manufacturer’s instructions for the specific glue you use to ensure a strong bond.
- Use weights or clamps: If necessary, use weights or clamps to hold the canvas in place while the glue dries, preventing warping or distortion.
With the right adhesive and careful application, you can create a stunning diamond painting that will be a source of pride and enjoyment for years to come.
Materials and Tools for Diamond Painting: Gluing Essentials
In the realm of diamond painting, adhering the shimmering diamonds to the canvas is a crucial step that demands precision and the right tools. Enter the paintbrush or sponge: your trusty allies in applying glue to the canvas with finesse.
For those who prefer a direct and traditional approach, a paintbrush offers a tactile experience. Its soft bristles gently caress the canvas, leaving a thin and even layer of glue. This method grants you control over the glue’s placement, allowing you to fill in specific areas or outline contours with ease.
Alternatively, a sponge offers a more efficient and time-saving solution for larger areas. Its porous structure absorbs glue generously, enabling you to spread it evenly over the canvas in broad strokes. The sponge’s wider surface area ensures a uniform distribution of glue, minimizing the risk of uneven adhesion.
Regardless of your preferred method, it’s essential to choose tools that are clean and free of debris to prevent contamination of the glue. Remember, the adhesive’s integrity is paramount for a flawless diamond painting masterpiece.
Essential Tools and Materials: Weights or Clamps
In the world of diamond painting, where meticulous precision and steady hands are paramount, the importance of weights or clamps cannot be overstated. These ingenious tools play a crucial role in holding the delicate canvas in place, ensuring that the diamonds are securely adhered during the drying process.
Imagine yourself as a master surgeon, meticulously crafting an intricate artwork. The last thing you want is for your masterpiece to suffer from wobbly lines or misaligned diamonds due to an unstable canvas. Enter weights or clamps, your trusty assistants that will steadfastly hold the canvas in its designated position, providing a stable foundation for your artistic endeavors.
These indispensable tools come in a variety of shapes and sizes, catering to the diverse needs of diamond painters. Whether you prefer heavy weights that firmly press down on the canvas or adjustable clamps that gently secure the edges, there is an option that will suit your specific requirements.
Why Use Weights or Clamps?
The benefits of using weights or clamps extend beyond mere convenience. By keeping the canvas firmly in place, you are not only ensuring a uniform and precise application of glue but also preventing the canvas from buckling or warping as it dries. This is especially important for larger paintings, where even the slightest movement can compromise the final result.
Types of Weights and Clamps
As mentioned earlier, there is a wide range of weights and clamps available for diamond painting. Let’s explore some of the popular options:
-
Weights: These are typically made of metal or stone and are designed to provide heavy, evenly distributed pressure on the canvas. They are particularly useful for large-scale paintings or for areas that require extra adhesion.
-
Clamps: Clamps, on the other hand, are usually adjustable and can be attached to the edges of the canvas. They allow for more precise positioning and can be easily repositioned as needed.
-
Combination Weights and Clamps: Some tools combine the functionality of both weights and clamps, providing a versatile solution that adapts to various painting surfaces and requirements.
How to Use Weights or Clamps
Using weights or clamps is a straightforward process:
- Prepare the Canvas: Before applying glue, place the canvas on a flat surface.
- Position the Tools: Arrange the weights or clamps around the perimeter of the canvas, ensuring that they are evenly spaced.
- Apply Glue: Apply a thin layer of glue to the designated area on the canvas.
- Secure the Diamonds: Using a diamond painting pen or tweezers, carefully place the diamonds onto the glued surface.
- Wait for Drying: Allow the glue to dry completely before removing the weights or clamps.
By following these simple steps, you can ensure that your diamond painting canvas remains perfectly flat and stable during the drying process, maximizing the adhesion of the diamonds and creating a stunning work of art.
Wet Glue Method: Using liquid glue to attach the diamonds.
Wet Glue Method: A Precise Technique for Diamond Painting
In the world of diamond painting, the wet glue method stands out as a technique that combines precision and artistry. This method involves using liquid glue to adhere the shimmering diamonds to the canvas, creating a mosaic that captivates the eye.
-
Precision Placement: With the wet glue method, you have complete control over the placement of each diamond. The liquid glue allows you to adjust and reposition the diamonds until you achieve the perfect arrangement.
-
Strong Bond: The liquid glue dries clear and creates a strong bond between the diamonds and the canvas. This ensures that your artwork will withstand the test of time, preserving its vibrancy for years to come.
-
Smooth Surface: Unlike other methods, the wet glue method produces a smooth and even surface. The liquid glue fills in any gaps between the diamonds, resulting in a seamless and polished finish.
Mastering the Wet Glue Method
Embracing the wet glue method is a delightful experience that requires a touch of patience and attention to detail. Here are some tips to help you achieve stunning results:
-
Apply a Thin Layer of Glue: Use a paintbrush or sponge to apply a thin and even layer of glue to the area where you want to place the diamonds. Avoid using too much glue, as it can make the diamonds difficult to work with.
-
Use Tweezers for Precision: Tweezers provide excellent control and precision when placing the diamonds. Gently pick up each diamond and carefully place it on the glued area.
-
Press Gently: After placing the diamond, press down gently to secure it in place. Avoid applying excessive pressure, as this can damage the diamond or the canvas.
-
Allow to Dry: Once all the diamonds are in place, allow the glue to dry completely before moving or framing the artwork. Drying times can vary depending on the type of glue used, so refer to the manufacturer’s instructions.
By following these steps, you can harness the power of the wet glue method to create diamond paintings that are both beautiful and long-lasting. Experience the joy of precision and artistry as you transform your canvas into a shimmering masterpiece with every sparkling diamond.
Dry Glue Method: A Simplified Approach to Diamond Painting
In the realm of diamond painting, meticulously placing tiny shimmering facets onto a canvas to create stunning works of art, the dry glue method stands out for its ease and convenience. Unlike the wet glue method, which requires liquid glue, this approach utilizes the magic of glue sheets or adhesive dots to effortlessly secure the diamonds.
With glue sheets, you simply peel off a portion of the protective backing and align it with the designated area on the canvas. The glue is already evenly distributed, freeing you from the hassle of applying it yourself. Precision is key when using glue sheets, as once placed, the diamonds cannot be easily repositioned without damaging them.
Adhesive dots, on the other hand, offer a more precise and flexible approach. These tiny dots come in various sizes, allowing you to choose the one that best fits the diamond’s surface. By applying the dot directly to the back of the diamond, you gain greater control over its placement and can easily adjust it if needed.
The dry glue method shines in its simplicity and ease of use, making it an ideal choice for beginners or those who prefer a hassle-free experience. However, it’s important to note that the bond created by glue sheets or adhesive dots may not be as strong as that provided by liquid glue. For larger canvases or projects that require more durability, you may prefer the wet glue method.
Essential Tools for Diamond Painting: Scissors
The Importance of Scissors
In the realm of diamond painting, scissors are an indispensable tool. They are the precision instruments that help you effortlessly sculpt your masterpiece, from trimming excess canvas to removing stray glue. With the right pair of scissors, you can achieve clean, precise cuts that enhance the overall aesthetics of your artwork.
Selecting the Ideal Scissors
When choosing scissors for diamond painting, there are several key factors to consider:
- Sharpness: The sharpness of the blades is crucial for making clean, effortless cuts. Look for scissors with high-quality blades that can easily cut through both canvas and glue.
- Ergonomics: Comfort is paramount when working on a prolonged project like diamond painting. Opt for scissors with comfortable handles that fit your hand well and reduce strain.
- Size: The size of the scissors should be appropriate for the task at hand. Smaller scissors offer precision for intricate cuts, while larger scissors are better for trimming larger pieces of canvas.
Expert Tips for Using Scissors
To ensure the best results from your scissors, follow these expert tips:
- Use a cutting mat: A cutting mat provides a stable surface that protects your tabletop from scratches and extends the lifespan of your scissors.
- Cut away from yourself: Always cut away from your body to avoid any accidents.
- Clean your scissors regularly: Wipe the blades with a soft cloth after each use to remove any glue or canvas residue that could affect their sharpness.
- Store your scissors properly: Keep your scissors in a dry, protected location to prevent damage.
Measuring the Canvas with Precision
Embark on your diamond painting journey with the utmost accuracy by measuring your canvas meticulously. A trusty measuring tape or ruler will serve as your guide, ensuring the precise alignment and flawless placement of your shimmering diamonds.
By carefully marking the canvas with measurements, you lay the foundation for a masterpiece that aligns seamlessly with your vision. Whether you seek to create a stunning wall display or a cherished gift, meticulous measuring empowers you to achieve your artistic aspirations with confidence.
Measuring the canvas involves more than just noting its dimensions. Precision is paramount when it comes to aligning the design, ensuring that each diamond finds its perfect home. Don’t be afraid to take your time, double-checking measurements and marking the canvas with light pencil strokes or delicate tape.
Remember, the measuring tape or ruler is your trusty companion, helping you navigate the canvas with ease. Let its precise markings guide your hand, ensuring that your diamond painting masterpiece is truly a work of art.
Essential Pencil or Pen for Diamond Painting: Your Creative Guide
In the world of diamond painting, meticulous precision and attention to detail are paramount. And when it comes to sketching or marking guidelines on your canvas, the humble pencil or pen becomes an indispensable tool.
Why Sketching and Marking Are Crucial
Before you start placing those glistening diamonds, it’s essential to have a clear roadmap to follow. Sketching and marking allows you to delineate the different areas of your design, ensuring each diamond is positioned accurately. By creating these guidelines, you’ll have a solid foundation for your sparkling masterpiece.
Choosing the Right Pencil or Pen
The type of pencil or pen you choose will depend on your personal preference and the surface of your canvas. For most fabrics, a mechanical pencil with a sharp point provides great control and precision. The thin lead allows for delicate lines without smudging or bleeding.
If you prefer a more fluid feel, a fine-line pen can be a good option. Choose a pen with ink that’s resistant to water and smudging, ensuring your guidelines remain intact throughout the diamond painting process.
Techniques for Pencil and Pen
- Light Strokes: When sketching guidelines, use light and gentle strokes to avoid indenting the canvas. The marks should be just visible enough to guide your diamond placement.
- Precise Measurements: For intricate designs, use a ruler or measuring tape to mark specific dimensions and ensure your diamonds align perfectly.
- Freehand Drawing: If you’re comfortable with drawing, you can also use a pencil or pen to sketch the entire design freehand. This allows for greater artistic interpretation and flexibility.
Tips for Optimal Results
- Practice: Before starting your actual diamond painting, take some time to practice sketching and marking on a scrap canvas. This will help you develop your technique and build confidence.
- Use a Light Table: A light table can illuminate your canvas, making guidelines more visible and easier to draw.
- Cover Finished Areas: As you fill in areas of your diamond painting, cover the finished sections with a protective sheet to prevent smudging or smearing your guidelines.
With the right pencil or pen and a few simple techniques, you can create a solid foundation for your diamond painting masterpiece. Let these tools guide your creativity and help you transform your canvas into a shimmering work of art.
Diamond Painting Essentials: Ensuring a Perfect Canvas for Your Masterpiece
As you embark on the captivating journey of diamond painting, it’s crucial to equip yourself with the right tools and materials. Among these essentials, the cutting mat stands out as an unsung hero, ensuring the precision and safety of your intricate creations.
Imagine a sturdy, self-healing surface where you can confidently wield your scissors without fear of damaging your table or precious canvas. The cutting mat acts as a protective barrier, preventing the sharp blades from slicing into the delicate fibers beneath. Its non-slip backing keeps the mat firmly in place, providing a stable and secure foundation for your cutting tasks.
But the cutting mat’s significance extends beyond its protective role. Its gridlines serve as an invaluable guide, helping you make precise measurements and maintain straight lines. The grid also helps you visualize the placement of your diamonds, ensuring that they align perfectly with the design.
With the cutting mat at your disposal, you can confidently trim excess canvas, cut adhesive sheets to size, and create custom shapes without compromising the integrity of your artwork. Its durability ensures that it will withstand countless hours of cutting and meticulous preparation, making it a long-lasting and versatile tool.
So, as you gather your supplies for your next diamond painting adventure, don’t overlook the humble cutting mat. It may not be the most glamorous item on your list, but it’s an indispensable companion that will help you achieve flawless results every time.
Essential Materials and Tools for a Mesmerizing Diamond Painting Experience
Embark on the enchanting journey of diamond painting with the right tools and materials at your disposal. From the canvas that holds your masterpiece to the precision instruments that bring it to life, each element plays a crucial role in creating a work of art that will captivate your senses.
Essential Materials
Diamond Painting Canvas: This specialized canvas is the foundation of your artwork. It features a printed design with corresponding adhesive areas where the diamonds will adhere.
Picture Frame: Choose a frame that complements the size and style of your finished masterpiece. It will protect and enhance the beauty of your creation.
Glue: The glue is the adhesive that binds the diamonds to the canvas. Different types of glue offer varying degrees of stickiness, so select one that suits your preferences.
Paintbrush or Sponge: Use a small paintbrush or sponge to apply the glue to the canvas in controlled amounts.
Weights or Clamps: These tools help keep the canvas flat and taut during the gluing process, ensuring the diamonds adhere firmly.
Gluing Methods
Wet Glue Method: Liquid glue is applied directly to the canvas, allowing you to place the diamonds accurately. However, it can be messy and requires ample drying time.
Dry Glue Method: Glue sheets or adhesive dots are pre-attached to the canvas. Simply peel off the backing and place the diamonds. This method is easier and cleaner but may not provide as strong a bond.
Additional Tools and Resources
Online Tutorials and Videos: Immerse yourself in a world of expert guidance with online tutorials and videos. Learn proper techniques, troubleshoot common issues, and discover new tips to enhance your diamond painting skills.
Diamond Painting Forums and Communities: Connect with fellow diamond painting enthusiasts, share your knowledge, and seek inspiration from others. These communities offer a wealth of information and support.
Craft Stores and Home Improvement Stores: Local stores often carry a wide variety of materials and supplies for diamond painting. Consult with knowledgeable staff to find the items you need.
Gloves: Protect your hands from glue and diamond dust by wearing gloves.
Eye Protection: Wear eye protection to prevent diamond dust from entering your eyes.
Ventilated Work Area: Glue fumes can be harmful, so ensure proper ventilation in your work space.
Diamond Painting Forums and Communities: A Hub for Enthusiasts and Knowledge Sharing
Diamond painting, a captivating craft involving the meticulous placement of sparkling diamonds on a canvas, has gained immense popularity in recent years. Diamond painting forums and communities have emerged as indispensable platforms for enthusiasts to connect, share knowledge, and enhance their diamond painting skills.
Within these virtual havens, diamond painting enthusiasts can connect with like-minded individuals who share their passion for this intricate art form. They can exchange ideas, discuss techniques, showcase their stunning creations, and seek advice from experienced members. These forums foster a sense of camaraderie, where members support and encourage each other’s artistic journeys.
The collective knowledge base found in diamond painting forums is invaluable. Experienced diamond painters generously share their tips, tricks, and insights, helping newcomers navigate the complexities of the craft. From choosing the right materials to mastering intricate diamond placement techniques, these forums serve as a treasure trove of practical guidance.
In addition to knowledge exchange, diamond painting forums provide a space for artistic inspiration. Members proudly display their magnificent creations, sparking ideas and inspiring others to push the boundaries of their creativity. By showcasing the diverse range of diamond painting styles, these forums act as a catalyst for innovation and artistic growth.
Diamond painting forums and communities play a pivotal role in the thriving diamond painting landscape. They connect enthusiasts, facilitate knowledge sharing, and inspire artistic growth. By fostering a community of passionate individuals, these forums empower diamond painters to elevate their skills, create stunning masterpieces, and share their love for this captivating craft.
Craft Stores and Home Improvement Stores: Your Go-to Diamond Painting Paradise
In the realm of diamond painting, where creativity meets precision, finding the right materials and tools is crucial. Craft stores and home improvement stores emerge as invaluable destinations for diamond painting enthusiasts, offering a treasure trove of supplies to ignite your artistic journey.
From the diamond painting canvas, the canvas that serves as your artistic canvas, to the picture frame, which proudly displays your masterpiece, these stores have it all. You’ll find glue in various forms, paintbrushes and sponges for meticulously applying it, and weights or clamps to ensure your canvas stays perfectly flat during drying.
Whether you prefer the wet glue method, where liquid glue bonds the diamonds with precision, or the dry glue method, relying on glue sheets or adhesive dots for quick and easy placement, these stores cater to your every need.
Additionally, you’ll find scissors for trimming excess canvas or glue, measuring tapes and rulers for precise measurements, and pencils or pens for sketching guidelines. Cutting mats protect your work surface, while canvas stretching tools prepare your canvas for framing and enhance its presentation.
Don’t forget frame matting, a stylish layer that elevates your artwork, and wall mounting hardware to showcase your masterpiece. Gloves protect your hands from adhesives, eye protection keeps diamond dust out of your eyes, and a ventilated work area ensures a safe and enjoyable painting experience.
Immerse yourself in an exciting world of diamond painting supplies at your local craft or home improvement store. Whether you’re a novice or a seasoned artist, you’ll find everything you need to bring your sparkling visions to life.
Essential Gloves for Diamond Painting: Shielding Your Hands from Adhesive Discomfort
Diamond painting, a delightful blend of artistry and precision, invites you to create captivating masterpieces. However, adhesives play a crucial role in securing these tiny gems onto the canvas, and prolonged contact can leave your hands feeling irritated and sticky. To ensure a comfortable and seamless painting experience, donning the right gloves is paramount.
Types of Gloves for Diamond Painting
The market offers a range of gloves designed specifically for diamond painting. These gloves are typically made of thin, breathable materials such as nitrile or latex. They provide an effective barrier against adhesives while allowing dexterity for precise diamond placement.
Benefits of Wearing Gloves
Beyond protecting your skin from adhesives, gloves offer several other advantages:
-
Prevents Fingerprints: Diamond painting canvases are highly sensitive to fingerprints and smudges. Gloves act as a barrier, ensuring that your hands don’t transfer oils and impurities onto the canvas.
-
Reduces Hand Fatigue: Working with tiny diamonds for extended periods can strain your hands. Gloves provide cushioning and support, minimizing discomfort and allowing you to paint for longer without strain.
-
Improves Hygiene: Gloves create a sanitary barrier between your hands and the materials, preventing the transfer of dirt and bacteria onto the canvas.
How to Choose the Right Gloves
Choosing the right gloves for diamond painting depends on your individual needs. Consider the following factors:
-
Fit: Gloves should fit snugly without being too tight or loose. Proper fit ensures comfort and dexterity.
-
Material: Nitrile or latex gloves are commonly recommended for diamond painting. They provide excellent protection and breathability.
-
Durability: Choose gloves that are durable enough to withstand repeated use and cleaning.
Recommendation: For optimal comfort and protection, opt for nitrile gloves with a snug fit. They offer a balance of breathability, durability, and tactile sensitivity essential for diamond painting.
Protect Your Eyes: Essential Gear for Diamond Painters
Embarking on the captivating journey of diamond painting unveils a realm of vibrant hues and sparkling allure. Yet, behind the mesmerizing shimmer lies a potential hazard: diamond dust. These tiny, crystalline particles can pose a risk to your precious eyes, making eye protection paramount in your diamond painting arsenal.
Diamond dust, akin to minuscule shards of glass, can become airborne when handling the drills and manipulating the diamonds. Inhaling or getting dust in your eyes can cause irritation, discomfort, and even corneal abrasions. Imagine the vibrant canvas transformed into a canvas of discomfort, hindering your creative flow and joy. To safeguard your vision and continue painting with unparalleled passion, equip yourself with protective eyewear.
Various types of eye protection gear are available to suit your needs. Goggles provide comprehensive protection, shielding your eyes from every angle. Safety glasses offer a more versatile option, easily fitting over your regular glasses. Remember, any type of eye protection is better than none. By protecting your eyes, you’re preserving the canvas of your creativity, ensuring countless hours of blissful diamond painting.
As you immerse yourself in the diamond painting experience, let these words serve as a gentle reminder: prioritize your eye health. With the right protective gear, you can safeguard your vision, embrace the artistic journey, and create radiant masterpieces that will adorn your walls for years to come.
Materials and Tools for Diamond Painting
Diamond painting, a mesmerizing and therapeutic craft, requires a few essential materials and tools to create stunning works of art. From the canvas to the glue, each element plays a crucial role in bringing your diamond painting to life.
Essential Materials
-
Diamond Painting Canvas: This special canvas is designed to hold the diamond design and features an adhesive surface to keep the diamonds in place.
-
Picture Frame: A picture frame provides a secure and attractive way to display your finished artwork, protecting it from dust and damage.
Gluing Methods
-
Wet Glue Method: This method involves applying liquid glue to the canvas directly. The diamonds are then placed on the glue and allowed to dry. This method offers more precision and control but requires careful application to avoid smudging or overflow.
-
Dry Glue Method: This method uses pre-applied glue sheets or adhesive dots. The diamonds are simply picked up and pressed onto the glue surface. This method is faster and easier but may not provide the same level of durability as the wet glue method.
Additional Tools and Resources
-
Scissors: For trimming excess canvas or glue.
-
Measuring Tape or Ruler: For measuring and marking the canvas.
-
Pencil or Pen: For sketching or marking guidelines on the canvas.
-
Cutting Mat: A protective surface for cutting materials.
-
Online Tutorials and Videos: These provide valuable instructions and tips for diamond painting techniques.
-
Diamond Painting Forums and Communities: These platforms offer a wealth of knowledge and allow you to connect with other enthusiasts.
-
Craft Stores and Home Improvement Stores: These are excellent sources for materials and supplies.
-
Gloves: Protect your hands from adhesives.
-
Eye Protection: Prevent diamond dust from entering your eyes.
-
Ventilated Work Area: It is essential to work in a well-ventilated area to prevent exposure to glue fumes. Inhaling these fumes can cause respiratory irritation and other health issues. Ensure proper ventilation by opening windows, using a fan, or working outdoors.
Diamond Painting: A Journey of Shimmering Art
Immerse yourself in the captivating world of diamond painting, where you become an artisan, transforming blank canvases into dazzling masterpieces. Embark on this creative adventure with the ultimate guide to materials and tools, your essential companions on this artistic odyssey.
Essential Materials: The Canvas of Your Masterpiece
-
Diamond Painting Canvas: This specialized canvas serves as the foundation of your sparkling masterpiece, featuring a pre-printed design adorned with an adhesive surface ready to embrace your diamonds.
-
Picture Frame: A worthy frame not only protects your shimmering creation but also elevates it to the status of an art object, ready to grace your walls or be gifted to loved ones.
-
Glue: The glue acts as the adhesive force that secures your diamonds to the canvas, ensuring they sparkle with unwavering brilliance.
-
Paintbrush or Sponge: Choose a soft paintbrush or sponge to gently apply the glue to the canvas, creating a receptive surface for your diamond embellishments.
-
Weights or Clamps: These trusty tools keep your canvas firmly in place as the glue dries, ensuring your diamonds adhere perfectly without shifting or moving.
Gluing Methods: Embracing the Adhesive Spirit
-
Wet Glue Method: This technique involves using a liquid glue that is directly applied to the canvas, providing a strong and long-lasting bond for your diamonds.
-
Dry Glue Method: Opt for glue sheets or adhesive dots for a more convenient gluing experience, allowing you to simply peel and place your diamonds onto the canvas.
Additional Tools and Resources: Enhancing Your Creative Journey
-
Scissors: These sharp tools help you trim excess canvas or glue, ensuring a polished and professional finish.
-
Measuring Tape or Ruler: Accurate measurements guide you in perfectly aligning your diamonds and creating a harmonious design.
-
Pencil or Pen: Sketch or mark guidelines on the canvas for precise placement and effortless diamond alignment.
-
Cutting Mat: A protective surface safeguards your work area and prevents damage to your materials.
-
Online Tutorials and Videos: Seek guidance from experienced diamond painters through online resources, gaining invaluable tips and techniques to elevate your skills.
-
Diamond Painting Forums and Communities: Connect with fellow enthusiasts, share knowledge, and find inspiration in vibrant online communities.
-
Craft Stores and Home Improvement Stores: Your local haven for all things diamond painting, where you can source materials and supplies to fuel your creative passion.
-
Gloves: Protect your hands from adhesive residue and keep your masterpiece pristine.
-
Eye Protection: Shield your eyes from diamond dust and ensure a safe and comfortable painting experience.
-
Ventilated Work Area: Create a well-ventilated space to minimize exposure to glue fumes.
-
Diamond Painting Kits: Discover pre-assembled packages that provide all the necessary materials, including canvas, diamonds, and tools, offering convenience and ease of entry for beginners and seasoned painters alike.
-
Canvas Stretching Tools: Prepare your canvas for a flawless fit within its frame using specialized stretching tools.
-
Frame Matting: Add an extra touch of elegance to your finished artwork by incorporating a decorative mat between the canvas and the frame.
-
Wall Mounting Hardware: Showcase your shimmering creation with confidence using appropriate hardware to secure it to walls.
Canvas Stretching Tools: The Unsung Heroes of Diamond Painting
In the realm of diamond painting, the canvas is the foundation upon which your masterpiece takes shape. To ensure the integrity and displayability of your artwork, preparing the canvas is paramount, and this is where canvas stretching tools come into play.
Canvas stretching involves securing the painted canvas onto a wooden frame, creating tension to eliminate wrinkles and ensure longevity. These specialized tools make the process easy and efficient, allowing you to transform your diamond painting into a gallery-worthy piece.
The key to successful canvas stretching lies in choosing the right tools:
-
Canvas Pliers: These indispensable pliers grip the canvas securely, preventing it from slipping out of the frame.
-
Stretcher Bars: These wooden bars form the frame that supports and tensions the canvas. Choose bars that are slightly shorter than the canvas edges to create the desired tension.
-
Canvas Stretcher: A device that provides a steady surface and assistance for applying tension to the canvas. It typically features adjustable clamps to accommodate different canvas sizes.
Using these tools, you can stretch your canvas to perfection, eliminating wrinkles and creating a taut surface. Once stretched, your diamond painting will radiate with brilliance and professionalism. Display it with pride, knowing that it is properly preserved and ready to be admired by all who behold it.
Materials and Tools for Diamond Painting: A Comprehensive Guide
Embark on the captivating world of diamond painting with this essential guide. From the foundational materials to the additional resources that will enhance your artistic journey, we’ll provide an in-depth exploration of everything you need to create stunning diamond art.
Essential Materials
- Diamond Painting Canvas: Begin with a canvas that contains the pre-printed design and adhesive for your diamond drills.
- Picture Frame: Frame your masterpiece to protect and display its sparkling beauty.
- Glue: Apply liquid glue or use glue sheets to permanently fix the diamonds onto the canvas.
- Paintbrush or Sponge: Use these tools to carefully apply glue to the canvas.
- Weights or Clamps: Keep your canvas flat and secure during the drying process.
Gluing Methods
- Wet Glue Method: Opt for liquid glue for a strong and flexible hold that withstands the test of time.
- Dry Glue Method: Enjoy the convenience of pre-cut glue sheets or adhesive dots for a quick and clean application.
Additional Tools and Resources
Additional items will elevate your diamond painting experience:
- Scissors: Trim excess canvas or glue with precision.
- Measuring Tape or Ruler: Ensure accurate measurements and mark guidelines on the canvas.
- Pencil or Pen: Sketch guidelines or personalize your design with creative flair.
- Cutting Mat: Protect your work surface from cuts and scratches.
- Online Tutorials and Videos: Seek guidance from expert tips and techniques.
- Diamond Painting Forums and Communities: Engage with fellow enthusiasts and share your creations.
- Craft Stores and Home Improvement Stores: Source all necessary materials and supplies conveniently.
- Gloves: Protect your hands from adhesives and diamond dust.
- Eye Protection: Prevent diamond dust from entering your eyes.
- Ventilated Work Area: Avoid exposure to glue fumes and ensure optimal air circulation.
- Diamond Painting Kits: Purchase pre-assembled packages with all materials ready to use.
- Canvas Stretching Tools: Prepare the canvas for framing with ease and precision.
- Frame Matting: Enhance the visual appeal of your artwork with a decorative layer between the canvas and frame.
- Wall Mounting Hardware: Securely display your finished masterpiece on any wall.
Materials and Tools for Diamond Painting: A Comprehensive Guide
Embarking on a diamond painting journey is an enthralling experience that transforms blank canvases into shimmering masterpieces. To ensure a seamless artistic journey, equipping yourself with the essential materials and tools is paramount.
Essential Materials
- Diamond Painting Canvas: This specialized canvas houses the adhesive-covered design pattern that guides the diamond placement.
- Picture Frame: A sturdy and elegant frame secures and showcases the completed artwork, bringing it to life.
- Glue: This adhesive substance adheres the diamonds firmly to the canvas, creating a dazzling mosaic.
- Paintbrush or Sponge: These tools assist in applying the glue evenly and with precision.
- Weights or Clamps: These accessories keep the canvas taut and prevent warping during the drying process.
Gluing Methods
Two primary gluing methods are employed in diamond painting:
- Wet Glue Method: Liquid glue is applied directly to the canvas, offering greater control and flexibility.
- Dry Glue Method: Glue sheets or adhesive dots provide a convenient and time-saving alternative to liquid glue.
Additional Tools and Resources
Beyond the essential materials, numerous additional tools and resources enhance the diamond painting experience:
- Scissors: Trim excess canvas or glue with precision.
- Measuring Tape or Ruler: Accurately mark the canvas and ensure proper alignment.
- Pencil or Pen: Sketch guidelines or mark important details on the canvas.
- Cutting Mat: Protect your work surface from sharp objects.
- Online Tutorials and Videos: Access step-by-step instructions and techniques from seasoned diamond painters.
- Diamond Painting Forums and Communities: Engage with other enthusiasts, share knowledge, and seek guidance.
- Craft Stores and Home Improvement Stores: Procure all necessary supplies and materials.
- Gloves: Protect your hands from adhesives.
- Eye Protection: Prevent diamond dust from entering the eyes.
- Ventilated Work Area: Ensure proper ventilation to minimize glue fume exposure.
- Diamond Painting Kits: Pre-assembled packages provide all the materials needed to get started.
- Canvas Stretching Tools: Prepare the canvas for framing, creating a professional finish.
- Frame Matting: Add a decorative touch between the artwork and the frame.
- Wall Mounting Hardware: Display your masterpiece with pride and ease.
