Ultimate Beginner’s Guide To Crocheting A Perfect Ball: Essential Tools, Patterns, And Techniques
Crocheting a Ball for Beginners
To crochet a ball, gather your essential tools, including yarn, a crochet hook, and scissors. Start by learning basic stitches like single crochet and slip stitch. Practice with a beginner ball pattern, then expand your skills with more intricate patterns. Remember to use a stitch marker to keep track of your stitches, and experiment with different yarn weights, fiber types, and tension to create a unique ball.
Essential Elements of Crocheting: Yarn: A Journey of Fibers, Weights, and Hues
In the enchanting realm of crocheting, yarn reigns supreme as the canvas upon which our creative visions come alive. Yarn, an indispensable element, weaves its way through the hook, transforming mere strands into intricate works of art.
Weight: A Dance of Textures
Yarn weight, a fundamental consideration, dictates the thickness and drape of your crochet creations. Bulky yarn, robust and voluminous, weaves through the hook with a weighty presence, creating cozy scarves and plush blankets. Medium weight yarn, the versatile chameleon, adapts to a myriad of projects, from airy sweaters to structured market bags. Fine weight yarn, ethereal and delicate, lends itself to intricate lacework and delicate motifs.
Fiber Content: A Symphony of Touch and Care
The fiber composition of yarn unfolds a symphony of tactile experiences and care requirements. Natural fibers, such as wool, cotton, and silk, whisper softness, breathability, and warmth against the skin. Synthetic fibers, like acrylic and nylon, offer durability, resilience, and wrinkle resistance. Blended yarns, a harmonious union of natural and synthetic fibers, combine the best of both worlds, offering comfort, practicality, and ease of care.
Colors: A Kaleidoscope of Joy
The color spectrum of yarn is an artist’s palette, beckoning us to paint our crocheted masterpieces with vibrancy and expression. Solid colors, bold and assertive, make a statement, while ** variegated yarns,** a dance of hues, create mesmerizing patterns and depth. Multicolored yarns, a playful blend, infuse projects with a burst of whimsy and joy.
Choosing the Perfect Yarn: Harmony in the Making
Selecting the right yarn for your project is an alchemical process, harmonizing weight, fiber content, and color to achieve the desired result. For cozy winter gear, bulky wool yarn wraps you in warmth. For summery garments, fine cotton yarn offers a breezy allure. Variegated acrylic yarn adds a touch of pizzazz to everyday accessories.
As you embark on your crocheting journey, let yarn be your guide. With its captivating textures, fibers, and colors, yarn is the very essence that breathes life into your creative creations.
The Art of Choosing the Perfect Crochet Hook
Amidst the symphony of yarns and needles, the crochet hook stands as the maestro, orchestrating the intricate tapestry of stitches. Selecting the proper size hook is paramount to unlocking the full potential of your crochet journey.
Like a conductor finding the right pitch for the orchestra, matching the hook size to the yarn weight is the key to achieving the intended texture and drape of your project. Heavier yarns, such as bulky and super bulky, demand the embrace of larger hooks, while finer yarns, like lace and fingering, seek the delicate embrace of smaller ones.
Imagine a waltz between hook and yarn, where the size harmony invites graceful movements. A hook that’s too small will fight against the yarn, creating tight, cramped stitches. Conversely, a hook that’s too large will allow the loops to become overly loose, resulting in a floppy fabric.
The ideal hook size provides a balance of tension and ease, akin to a dancer finding the perfect rhythm. The yarn label will often guide you towards the most suitable hook size for your chosen yarn. But don’t hesitate to experiment and find what resonates with your unique style and comfort level.
Remember, the crochet hook is your artistic partner, the brush that paints the canvas of your dreams. Selecting the right size is a crucial step in unleashing your creativity and crafting breathtaking crocheted masterpieces.
Sharp, Pointed Scissors: An Indispensable Tool for Crocheting
As a crocheter, your arsenal of tools is incomplete without a pair of sharp, pointed scissors. These unassuming marvels serve as your companions throughout your creative journey, ensuring precise cuts and seamless transitions.
Every thread you snip, every yarn you trim, and every knot you sever requires the finesse of sharp blades. Sharpness is paramount for clean cuts that prevent frayed or tangled yarns. Pointed tips allow you to reach into tight spaces and navigate intricate patterns with ease.
Beyond their functionality, sharp, pointed scissors also enhance your crocheting experience. They eliminate frustration caused by dull blades, making the process more enjoyable and stress-free. Well-maintained scissors maintain their sharpness over time, providing you with years of reliable use.
Choosing the Right Scissors for Crocheting
Selecting the ideal pair of scissors for crocheting requires consideration of ergonomics, blade length, and material.
Ergonomic scissors are designed to fit comfortably in your hand, reducing strain and fatigue during extended use.
Blade length varies depending on personal preference and the type of crocheting you do. Longer blades may be more efficient for cutting thick yarns or large projects, while shorter blades offer greater precision for delicate pieces.
Material durability is crucial. Stainless steel scissors are highly recommended for their resistance to rust and wear.
Tips for Maintaining Sharp Scissors
To preserve the sharpness of your precious scissors, follow these simple tips:
- Clean the blades regularly using a soft cloth or brush.
- Avoid cutting through abrasive materials such as metal wire.
- Sharpen the blades periodically using a dedicated scissor sharpener.
- Store your scissors in a protective case or sleeve to prevent nicks and damage.
By taking good care of your sharp, pointed scissors, you’ll ensure they remain your trusted companions on your crocheting adventures. Remember, these tools are not just instruments but integral parts of your creative expression.
Yarn Needle: An Essential Tool for Crocheting Mastery
As a budding crocheter, your arsenal of tools should include a trusty yarn needle. It may seem like a minor item, but this needle plays a pivotal role in ensuring the seamless completion of your crochet creations.
Weaving In Loose Ends
The end of any crochet project inevitably involves loose ends dangling from your yarn. Leaving these strands untamed can compromise the integrity and aesthetics of your work. Enter the yarn needle. With its sharp and pointed tip, it allows you to effortlessly weave these ends into the fabric of your project, creating a polished and professional finish.
Joining Pieces Together
In the realm of crochet, there are times when you’ll need to connect multiple pieces to form a cohesive creation. Once again, the yarn needle comes to your aid. Its flexibility makes it ideal for sewing pieces together, ensuring a secure and undetectable seam.
Creating Embellishments
The yarn needle transcends its functional role and becomes a creative tool in its own right. Use it to embroider intricate designs, attach embellishments, or even create free-form crochet artwork. The possibilities are endless, limited only by your imagination.
Tips for Yarn Needle Mastery
- Choose the Right Needle: Select a yarn needle that matches the weight and texture of your yarn.
- Thread Carefully: Thread the yarn needle with a doubled-over strand of yarn to prevent fraying.
- Hold Securely: Grip the yarn needle comfortably, allowing for precise control.
- Use Proper Technique: Weave the yarn needle through the stitches in a consistent and even manner.
- Secure Your Ends: Knot the ends of the yarn securely after weaving them in to ensure they don’t unravel.
The humble yarn needle may be small, but its impact on your crochet projects is profound. Embrace the power of this essential tool to weave in ends, join pieces, and add embellishments. With a yarn needle in your hand, the possibilities for your crochet creations are boundless.
Essential Elements of Crocheting: The Magic of the Magic Ring
Embark on a crocheting adventure, where intricate stitches and vibrant yarns intertwine to create stunning masterpieces. Among the essential tools, the magic ring shines as a cornerstone technique, empowering you to craft seamless projects without leaving unsightly holes.
A magic ring is the key to starting your crocheting journey in the round, creating a perfect circle without a gaping center. It’s an indispensable technique for crocheting amigurumi, hats, and other projects that require a cylindrical or spherical shape.
To cast a magic magic ring, begin by creating a loop with your yarn and securing it with a slip knot. Insert your hook into the loop and draw a loop through it. Now, with the hook still in the loop, pull the tail of the yarn through the loop, creating a second loop. Repeat this process until you have four loops on your hook.
The magic happens when you pull the tail of the yarn through all four loops at once. This ingenious move seals the circle, leaving no room for gaps. With your magic ring securely in place, you’re ready to embark on a world of crocheting possibilities.
Tips for a Perfect Magic Ring:
- Use a smaller hook than recommended for your yarn to ensure the ring is tight and secure.
- Pull the tail of the yarn slowly and evenly to avoid creating gaps.
- Practice makes perfect! The more you make magic rings, the smoother and tighter they will become.
Mastering the magic ring unlocks a gateway to endless crocheting opportunities. Whether you’re creating cozy hats, cuddly toys, or delicate doilies, this technique will become a trusted ally in your crafting adventures.
The Essence of Single Crochet: The Cornerstone of Crochet
As you embark on your enchanting journey into the realm of crochet, let us unravel the secrets of the fundamental stitch that forms the very foundation of most crochet creations: the Single Crochet. This humble yet indispensable stitch holds the power to transform a simple yarn into a symphony of intricate designs, shaping your crochet dreams into tangible masterpieces.
Understanding the Single Crochet Stitch
At its core, the single crochet stitch is an elegant combination of precision and creativity. It begins with a delicate hook, which gently weaves through the intricate loops of yarn, creating a crisp and defined single stitch. This basic stitch serves as the building block for countless crochet patterns, allowing you to construct everything from cozy blankets to charming amigurumi creatures.
The Versatile Nature of Single Crochet
The versatility of the single crochet stitch lies in its ability to adapt to a wide range of projects and techniques. Whether you’re a seasoned crocheter or just starting your adventure, this stitch offers endless possibilities for exploration. Its condensed structure creates a tight and sturdy fabric, perfect for creating durable items like placemats and bags. Conversely, when worked with a looser tension, it can produce a soft and airy texture, ideal for blankets and scarves.
Mastering the Basics of Single Crochet
As you begin your single crochet journey, it’s crucial to grasp the foundational techniques that will guide your progress. First, establish a consistent gauge, which refers to the number of stitches and rows you create per inch. This precise measurement ensures that your crochet projects match the intended pattern and dimensions. Moreover, it teaches you to control the tension of your stitches, determining the elasticity and overall appearance of your creations.
Embracing the Creative Potential of Single Crochet
Once you’ve mastered the basics of single crochet, the possibilities for creativity are limitless. This versatile stitch can be combined in various ways to create an array of textures and patterns. Experiment with different yarn weights to influence the size and drape of your creations. Explore the fascinating world of fiber content, experimenting with materials like cotton, wool, or acrylic, each with its unique warmth, durability, and care requirements.
As you delve deeper into the enchanting world of crochet, the Single Crochet stitch will become your indispensable companion, guiding you in creating an endless tapestry of beautiful and practical masterpieces. Embrace the versatility of this fundamental stitch, mastering its techniques, and unlocking the boundless potential for creativity that it holds. Let your hook dance across the yarn, transforming it into a vibrant expression of your imagination and artistry.
Slip Stitch: The Versatile Crocheting Technique for Seamless Joining and Delicate Edging
In the realm of crocheting, the slip stitch stands as an unassuming yet indispensable technique, opening doors to a world of possibilities. Mastering this foundational stitch is like unlocking a secret code, granting access to intricate patterns, flawless joinery, and exquisite edging.
Imagine a crochet project where transitions between pieces flow effortlessly, without a single hint of separation. The slip stitch makes this seamless connection a reality, allowing you to join motifs, rows, and shapes with invisible elegance. Its essence lies in creating a tight, almost invisible bond, ensuring that your crochet fabric feels cohesive and refined.
Furthermore, the slip stitch unveils its versatility in the creation of delicate edges. Whether you desire a scalloped border that dances around your project or a refined finish that enhances its contour, the slip stitch offers the precision and finesse to execute your vision flawlessly.
Beyond its practical applications, the slip stitch also empowers crocheters to explore the realm of crocheting in the round. This technique transforms your crochet piece into a continuous cylinder, opening up a plethora of possibilities for hats, coasters, and even plush toys. The slip stitch serves as the invisible anchor, ensuring that your project maintains its circular form without sacrificing its structural integrity.
Embark on your crocheting journey with confidence, knowing that the slip stitch is your loyal companion. It will guide you through flawless joinery, delicate edging, and the captivating world of crocheting in the round. Unleash your creativity and elevate your crochet projects to new heights with this fundamental yet extraordinary technique.
The Art of Crocheting: Master the Half Double Crochet
In the realm of crocheting, where artful hands craft intricate creations, the half double crochet emerges as a pivotal stitch, elevating your skills to new heights. Beyond the foundational stitches of single and slip stitch, this taller stitch introduces a world of texture and design possibilities.
As you embark on the journey of mastering the half double crochet, your nimble fingers will dance with a newfound grace. With each hook through the yarn, you’ll create a taller, more textured loop, opening up avenues for stunning and intricate patterns.
The half double crochet serves as a gateway to a realm of creative possibilities. It empowers you to create projects with a more intricate and textured aesthetic, elevating your crochet creations from simple to captivating.
Tips for Perfecting the Half Double Crochet:
- Maintain an even tension. The key to creating consistent stitches lies in controlling the tightness or looseness of your crochet hook throughout the crocheting process.
- Practice regular intervals. The more you crochet, the more comfortable you’ll become with the half double crochet stitch. Consistent practice will enhance your control and refine your technique.
- Utilize online tutorials. Numerous resources are available online to guide you through the half double crochet stitch. Visual aids and step-by-step instructions can greatly enhance your learning experience.
As you delve into the world of half double crochet, you’ll discover its versatility in creating a wide array of crochet projects. From delicate lace patterns to warm and cozy blankets, the half double crochet empowers you to express your creativity in countless ways.
Embrace the challenge, explore the possibilities, and master the art of half double crochet. Let your crochet hook be a paintbrush, your yarn a canvas, and your creations a testament to your newfound skills.
Explore Double Crochet: The Tallest of Basic Stitches
In the realm of crocheting, mastering double crochet unlocks a world of intricate designs and airy fabrics. It’s the tallest of the basic stitches, creating a more open and breathable texture.
The Magic of Double Crochet
Unlike single crochet or slip stitch, double crochet involves making a loop on your hook, then inserting the hook into the next stitch and wrapping the yarn over the hook. After pulling this loop through the stitch, you’ll create another loop on the hook and draw it through both loops simultaneously. This results in a tall, upright stitch with a “V” shape.
Embellishing Your Creations
Double crochet opens up a plethora of possibilities for embellishing your crochet projects. Its open and airy nature lends itself perfectly to delicate lace patterns, airy scarves, and lightweight summer tops. By varying the tension of your stitches, you can create different effects, from lacy and delicate to sturdy and textured.
Enhancing Your Skills
Mastering double crochet is a significant step in your crocheting journey. It not only expands your stitch repertoire but also enhances your overall technique. The practice of creating even and consistent double crochet stitches improves your control and precision.
Tips for Double Crochet Success
- Use a larger hook: Double crochet generally requires a hook size larger than that used for single crochet.
- Maintain a loose tension: Double crochet stitches should be made with a slightly loose tension to achieve that airy, open texture.
- Count your stitches: It’s crucial to count your stitches accurately to ensure your projects come out as intended.
- Practice makes perfect: Like any crochet technique, proficiency in double crochet comes with practice. Don’t be discouraged if your first attempts are not flawless.
Embrace the Journey
As you delve into the world of double crochet, remember that the journey is as important as the destination. Take your time, experiment with different yarns and patterns, and let your creativity flow. With patience and practice, you’ll soon be crocheting stunning openwork designs that will leave a lasting impression.
Beginner Ball Pattern: Start with a simple ball pattern to practice basic stitches and techniques.
Beginner’s Guide to Crocheting: Essential Tools and Techniques
Embark on a creative journey with crocheting, the art of creating intricate fabrics and objects using a simple hook and yarn. As a beginner, mastering the basics will lay the foundation for your future endeavors.
Essential Tools for Crocheting:
-
Yarn: The heart of your project, choose yarn based on its weight, texture, and desired outcome.
-
Crochet Hook: Your wand for creating, select a hook size that complements the yarn you’ve chosen.
-
Scissors: Sharp and precise, these will help you trim and shape your creations seamlessly.
-
Yarn Needle: The invisible seamstress, use this needle to weave in loose ends and connect pieces.
-
Magic Ring: A clever technique, this ring allows you to start crocheting in the round without leaving a hole.
Fundamental Stitches:
-
Single Crochet: The cornerstone of most crochet projects, this stitch forms the foundation of your creations.
-
Slip Stitch: A versatile stitch, the slip stitch is used for joining, creating edges, and working in the round.
Elevate Your Skills:
As you progress, explore more advanced techniques that will add depth and texture to your projects:
-
Half Double Crochet: A taller stitch than single crochet, this stitch creates a more textured and intricate fabric.
-
Double Crochet: The tallest of the basic stitches, it creates a more open and airy effect.
Your First Crocheted Project:
Once you’ve mastered the basics, it’s time to put your skills to the test! Begin with a simple Beginner Ball Pattern. This pattern will guide you through the process of creating a small, round ball using the single crochet stitch. Through this project, you’ll not only practice your newfound skills but also witness the transformative power of crocheting.
Basic Ball Pattern: Build on your skills with a more intricate ball pattern that incorporates different stitches.
Build Your Crocheting Skills with an Intricate Ball Pattern
Embark on a thrilling crocheting adventure by experimenting with a beautiful ball pattern. This pattern will ignite your creativity and expand your repertoire with diverse stitches. Dive into a world of stitches that will transform your simple ball into a captivating masterpiece.
As you work through the pattern, you’ll encounter challenging yet rewarding stitch combinations. Each stitch adds a unique touch, enhancing the overall texture and visual appeal of your ball. You’ll master the art of incorporating different stitches seamlessly, creating a ball that showcases your growing crocheting prowess.
The complexity of the ball lies in its intricate stitch combinations. It’s a perfect opportunity to practice your attention to detail and stitch precision. As you progress, you’ll witness the astounding transformation of your ball, from a basic sphere to an exquisite work of art.
Embrace the learning curve that accompanies this pattern. With each stitch you conquer, your confidence as a crocheter will soar. Remember that the journey of a thousand stitches begins with a single ball, so let this pattern be your guide towards becoming a master crocheter.
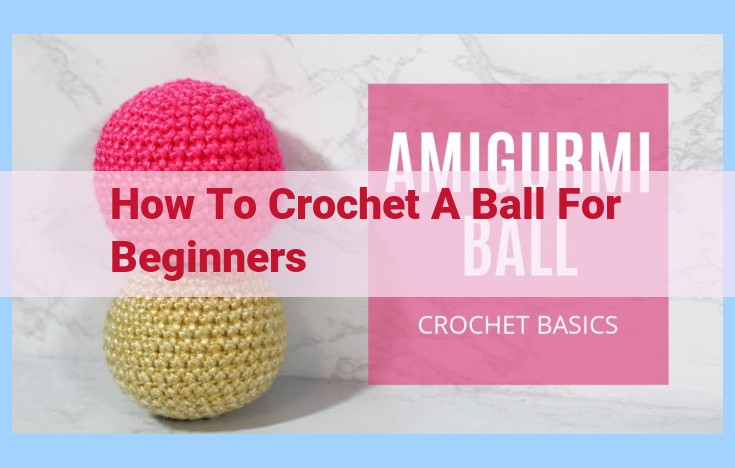
Amigurumi Ball Pattern: Explore the art of amigurumi by creating a cute and cuddly stuffed ball.
Amigurumi’s Embrace: Crafting a Cuddly Stuffy
Dive into the enchanting world of amigurumi, where yarn transforms into an adorable tapestry of cuddly creations. One such masterpiece is the amigurumi ball, a testament to the power of crochet. With this delightful pattern, you’ll embark on a whimsical journey to craft a cherished companion.
Materials and Tools:
- Yarn: Embrace the warmth and softness of your chosen yarn, selecting a shade that reflects your imagination.
- Crochet Hook: Choose a hook size that harmonizes with the yarn weight, enabling smooth and effortless stitches.
- Yarn Needle: This trusty needle will be your ally in weaving in loose ends and securing pieces, leaving your creation pristine and complete.
Stitches and Techniques:
- Single Crochet: Master this foundational stitch, the bedrock of amigurumi. Each loop intertwines, creating a sturdy yet pliable fabric.
- Increase: Expand your creation by cleverly adding stitches. This technique allows for shaping and creating the adorable curves that define your amigurumi ball.
- Decrease: Conversely, decrease stitches to shape your ball, ensuring a well-rounded and symmetrical masterpiece.
Assembling Your Ball:
With each stitch meticulously placed, it’s time to assemble your amigurumi ball. Following the pattern with precision, you’ll connect the pieces, marveling as your ball takes shape before your very eyes.
* Magic Ring: Commence your adventure with a magic ring, an ingenious technique that creates a seamless foundation for your ball.
* Working in the Round: Crocheting in the round is the key to creating the spherical shape of your ball. Stitch after stitch, your creation transforms into a delightful orb.
Embracing Amigurumi’s Magic:
Amigurumi opens a gateway to a realm where imagination and creativity intertwine. As you complete your ball, you’ll not only have a cozy companion but also a heartfelt reminder of your crocheting journey. Whether you choose to gift this adorable creation or treasure it for yourself, it will forever evoke the joy and magic of the art of amigurumi.
Essential Elements of Crocheting: Stitch Markers, the Guiding Stars for Precise Stitching
In the intricate tapestry of crochet, every stitch plays a crucial role in shaping the final masterpiece. To ensure precision and consistency, stitch markers emerge as indispensable instruments for discerning crocheters. These humble yet effective tools are the guiding stars that illuminate the path to impeccable execution.
Stitch markers, often composed of plastic or metal, stand out as indispensable accessories for marking specific stitches or rows within your crochet project. Their significance extends far beyond their diminutive size, as they empower you to:
-
Keep Track of Complex Patterns: When intricate patterns unfold, it’s easy to lose track of where you are. Stitch markers serve as landmarks, guiding you through the maze of stitches, ensuring that you maintain your place with impeccable accuracy.
-
Maintain Row Count: Rows, the building blocks of crochet fabric, can often blend into one another, especially in large-scale projects. Employing stitch markers to demarcate rows allows you to maintain a precise count, guaranteeing that your crochet creation retains its intended shape and dimensions.
-
Perfect Seamless Joins: When joining separate pieces of crochet work, stitch markers act as precise checkpoints. By marking the corresponding stitches on each piece, you can align them flawlessly, resulting in an invisible and seamless connection.
-
Highlight Specific Stitches: Some crochet patterns call for specific stitches to be worked differently. Stitch markers illuminate these stitches, ensuring that you don’t miss them in the flurry of hooks and yarn.
-
Create Decorative Elements: Beyond their practical function, stitch markers can also add a touch of style and flair to your crochet projects. Decorative stitch markers, adorned with beads or charms, elevate your creations into works of art.
As you embark on your crochet journey, remember that stitch markers are not just accessories but essential companions. They empower you to navigate intricate patterns, maintain precise stitch counts, and achieve flawless joins, ultimately transforming your crochet creations into masterpieces of precision and beauty.
Yarn Weight: A Critical Factor in Crocheting
In the world of crocheting, yarn weight holds immense significance, influencing both the size and texture of your final creation. Understanding yarn weight is akin to deciphering a secret code that unlocks a tapestry of possibilities.
Yarn weight is a measure of the thickness or thinness of a yarn. It is determined by the number of plies in the yarn, where each ply represents a strand of yarn twisted together to form the final thread. The higher the number of plies, the thicker the yarn and the lower the yarn weight number.
Impact on Size
Yarn weight directly affects the size of your crocheted project. Thicker yarns, with their lower weight numbers, result in larger and bulkier items. Conversely, thinner yarns, with higher weight numbers, yield smaller and more delicate pieces. This principle is especially crucial for projects where precision is paramount, such as intricate lace doilies or delicate garments.
Influence on Texture
Beyond size, yarn weight also profoundly influences the texture of your creations. Thicker yarns produce a denser, more substantial fabric with a more pronounced texture, while thinner yarns create a lighter, airier fabric with a more subtle texture. The texture of your finished project can evoke different sensations and convey varying styles, from the cozy warmth of a chunky scarf to the ethereal lightness of a lace shawl.
Choosing the Right Yarn Weight
Selecting the appropriate yarn weight for your project is essential for achieving the desired outcome. Consider the purpose and style of your creation. For projects requiring durability and warmth, such as blankets and rugs, opt for thicker yarns. For delicate garments and accessories, choose thinner yarns for a more refined look and feel.
Remember, yarn weight is an indispensable aspect of crocheting that empowers you to manipulate the size and texture of your creations, transforming simple threads into captivating works of art.
Fiber Content: The Building Blocks of Crocheting
In the intricate world of crocheting, the fiber content of your yarn plays a pivotal role in shaping the essence of your creations. Each fiber boasts unique characteristics, like texture, warmth, and durability, lending a distinct personality to your crocheted masterpiece.
Natural Fibers, Nature’s Embrace:
Natural fibers, such as wool, cotton, and linen, are derived from plants or animals. Wool, known for its exceptional warmth and softness, keeps you cozy on chilly nights. Cotton, a versatile fiber, offers breathability and absorbency, making it ideal for warm-weather projects. Linen, with its crisp, airy texture, adds an elegant touch to your crochet creations.
Synthetic Fibers, a Modern Innovation:
Synthetic fibers, like acrylic and nylon, are man-made, offering unique advantages. Acrylic mimics the warmth of wool while remaining more affordable and hypoallergenic. Nylon, renowned for its strength and elasticity, is perfect for durable items like rugs and bags.
Blends: The Best of Both Worlds:
Blends combine the strengths of different fibers, creating versatile yarns with tailored properties. A blend of wool and acrylic, for instance, offers both warmth and durability. Cotton and linen blends add breathability and texture to your projects.
Care Instructions: Preserving Your Crochet Legacy:
Understanding the care instructions for your fiber choice ensures the longevity of your crocheted creations. Natural fibers often require gentle hand-washing or dry cleaning to maintain their integrity. Synthetic fibers, on the other hand, are more forgiving and can withstand machine washing and drying.
By embracing the nuances of fiber content, you unlock countless possibilities in the world of crocheting. Experiment with different fibers, discover their unique qualities, and embark on a creative journey that will result in cherished keepsakes that will stand the test of time.
Gauge: The Precision Paintbrush of Crocheting
Measure, Adjust, Master
Imagine crocheting a heart-stopping masterpiece, only to find it’s a tad too snug for your intended recipient. Or worse, your cozy blanket turns out to be more fit for a teddy bear than a human. Ouch!
To avoid such crocheting heartaches, gauge is your trusty ally. It ensures your creations match the patterns and fit your aspirations.
What is Gauge?
Think of gauge as the precise ruler that measures the number of stitches and rows per inch in your crochet fabric. It’s the foundation upon which you build your crocheted dreams.
Why is Gauge Important?
- Pattern Accuracy: Gauge ensures your crochet treasures align with the pattern’s specifications.
- Consistent Sizing: It guarantees your crocheted garments and accessories fit comfortably and as intended.
- Yarn Consumption: Accurate gauge helps you estimate the exact amount of yarn required for your project, saving you from yarn shortages or leftovers.
Measuring Gauge
To measure gauge, work a small swatch, usually about 4 inches by 4 inches, using the hook and yarn specified in the pattern. Count the number of stitches and rows within that 4-inch square.
Adjusting Gauge
If your gauge doesn’t match the pattern, don’t fret! Adjust your hook size. A larger hook will create larger stitches and a looser fabric, while a smaller hook will produce smaller stitches and a tighter fabric.
Perfecting Tension
Gauge is intertwined with tension, the tightness or looseness of your crochet stitches. To achieve consistent gauge, aim for an even tension throughout your work. This ensures your stitches are uniform in size and the fabric has the desired drape.
Remember: Gauge is not just a technicality; it’s the key to unlocking the magic and precision of crocheting. So, measure, adjust, and master gauge, and let your crochet creations blossom into breathtaking works of art!
Mastering Tension: The Key to Crochet Perfection
Maintaining proper tension is paramount in the art of crocheting. It governs the tightness or looseness of your stitches, ultimately influencing the look, feel, and durability of your creations. Think of it as the delicate balance between too tight and too loose—each extreme inviting its own set of challenges.
Too Tight Stitches:
Crocheting with a death grip results in unwavering tension, leading to stiff, unyielding fabric that resembles a military uniform rather than a cozy blanket. The stitches tend to pull together, creating a dense, unyielding canvas that lacks fluidity and drape. Moreover, excessive tension puts undue stress on your hands and wrists, turning crochet from a relaxing pastime into an uncomfortable chore.
Too Loose Stitches:
On the other side of the spectrum lies the equally problematic realm of loose stitches. When your tension is too relaxed, your stitches become uneven, creating a fabric that lacks structure and integrity. Holes and gaps may appear, compromising the overall strength and resilience of your project. Additionally, loose stitches can unravel easily, transforming your cherished creations into a tangled mess with a single tug.
The Golden Mean: Finding the Perfect Balance
Achieving perfect tension is the holy grail of crocheting. It’s the sweet spot where stitches are neither too tight nor too loose, resulting in fabric that is both pliable and durable, with a beautiful drape and pleasing texture. To find this golden mean, practice regularly and pay close attention to your stitch formation. If your stitches feel tight and pull inward, adjust your grip and relax your hands. Conversely, if they feel loose and floppy, tighten your grip slightly.
Tips for Maintaining Tension
-
Consistency is Key: Aim for even tension throughout your project by maintaining a consistent grip and speed. Avoid sudden bursts of force or pauses that can create irregularities in your stitches.
-
Yarn Management: Keep your yarn at a manageable tension by loosely guiding it with your non-dominant hand. Avoid tugging or pulling on the yarn, as this can affect the tightness of your stitches.
-
Practice Patience: Developing proper tension takes time and patience. Don’t get discouraged if your stitches aren’t perfect at first. Keep practicing and refining your technique until it becomes second nature.
By mastering tension, you elevate your crocheting skills to new heights. You’ll create projects that are not only beautiful but also durable, comfortable, and a testament to your artistry. Embrace the power of controlled tension and let your crochet creations blossom into masterpieces.
