Butter-Free Cookies: Healthier Alternatives For Baking Delights
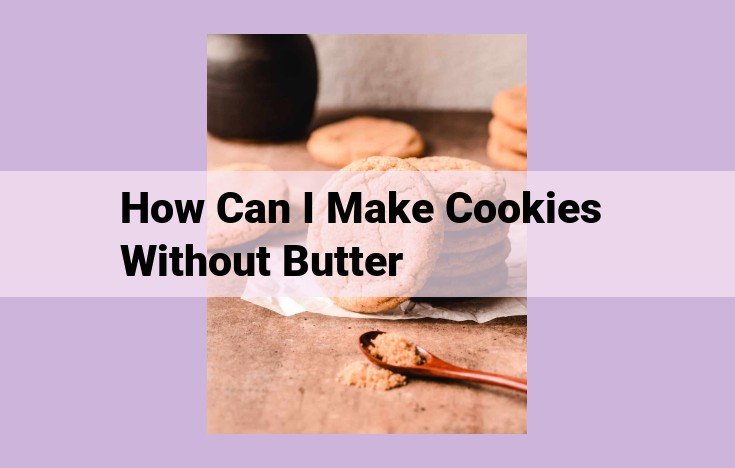
To make cookies without butter, use vegetable oil, olive oil, or applesauce as an alternative fat. These ingredients provide moisture and flavor while reducing the amount of saturated fat in the cookies. Be sure to adjust the recipe slightly by using less liquid ingredients to compensate for the lack of butter’s water content.
Essential Ingredients for Baking: Flour, the Foundation of Delectable Delights
Flour: The Cornerstone of Every Baked Wonder
Flour, the cornerstone of baking, is the very essence that transforms simple ingredients into delectable wonders. A myriad of flour varieties exists, each with its unique properties that dramatically influence the outcome of your creations.
All-Purpose Flour: The Versatile workhorse
- The most commonly used flour, an all-purpose workhorse, embodies a blend of soft and hard wheat varieties.
- Properties: Ideal for a wide range of baked goods, from cookies to cakes, all-purpose flour offers a balanced combination of gluten and starch, resulting in a moderate rise and tender crumb.
Bread Flour: The Muscle Behind Hearty Loaves
- Derived from high-protein hard wheat, bread flour packs a punch with its robust gluten content.
- Properties: Bread flour’s sturdy structure creates a strong, elastic dough, perfect for artisanal loaves and crusty rolls that boast an impressive height and chewy texture.
Cake Flour: The Delicate Star of Sweet Indulgence
- Milled from soft wheat, cake flour is a whisper-light treasure with a low gluten content.
- Properties: Its delicate touch yields tender, crumbly cakes and airy pastries, where every bite melts like a whisper on your tongue.
Whole Wheat Flour: The Treasure Trove of Nutrition
- Ground from the entire wheat kernel, whole wheat flour preserves the bran, germ, and endosperm, resulting in a fiber-rich treasure.
- Properties: While whole wheat flour imparts a denser texture to baked goods, its nutritional value makes it a guilt-free indulgence, providing a delightful balance of fiber, vitamins, and minerals.
Choosing the Right Flour: A Symphony of Ingredients
The choice of flour is an orchestra of ingredients, harmonizing flavors and textures. Consider the desired outcome of your culinary adventure. For ethereal cupcakes, embrace the softness of cake flour; for hearty loaves that defy gravity, bread flour’s strength will guide you; and for nutritional harmony, whole wheat flour weaves a tapestry of goodness.
Sugar: The Sweet Symphony of Baking
Sugar, the ubiquitous ingredient in our baking endeavors, plays a symphony of culinary wonders. From its natural sweetness to its magical ability to enhance textures, sugar has earned a prominent place in the baker’s toolkit.
Types of Sugar
The world of sugar offers a diverse array of options, each with its unique character. White sugar, the most common, is a refined sugar that has been stripped of its molasses content, resulting in a neutral flavor and sparkling crystals. In contrast, brown sugar retains some of its molasses, imparting a rich caramel flavor and a slightly moist texture.
Uses of Sugar
Sugar contributes to baking in myriad ways. Its most obvious role is as a sweetener, adding a delightful touch to our creations. White sugar is ideal for recipes where a neutral flavor is desired, while brown sugar lends a richer flavor to cakes, cookies, and other treats.
But sugar’s versatility extends beyond mere sweetness. It also plays a crucial role in creating the desired texture of baked goods. White sugar, when heated, caramelizes, creating a crisp outer layer on cookies and other delights. Brown sugar, on the other hand, retains moisture, resulting in chewy and tender confections.
The Science of Sweetness
Sugar’s ability to add sweetness stems from its chemical composition. When sugar dissolves in liquid, it breaks down into individual molecules of glucose and fructose. These molecules have a sweet taste that stimulates our taste buds and provides the pleasure we associate with sugar.
Choosing the Right Sugar
Selecting the appropriate sugar for a given recipe is essential for achieving the desired outcome. White sugar is best suited for recipes requiring a neutral flavor and crisp texture, while brown sugar is preferred for richer flavors and chewier textures. Understanding the nuances of each type of sugar will empower you to create baking masterpieces that tantalize the senses.
The Eggs-cellent Essential in Baking: A Comprehensive Guide
Eggs, the extraordinary culinary wonders, play an indispensable role in the tapestry of baking. Their contributions extend beyond mere flavor enhancement, encompassing crucial functions that underpin the very structure and texture of our beloved baked creations. Let’s delve into the egg-citing world of baking, unraveling the secrets behind this irreplaceable ingredient.
Binding Agents: The Glue that Holds It All Together
Eggs excel as binding agents, effectively gluing together the ingredients in your baking endeavors. Their proteins, when subjected to heat, coagulate, forming a network that binds the mixture, preventing it from crumbling apart. This binding prowess is especially evident in cakes, muffins, and other baked goods that require a firm yet tender crumb.
Leavening Agents: The Power of Lift
In addition to their binding abilities, eggs also serve as natural leavening agents. When whipped into a frothy frenzy, egg whites trap air, creating tiny bubbles that expand during baking, resulting in a light and airy texture. This leavening action is particularly crucial in sponge cakes, meringues, and other delicate confections that rely on their ethereal lightness.
Different Types of Eggs: Each with Its Unique Purpose
The baking world offers a versatile array of eggs, each with its distinct characteristics and applications.
-
Whole Eggs: The undisputed all-rounders, whole eggs encompass both the egg white and yolk, providing a balanced combination of binding and leavening properties.
-
Egg Whites: These protein-rich superstars excel in creating lofty peaks when whipped, making them the backbone of meringues and soufflés.
-
Egg Yolks: The rich and flavorful yolks contribute primarily to binding and flavor enhancement. They impart a golden hue to baked goods, such as custards, pâtes à choux, and brioche.
Proper Handling: Ensuring Optimal Performance
To harness the full potential of eggs in baking, proper handling is paramount.
-
Freshness Matters: Always use fresh eggs for optimal binding and leavening abilities. Store eggs refrigerated to maintain their freshness.
-
Temperature Matters: For most baking applications, room-temperature eggs are preferred as they incorporate more easily into the mixture.
-
Separate with Precision: When separating eggs, use a clean, grease-free bowl. Avoid any yolk contamination in the egg whites, as even a tiny bit of yolk can hinder the whipping process.
Mastering the art of eggs in baking unlocks a world of culinary delights. From towering cakes that defy gravity to melt-in-your-mouth cookies, eggs are the unsung heroes that orchestrate the symphony of flavors and textures that make every bite an unforgettable experience.
The Magic of Salt in Baking: Enhance Flavors and Elevate Ingredients
Bringing Balance to Your Culinary Creations
In the world of baking, salt is not just a seasoning; it’s a masterful orchestrator of flavors. It has the remarkable ability to elevate, balance, and bring harmony to your culinary masterpieces.
From the delicate sweetness of cookies to the savory richness of bread, salt plays a pivotal role in creating a flavorful symphony that delights the palate. It not only enhances the inherent flavors of ingredients but also counteracts bitterness, suppresses excessive sweetness, and intensifies aromas.
Salt acts like a culinary conductor, drawing out the subtle nuances and vibrant melodies of each ingredient. It unifies disparate flavors, coaxes them into harmony, and creates a coherent and pleasing symphony.
A Vital Component for Texture and Structure
Beyond its flavor-enhancing properties, salt also plays a crucial role in the texture and structure of baked goods. It strengthens gluten bonding in dough, resulting in chewier breads and pastries. It also inhibits yeast activity, which can lead to a denser, less airy texture. By carefully adjusting the salt balance, bakers can achieve the ideal balance between elasticity and crumbliness.
Handle with Care: The Delicate Balancing Act
While salt is an essential ingredient, it’s important to handle it with care. Too little salt can result in flat and bland baked goods, while too much can overwhelm the palate and make the final product unpalatable.
The ideal amount of salt depends on the specific recipe and the desired flavor profile. A good rule of thumb is to start with a small amount and gradually adjust to taste. Don’t be afraid to experiment and trust your palate to guide you towards the perfect balance.
Remember, salt is the secret ingredient that transforms ordinary baked goods into extraordinary culinary experiences. Its magical ability to enhance flavors and textures makes it an indispensable ally in any baker’s kitchen. Embrace the power of salt, and let it unleash the hidden potential of your baking endeavors.
Baking Powder vs. Baking Soda: Unleashing the Leavening Agents
When it comes to baking, leavening agents are the secret ingredient that transforms flat dough into fluffy delights. Among the arsenal of leavening agents, baking powder and baking soda stand out as the most versatile and reliable. But what exactly are they, how do they work, and when do you use them? Let’s dive into their world!
Baking Powder: The Versatile Leavener
Baking powder is a complete leavening agent, meaning it contains both an acid and an alkali. When combined with a liquid, the acid reacts with the alkali to release carbon dioxide gas, which creates the bubbles that make your cakes and muffins rise. Baking powder is commonly used in recipes that contain acidic ingredients, such as buttermilk, yogurt, or lemon juice. These ingredients help to activate the baking powder, resulting in a light and airy texture.
Baking Soda: The Alkali Half
Unlike baking powder, baking soda is not a complete leavening agent. It’s an alkaline compound that requires an acid to react. When baking soda is combined with an acidic ingredient, such as vinegar or lemon juice, it releases carbon dioxide gas, creating the same bubbly effect as baking powder. Baking soda is typically used in recipes that are already slightly acidic or when you want a more pronounced flavor, as it can impart a slightly bitter taste.
Key Differences
- Completeness: Baking powder is a complete leavening agent, while baking soda requires an acid to activate.
- Acidity: Baking powder works well in slightly acidic recipes, while baking soda requires a more acidic environment to react.
- Taste: Baking powder has a neutral taste, while baking soda can impart a slightly bitter flavor.
Appropriate Measurements
When measuring leavening agents, precision is key. Too little can result in flat or dense baked goods, while too much can lead to an overly airy or bitter taste. Check your recipe carefully and follow the measurements precisely.
Whether you’re baking a fluffy cake or a chewy muffin, understanding the different leavening agents is essential. Baking powder and baking soda, each with their unique properties, offer valuable tools for creating delectable baked treats that will impress your taste buds and warm your heart.
The Magical Essence: Vanilla Extract
In the realm of baking, vanilla extract reigns supreme as the quintessential flavor enhancer. Its warm, inviting aroma and rich, sweet taste have the power to elevate ordinary treats into extraordinary delights. But what exactly is vanilla extract, and how does it work its culinary magic?
Vanilla extract is derived from the vanilla bean, a long, slender pod that grows on tropical vines. Inside each pod lies a sticky black paste containing thousands of tiny seeds. These seeds hold the flavorful compounds that give vanilla extract its characteristic aroma and taste.
When vanilla beans are harvested, they undergo a meticulous curing process that allows their flavors to develop and intensify. The beans are then split open, and the fragrant paste is carefully scraped out. This paste is then infused in alcohol, which extracts the volatile compounds that give vanilla its distinctive flavor profile.
In baking, vanilla extract plays a dual role as both a flavoring and an aroma enhancer. Its rich, sweet taste complements a wide range of desserts, from cakes and pies to cookies and ice cream. It can balance out the bitterness of chocolate, enhance the sweetness of fruit, and add a touch of warmth to savory dishes.
But beyond its flavor, vanilla extract also contributes to the overall aroma of baked goods. Its warm, inviting scent fills the kitchen with a sense of comfort and indulgence. It can evoke memories of childhood treats and create a cozy, inviting atmosphere.
When choosing vanilla extract, opt for pure vanilla extract for the best flavor and aroma. Look for brands that list vanilla bean extractives as the first ingredient, and avoid extracts that contain artificial flavors or additives.
Incorporating vanilla extract into your baking is simple and straightforward. Add it to your wet ingredients along with other liquids, such as milk, cream, or eggs. The amount you use will depend on the recipe and your personal preference, but a good starting point is 1/2 teaspoon of pure vanilla extract per cup of flour.
So, next time you’re baking, don’t forget the magic of vanilla extract. Just a few drops of this culinary treasure can transform your treats from ordinary to extraordinary, adding a touch of warmth, sweetness, and aroma that will delight your taste buds and create lasting memories.
Essential Oils and Applesauce: Alternative Fats in Baking
In the realm of baking, fats play a crucial role in determining the texture, flavor, and overall success of your creations. While butter is often the go-to choice, there’s a world of alternative fats waiting to be explored. Vegetable oils, olive oil, and even applesauce offer unique benefits that can elevate your baking game.
Vegetable Oil: The Versatile Choice
Vegetable oils, such as canola or sunflower oil, are neutral in flavor and have a light texture. They’re perfect for cakes, cookies, and muffins when you want a moist and tender crumb without overpowering the other flavors. Vegetable oils are also high in unsaturated fats, making them a healthier option compared to saturated fats found in butter.
Olive Oil: A Mediterranean Delight
Olive oil adds a rich, fruity flavor to your baking creations. It’s an excellent choice for savory recipes, such as focaccia bread or crackers. The monounsaturated fats in olive oil are known for their heart-healthy properties. When using olive oil, opt for extra virgin olive oil for the best flavor and nutritional benefits.
Applesauce: The Natural Sweetener
Applesauce is a pureed fruit that adds moisture and natural sweetness to baked goods. It’s a healthy alternative to sugar, as it contains fiber and antioxidants. Applesauce is perfect for quick breads, muffins, and cakes where you want a subtly sweet flavor without the guilt.
Choosing the Right Fat for Your Recipe
The type of fat you choose will depend on the desired texture and flavor of your baked good. Here’s a quick guide:
- Moist and tender: Vegetable oil or applesauce
- Rich and flavorful: Olive oil
- Neutral flavor: Vegetable oil
- Healthier option: Vegetable oil
Remember, precise measurements are essential when baking. Always follow the recipe’s instructions carefully to avoid any unwanted surprises. With the right fats in your arsenal, you can unlock a world of flavor and texture possibilities in your baking adventures.
Measuring Cups and Spoons: The Cornerstone of Baking Precision
Imagine you’re embarking on a culinary adventure, eager to create a masterpiece that tantalizes your taste buds. But as you dive into the recipe, a daunting obstacle presents itself: precise measurements. You grab a measuring cup and spoon, but are you sure they’re the right ones?
In the realm of baking, precision is paramount. Just a pinch too much or too little of an ingredient can dramatically alter the outcome of your creation. That’s why it’s essential to have a well-equipped arsenal of measuring tools.
When it comes to measuring cups, you’ll find three main types:
- Dry Measuring Cups: Designed for measuring dry ingredients like flour and sugar.
- Liquid Measuring Cups: Specifically made for measuring liquids such as water and milk. They have a pouring spout for easy handling.
-
Adjustable Measuring Cups: Versatile tools that allow you to measure both dry and liquid ingredients with one convenient device.
Choosing the right measuring cups is crucial:
-
Dry Measuring Cups: Use a flat, straight edge to level off the top, ensuring accuracy.
- Liquid Measuring Cups: Place the cup at eye level to read the measurement at the bottom of the liquid’s curve.
- Adjustable Measuring Cups: Use the sliding mechanism to adjust the volume, making it a breeze to measure various quantities.
Measuring spoons are equally important. There are three standard sets:
- Teaspoon: 5 milliliters
- Tablespoon: 15 milliliters
- Cup: 60 milliliters
Using measuring spoons correctly:
- Dry Ingredients: Spoon the ingredient into the measuring spoon and level it off with a straight edge.
- Liquid Ingredients: Dip the spoon into the liquid, then gently tap it on the counter to remove any excess.
Remember, precision is key. Don’t hesitate to invest in a high-quality set of measuring cups and spoons. They’ll serve as your trusty companions on your baking journey, helping you create culinary masterpieces that are both delicious and aesthetically pleasing.
Essential Tools for Baking: Mixing Bowls
In the culinary symphony of baking, the humble mixing bowl plays a pivotal role. Choosing the right bowl for your culinary masterpiece is as crucial as selecting the finest ingredients. Let’s delve into the diverse world of mixing bowls, unraveling their sizes, materials, and functionalities.
Sizes Matter
Mixing bowls come in an array of shapes and sizes, catering to the demands of every recipe. Small bowls, ideal for whisking sauces or mixing small quantities of ingredients, offer precision and ease of handling. Medium bowls, the workhorses of the kitchen, are versatile for a wide range of tasks, from preparing batter to mixing salad dressings. Large bowls, the titans of the baking realm, are indispensable for spacious undertakings like kneading dough or whipping up large batches of frosting.
Material Matters
The material of your mixing bowl influences its functionality and durability. Glass bowls, transparent and heat-resistant, allow you to monitor the mixing process visually. Stainless steel bowls, resilient and non-reactive, are ideal for tasks involving acidic ingredients or temperature changes. Plastic bowls, lightweight and break-resistant, offer convenience and affordability.
Special Purpose Bowls
Beyond the standard bowls, specialized bowls cater to specific baking needs. Double-boiler bowls, composed of two nested bowls, facilitate gentle heating over simmering water for melting chocolate or making sauces. Microwave-safe bowls, designed for convenience, allow for quick and easy preparation in the microwave.
The Perfect Fit
Selecting the right mixing bowl is a culinary ballet, a harmonious match between the task at hand and the bowl’s capabilities. Small bowls waltz with precision, while medium bowls tango with versatility. Large bowls embrace their role as grand ballrooms for the most opulent of culinary creations.
The choice of material depends on the recipe’s demands and your personal preferences. Glass bowls offer a clear view of the mixing process, stainless steel bowls stand strong against acidic ingredients, and plastic bowls bring both practicality and economy to the baking haven.
Remember, the perfect mixing bowl is an extension of your culinary self, aiding you in creating masterpieces that delight both taste buds and souls.
Spatulas: An Essential Tool for Baking Magic
In the realm of baking, where precision and efficiency reign supreme, spatulas emerge as indispensable tools. They orchestrate the delicate dance of ingredients, ensuring seamless mixing and flawless scraping.
Behold the Spatula’s Symphony
Spatulas come in a captivating array of shapes and sizes, each designed to tackle specific baking challenges. Rubber spatulas, with their pliant demeanor, embrace liquids and pastes with unparalleled grace. They negotiate the contours of bowls with ease, rescuing every last drop of batter.
Their silicone counterparts, known for their high heat tolerance, stand their ground even in the face of scorching sugar. They deftly maneuver around hot pans, distributing fillings and sauces with impeccable precision.
A Spatula’s Multifaceted Mastery
Beyond their basic functions, spatulas also possess a hidden repertoire of culinary wizardry. They deftly fold egg whites into batters, creating ethereal lightness. They swiftly scrape the edges of pans, ensuring no crumb is left behind. With each deft motion, they transform ingredients into culinary masterpieces.
Choosing the Perfect Spatula
Navigating the plethora of spatulas can be a daunting task, but fret not. Consider the type of baking you frequently indulge in. For intricate pastries, a small, flexible spatula shines brightest. If ambitious cakes are your forte, a larger, robust spatula will prove indispensable.
Care for Your Spatula, Your Culinary Ally
Like any cherished tool, spatulas demand proper care and maintenance. Clean them promptly after use, banishing any food residue that might dampen their performance. Store them in a dedicated drawer, ensuring they remain within reach at a moment’s notice.
Embark on your baking adventures armed with the knowledge of spatulas. May their versatility and precision elevate your culinary creations to new heights. Remember, a spatula in hand is a step toward baking bliss.
Cookie Sheets: The Pillars of Perfect Baking
Cookie sheets, the indispensable workhorses of any baker’s kitchen, serve as the foundation for an array of delectable treats. But not all cookie sheets are created equal. Understanding their types and how to prepare them for baking is crucial for achieving crispy edges, golden-brown centers, and evenly baked goods.
Types of Cookie Sheets
Half-Sheet Cookie Sheet: As its name suggests, this is the classic rectangular cookie sheet, measuring approximately 18×13 inches. It’s the perfect size for large batches of cookies, especially if you like to spread them out for maximum airflow and even baking.
Jelly Roll Cookie Sheet: This is a smaller, narrower sheet that measures around 15×10 inches. It’s ideal for rolling up jelly rolls, but can also be used for smaller batches of cookies, especially when you want a slightly thicker texture.
Preparing Cookie Sheets for Baking
Preheating: To ensure evenly baked goods, always preheat the cookie sheet before placing your dough on it. This helps create a consistent temperature across the surface and prevents hot and cold spots that can result in uneven cooking.
Lining: For easy cleanup and to prevent sticking, line the cookie sheet with parchment paper. This non-stick barrier keeps baked goods from sticking to the metal and makes it a breeze to remove them.
Greasing: If you don’t have parchment paper on hand, you can lightly grease the cookie sheet with butter or cooking spray. This will also help prevent sticking and ensure a golden-brown finish.
Tips for Using Cookie Sheets
- Space Your Cookies: Leave enough space between cookies to allow for proper airflow and even baking. Overcrowding can lead to uneven cooking and soggy centers.
- Rotate the Sheet: During baking, rotate the cookie sheet halfway through the cooking time. This ensures even heat distribution and prevents one side from over-browning.
- Cool Before Removing: Once the cookies are finished baking, let them cool on the cookie sheet for several minutes before transferring them to a wire rack. This helps prevent breakage and allows them to set properly.
By understanding the types of cookie sheets and the importance of preparing them properly, you’ll be well on your way to creating perfectly baked treats every time. So, gather your ingredients, grab your cookie sheets, and let the baking adventure begin!
Essential Ingredients and Tools for Baking
Essential Ingredients
5. Parchment Paper: A Baking Essential
In the realm of baking, where precision and perfection reign supreme, there’s an unsung hero that often goes unnoticed but plays a pivotal role in the success of our culinary creations: parchment paper.
This humble, yet indispensable tool may seem like a mere accessory, but it wields the power to transform your baking experience from a potential disaster to a symphony of simplicity and success. Its primary virtue lies in its non-stick surface, which prevents the dreaded sticking of pastries, cookies, and breads to the baking sheets. This unparalleled anti-adhesion property eliminates the need for excessive greasing, saving you time, effort, and a potential mess.
Not only does parchment paper facilitate easy release, but it also promotes even cooking. Its porous nature allows air to circulate freely around the baked goods, ensuring that they brown uniformly and achieve an irresistible golden-brown exterior.
Moreover, parchment paper is a staunch ally in the realm of cleanup. Its disposable nature saves you precious time and the hassle of scrubbing away stubborn baked-on residue from your baking sheets and pans. Simply dispose of the used parchment paper, and voila – a spotless kitchen awaits!
Handling Parchment Paper with Care
While parchment paper is a remarkably versatile tool, handling it with care is paramount to maximizing its benefits. Here are a few tips to ensure optimal performance:
- Use parchment paper of the appropriate size. Too small a sheet will leave edges exposed, while too large a sheet can curl up or obstruct airflow.
- Line baking sheets completely. This ensures that pastries and doughs won’t stick to any exposed metal surfaces.
- Avoid using parchment paper in direct contact with heat sources, such as broiler coils or gas burners. Excessive heat can cause the paper to burn or smoke.
- If you’re working with wet batters or doughs, allow them to set slightly before covering them with parchment paper. This helps prevent the paper from tearing or becoming soggy.
By incorporating parchment paper into your baking routine, you’ll not only save time and effort but also achieve perfectly baked, delectable creations that will tantalize your taste buds and impress your friends and family.
